

Why Your "Bad Hardwood Floor" Is Actually a Subfloor Problem (And What It Takes to Fix It)
Hardwood floor gaps, squeaking, and bouncy boards are often blamed on poor installation, but the real culprit is usually beneath the surface. Sagging floor joists, uneven subfloors, and construction shortcuts from decades ago cause problems no quality flooring can overcome. After 20+ years working in Pennsylvania homes, we've seen hundreds of "flooring failures" that were actually structural issues. Learn how to identify joist sag, subfloor problems, and what it takes to fix them before installing hardwood.
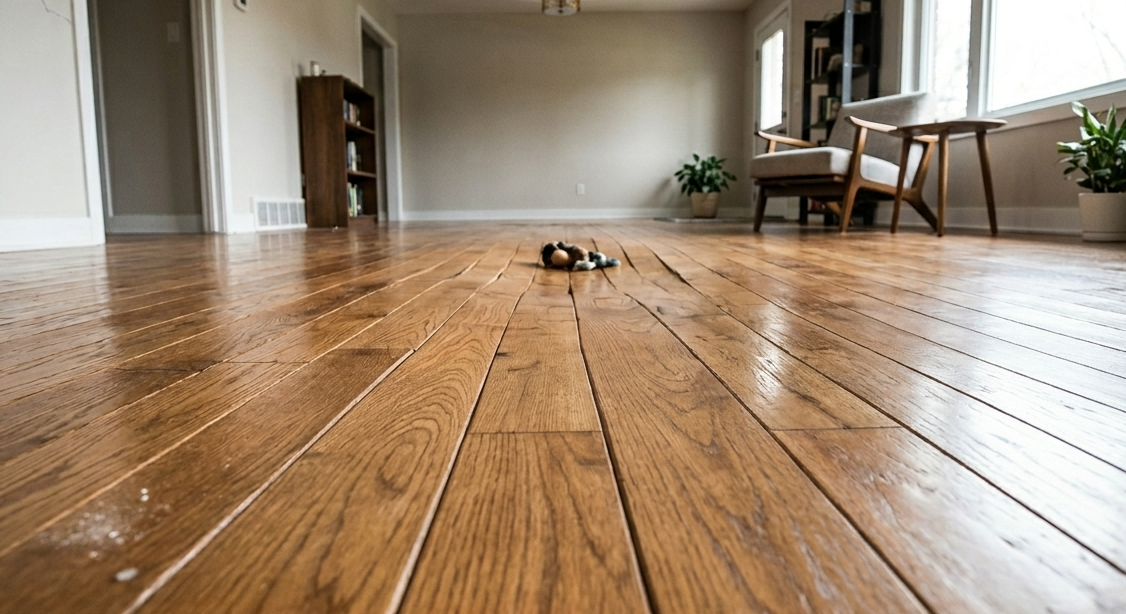
Your hardwood floors have gaps between planks that weren't there six months ago. Or they squeak with every step. Or certain boards feel bouncy and unstable underfoot. You're convinced the installation was done poorly or the materials were cheap, and you're researching contractors to rip it out and start over.
Before you spend $15,000+ on replacement hardwood, you need to understand something critical: the problem probably isn't your hardwood floor. It's what's underneath—sagging floor joists, uneven subfloors, moisture-damaged sheathing, or construction shortcuts that have been hiding beneath your flooring for decades.
After 20+ years installing and refinishing hardwood throughout Bucks County, Montgomery County, and Philadelphia, we've diagnosed hundreds of "flooring failures" that were actually structural issues. Homeowners are understandably frustrated when beautiful hardwood develops problems, but installing new flooring over bad subfloors guarantees the same problems will reappear—often within months.
Here's how to identify subfloor and joist problems, what causes them in Pennsylvania and New Jersey homes, and what it actually takes to fix them properly.
Understanding the Structure Beneath Your Hardwood
Hardwood flooring is the visible surface, but it's only the top layer of a multi-component floor system. Understanding what's beneath helps you identify where problems originate:
Floor joists: Horizontal structural beams (typically 2x8, 2x10, or 2x12 lumber) that span between foundation walls or support beams, spaced 16" apart in most residential construction. Joists carry the weight of everything above them—floors, furniture, people.
Subfloor: Sheet material (typically 3/4" plywood or OSB in modern construction, 1x6 or 1x8 boards in older homes) nailed or screwed to the top of joists, creating the flat surface on which flooring is installed.
Underlayment (optional): Additional thin layer sometimes installed between subfloor and hardwood for sound dampening or moisture protection.
Hardwood flooring: The visible surface—solid or engineered hardwood nailed, glued, or floated over the subfloor.
Problems at the joist or subfloor level inevitably affect the hardwood surface above. You can install the most expensive materials with perfect technique, but if the foundation is compromised, the floor will fail.
Sagging Floor Joists: The Most Common Structural Problem
Floor joist sag is extremely common in Pennsylvania and New Jersey homes built before 1990, and it's the root cause of many hardwood floor problems.
What Causes Joist Sag
Undersized joists for the span: Older building codes allowed smaller joists or longer spans than modern standards. A 2x8 joist spanning 14 feet might have met 1960s codes but will sag over decades under constant load.
Natural wood deflection over time: Wood joists compress slightly under constant weight. Over 30-50 years, this compression becomes permanent deflection (sag), particularly at the center of the span where load is greatest.
Moisture damage and rot: Joists in basements, crawl spaces, or areas with historical water intrusion can develop rot that weakens structural capacity. Even after moisture issues are resolved, damaged joists remain compromised.
Insect damage: Termites, carpenter ants, and powder post beetles can damage joist integrity over decades, creating weak sections that sag under load.
Notching or drilling for utilities: Plumbers and electricians sometimes cut or drill joists to route pipes and wiring. Improper notching weakens joists, and what was adequate when new becomes insufficient after years of load.
Settling and foundation movement: Homes in Pennsylvania and New Jersey built on clay soils experience foundation settling that can stress joists unevenly, creating sag in some areas while other sections remain level.
How Joist Sag Affects Hardwood Floors
When floor joists sag, they create an uneven surface that the subfloor follows. This results in:
Sloped or wavy floors: A 1/2" to 2" dip across a room's span is common in homes with sagging joists. Hardwood installed over this slope appears level along its length but the entire floor plane is tilted or curved.
Gaps between hardwood planks: As joists sag, they pull the subfloor and hardwood down with them. This creates tension that can open gaps between planks, particularly in the center of rooms where sag is most pronounced.
Squeaking and movement: Sagging joists flex more than level joists under foot traffic. This movement causes hardwood planks to shift and rub against each other or against fasteners, creating squeaks and creaks.
Nail pops and fastener failure: As joists deflect, nails holding hardwood to the subfloor work loose. This creates hollow-sounding areas where the hardwood has separated from the subfloor below.
You can install perfect hardwood with proper acclimation, correct nailing schedule, and appropriate expansion gaps—but if the joists underneath are sagging 1" in the middle of the room, those floors will develop problems.
Identifying Joist Sag in Your Home
The marble test: Place a marble or small ball in the center of a room. If it rolls toward walls without you touching it, your floor has sag.
The straightedge test: Lay a long straight board (6-8 feet) across the floor in multiple directions. Gaps between the board and floor surface reveal unevenness.
Visual observation: Stand at a doorway and look across the floor toward the opposite wall. Severe sag is often visible as a subtle dip or slope.
The bounce test: Walk across the floor and note any springy or bouncy feel. Excessive deflection indicates joists that are undersized, damaged, or inadequately supported.
Furniture tilt: Freestanding furniture that tilts or rocks when placed on "level" floors indicates the floor itself isn't level.
In older homes throughout Wayne, Radnor, Newtown, Doylestown, and Philadelphia, some degree of joist sag is nearly universal. The question isn't whether sag exists, but whether it's severe enough to cause flooring problems or structural concerns.
Uneven Subfloors: Installation Shortcuts and Age-Related Deterioration
Even when joists are structurally sound, the subfloor layer can develop problems that affect hardwood performance.
Common Subfloor Issues
Warped or cupped plywood: Moisture exposure causes plywood subfloor panels to warp, cup, or delaminate. Once this happens, the panel no longer provides a flat surface for hardwood installation.
Board subfloors with gaps: Homes built before 1950 often have 1x6 or 1x8 board subfloors instead of plywood. These boards shrink over decades, creating gaps between boards. Hardwood installed over these gaps can develop squeaks and movement.
Inadequate fastening: Subfloors must be securely fastened to joists with screws or ring-shank nails at proper spacing. In older homes or shoddy construction, subfloors may have been installed with too few fasteners or wrong fastener types, allowing panels to shift and separate.
Damaged or rotted sections: Water damage from historical leaks, flooding, or plumbing failures can rot sections of subfloor even after the moisture source is eliminated. These soft spots flex under hardwood, causing squeaks and instability.
Wrong thickness or material: Code requires 3/4" plywood subfloor for nail-down hardwood installation. Some builders used 5/8" plywood or OSB (oriented strand board) to save money. These thinner materials don't provide adequate holding power for flooring nails and flex excessively under load.
Improper spacing of panels: Plywood subfloor panels should have 1/8" gaps between sheets to allow for expansion. Panels installed tight against each other can buckle when they expand with humidity changes, creating high spots that telegraph through hardwood.
How Subfloor Problems Affect Hardwood
High and low spots: Warped subfloor panels create ridges and valleys. Hardwood installed over these areas develops corresponding high and low spots. In severe cases, you can feel or see ridges where subfloor panels meet.
Squeaking at every step: Subfloor that's inadequately fastened or damaged moves when you walk across it. This movement causes nails to rub in their holes, producing squeaks.
Nail pops and loose planks: If the subfloor is too thin or damaged, hardwood nails don't hold properly. Planks work loose, creating hollow-sounding areas and instability.
Cupping and crowned boards: Uneven subfloor support causes hardwood planks to cup (edges higher than center) or crown (center higher than edges) as they try to conform to the irregular surface below.
Assessing Subfloor Condition
Proper subfloor assessment requires removing a section of existing flooring or accessing the underside from a basement or crawl space. Here's what professional contractors evaluate:
Thickness and material type: We measure actual thickness (not assumed) and verify material type. Discovering 5/8" OSB instead of 3/4" plywood changes the project scope significantly.
Fastening pattern: We check fastener spacing, type, and whether screws/nails have backed out or lost holding power.
Panel condition: We look for warping, delamination, water staining, soft spots, and any other damage that compromises structural integrity.
Levelness across the surface: We use laser levels or long straightedges to measure deviation from flat. Variations greater than 3/16" over 10 feet require correction before hardwood installation.
Moisture content: We use moisture meters to verify subfloor is dry (12% or less for wood subfloors). Installing hardwood over wet subfloors guarantees future problems.
This assessment happens before we quote hardwood installation, not after discovering problems mid-project. Reputable contractors won't install hardwood over subfloors they know will cause failures.
Shoddy Original Construction: Cutting Corners That Create Decades of Problems
Some hardwood floor problems originate from construction shortcuts taken 20, 40, or 60 years ago when the home was built.
Common Construction Shortcuts We Encounter
Joists spaced too far apart: Code requires joists at 16" on center for residential floors. Some builders used 24" spacing to save lumber costs. This wider spacing creates excessive deflection that affects everything built above.
Undersized joists for the span: Using 2x8 joists when 2x10s were required, or allowing longer spans than appropriate for the joist size. These undersized systems appear adequate initially but sag over decades.
Inadequate bridging between joists: Bridging (cross-bracing between joists) prevents twisting and helps distribute loads. Many older homes lack adequate bridging, allowing joists to twist and move independently.
Subfloor installed over wet lumber: Joists and subfloors installed before lumber had time to dry can shrink significantly after installation, creating movement and instability.
Wrong or insufficient fasteners: Using smooth-shank nails instead of ring-shank or screws for subfloor attachment. Using too few fasteners to save time. Both create subfloors that work loose over time.
No expansion gaps in subfloor panels: Installing plywood subfloor tight without expansion gaps between panels. When panels expand with humidity, they buckle and create high spots.
These shortcuts aren't always visible during home inspections because they're hidden beneath finished flooring. They only become apparent when that flooring needs replacement or when structural problems develop.
Geographic and Era-Specific Issues
Pennsylvania and New Jersey construction 1950-1970: This era commonly saw board subfloors replaced with thinner plywood (5/8" instead of 3/4"), inadequate fastening, and undersized joists for cost savings during the post-war building boom.
Row homes in Philadelphia: Shared-wall construction and narrow floor spans create unique structural considerations. Original joists in 100+ year old rowhomes are often undersized by modern standards and have settled significantly.
Bucks County developments 1960-1980: Rapid suburban expansion led to construction shortcuts in some developments. Homes in these areas sometimes have joist spacing issues or subfloor problems not immediately apparent.
Historic homes throughout the region: Properties in Wayne, Radnor, Newtown Borough, and other historic areas often have hand-hewn joists, board subfloors, and construction methods that don't align with modern building science. These require specialized assessment and solutions.
What It Takes to Fix Subfloor and Joist Problems
Addressing structural issues beneath hardwood isn't simple or cheap, but it's the only way to prevent recurring flooring problems.
Fixing Sagging Joists
Sistering joists: Attaching new joists alongside existing sagging joists, bolted together at intervals. This adds structural capacity and reduces deflection. Cost: $20-40 per linear foot including labor.
Installing support columns and beams: Adding permanent steel columns or wood posts in basements or crawl spaces to support joists at mid-span. This eliminates sag by providing support where deflection is greatest. Cost: $800-2,000 per support location including beam and column.
SmartJack or adjustable support systems: Engineered support posts that can be adjusted over time to maintain level floors as homes continue settling. Common in crawl space applications. Cost: $400-800 per support post.
Complete joist replacement: In cases of severe rot or insect damage, joists may need replacement. This is invasive and expensive but sometimes necessary. Cost: $50-100+ per linear foot depending on access and scope.
The appropriate solution depends on the degree of sag, accessibility, and whether the home is actively settling or has stabilized.
Fixing Subfloor Problems
Subfloor reinforcement: Screwing down loose subfloor panels, adding blocking between joists, and applying construction adhesive to eliminate movement and squeaks. Cost: $2-4 per square foot.
Subfloor replacement (sections): Cutting out damaged or warped sections and replacing with new 3/4" plywood. Cost: $8-15 per square foot including material and labor.
Complete subfloor replacement: In severe cases, removing all existing subfloor and installing new 3/4" T&G plywood throughout. Cost: $10-20 per square foot depending on room access and scope.
Self-leveling compound application: For minor unevenness (under 1/4"), applying floor leveling compound to create a flat surface. Cost: $3-6 per square foot.
Plywood underlayment layer: Installing an additional layer of 1/2" or 3/4" plywood over existing subfloor to add thickness and create a level surface. Cost: $4-8 per square foot.
These costs are in addition to hardwood installation but are necessary to prevent recurring failures.
The Full Project Cost Reality
For a 500 square foot room with moderate joist sag and subfloor issues, comprehensive correction might include:
Sistering 10 joists: $2,500
Installing 2 support columns: $1,600
Replacing damaged subfloor sections: $1,200
Reinforcing remaining subfloor: $600
Total structural work: $5,900
Hardwood installation: $5,000-7,500
Total project: $10,900-13,400
Compare this to simply installing hardwood over the bad subfloor for $5,000-7,500 and having the same problems reappear within 1-2 years, requiring complete removal and reinstallation.
The structural work is expensive, but it's a one-time investment that solves the problem permanently rather than cosmetically covering it.
How to Know If You Have Structural Problems Before Installing Hardwood
If you're planning hardwood installation and want to avoid discovering expensive structural issues mid-project:
Hire a structural engineer for evaluation: Cost $400-800 for residential assessment. They'll identify joist sag, undersized framing, and support deficiencies before flooring work begins.
Insist on subfloor inspection before quotes: Reputable contractors should assess subfloor condition as part of the estimating process. If a contractor quotes hardwood installation without looking at your subfloor, find someone else.
Ask about subfloor correction in quotes: Explicitly ask contractors to itemize any subfloor or structural work needed. Compare how different contractors address problems—some will hide issues, others will be transparent.
Look for warning signs: Existing flooring that squeaks, bounces, or shows gaps likely indicates subfloor issues. Sloped or wavy floors visible to the eye definitely indicate joist problems. Don't ignore these signs.
Expect realistic pricing: If one contractor's quote is significantly lower than others, they're likely ignoring structural issues or planning to install over problems rather than correcting them.
Our Approach to Subfloor and Structural Issues
At Cyclone Hardwood Floors, we assess subfloors before quoting every hardwood installation project. This sometimes means delivering news clients don't want to hear—that their floor needs structural work before hardwood installation makes sense—but it's the only honest approach.
Thorough inspection: We access basements, crawl spaces, or remove sections of existing flooring to evaluate joist and subfloor condition. We use laser levels and moisture meters to verify structure is adequate.
Transparent communication: We explain what we find, show you the problems when possible, and explain why they matter for hardwood installation longevity.
Itemized pricing: Structural corrections are quoted separately from hardwood installation so you understand costs and can make informed decisions.
Coordination with structural contractors: For major joist work or foundation issues, we coordinate with structural engineers and general contractors to ensure proper sequencing.
No shortcuts: We don't install hardwood over subfloors we know will cause problems, even if clients pressure us to skip corrections. Our reputation depends on installations that perform well for decades, not projects that fail within years.
The Bottom Line on Subfloors and Hardwood Success
Beautiful hardwood installed over bad subfloors will develop problems—gaps, squeaks, movement, and instability—that no amount of quality materials or skilled installation can prevent. The subfloor and joist system is the foundation on which hardwood depends, and foundation problems always manifest in the surface above.
Addressing structural issues adds significant cost to flooring projects, but it's the only way to achieve long-term success. Attempting to save money by installing over known problems guarantees you'll pay twice—once for the installation that fails, again for the corrective work and reinstallation that should have been done initially.
Planning hardwood installation in your Bucks County, Montgomery County, or Philadelphia home? Contact Cyclone Hardwood Floors for honest subfloor assessment and transparent pricing. We'll tell you if your floors are ready for hardwood or if structural corrections are needed first—before you spend money on a project that can't succeed.
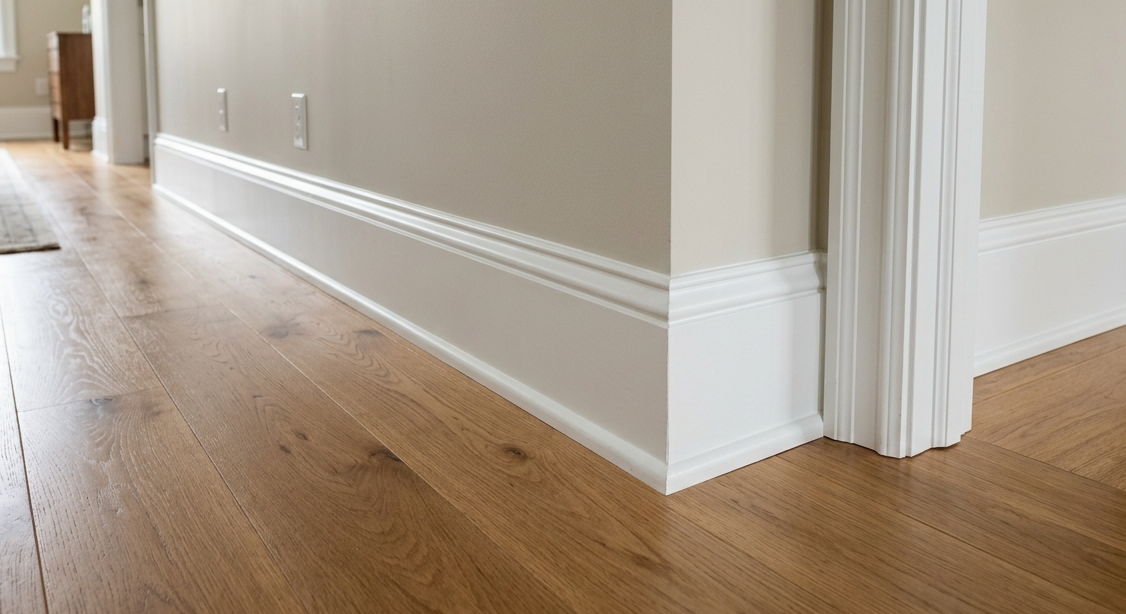
Why your homeowners need new baseboards when installing hardwood..
Installing 3/4" hardwood flooring raises floor height, making existing 3-4" baseboards too short to cover expansion gaps properly. Even when height isn't the issue, baseboards installed with nails, adhesive, caulk, and multiple paint coats don't remove cleanly—they crack, split, and chip, requiring extensive repair before reinstallation. After 20+ years installing hardwood throughout Pennsylvania, we've learned baseboard replacement costs $3-6 per linear foot but ensures professional finished appearance that reusing damaged baseboards can't achieve.

You're getting quotes for hardwood floor installation and one line item keeps appearing: baseboard replacement. You look at your existing baseboards and think, "Those are perfectly fine—can't the contractor just remove them carefully and put them back after the floor is done?"
The short answer is no, not without problems. The longer answer involves floor height changes, decades-old paint and caulk, installation methods that weren't designed for removal, and the reality that "carefully removing baseboards" sounds simpler than it actually is.
After 20+ years installing hardwood throughout Bucks County, Montgomery County, and Philadelphia, we've had this conversation hundreds of times. Homeowners are understandably frustrated when told their baseboards—which look fine and aren't damaged—need to be replaced as part of a flooring project. Here's why baseboard replacement is often necessary, when you can avoid it, and what to expect cost-wise.
The Floor Height Problem: Why Existing Baseboards Are Now Too Short
The most common reason baseboards can't be reused is simple geometry: your new hardwood floor is taller than whatever flooring it's replacing, and your existing baseboards are no longer tall enough to cover the gap between the floor and the wall.
How Floor Height Changes With New Hardwood
When you install hardwood flooring over an existing subfloor, you're adding material that increases the overall floor height. The amount varies based on what you're installing:
3/4" solid hardwood adds 3/4" of height. This is the most common thickness for traditional oak, maple, hickory, and other domestic hardwoods.
5/8" solid hardwood adds 5/8" of height. Some exotic species and prefinished products use this slightly thinner profile.
Engineered hardwood typically adds 3/8" to 1/2" depending on product thickness. Engineered flooring has a hardwood veneer on top of a plywood core, resulting in thinner overall profile than solid hardwood.
Additional underlayment may add 1/8" to 1/4" if sound dampening or moisture barrier is required.
If you're removing carpet before hardwood installation, the height change is even more dramatic. Carpet plus padding often measures 1/2" to 3/4" in height. Replacing it with 3/4" solid hardwood means you're going from a soft, compressible surface to a rigid one at approximately the same height—but the visual and functional difference is significant.
Why Baseboard Height Matters
Baseboards serve a critical function: covering the expansion gap between hardwood flooring and the wall. Hardwood expands and contracts with seasonal humidity changes, so proper installation requires leaving 1/4" to 1/2" gap around the room's perimeter. Baseboard hides this gap while allowing the floor to move freely.
Standard baseboard in homes built over the past 50 years is typically 3" to 4" tall (sometimes 5" in older or more formal homes). When installed over the original flooring—whether carpet, vinyl, or older hardwood—these baseboards covered the gap adequately because they extended from the floor surface to the appropriate height on the wall.
Add 3/4" of new hardwood flooring height, and suddenly your baseboards are 3/4" shorter relative to the floor. What was once a 4" baseboard extending from floor to wall is now effectively a 3.25" baseboard sitting on top of the new floor. This creates two problems:
The baseboard looks disproportionately short. A 3" baseboard on a 3/4" raised floor reads as visually stubby and unfinished. The proportions are wrong, and the room feels incomplete even if you can't immediately identify why.
The baseboard doesn't adequately cover transitions and gaps. The expansion gap, shoe molding attachment point, and transition to the hardwood surface all occur in that bottom 3/4" zone. If your baseboard is now too short, these functional elements become visible or problematic.
The Quarter Round "Solution" That Isn't
Some contractors suggest leaving the existing short baseboard and adding quarter round molding to cover the gap at the floor. Quarter round is a small, rounded molding piece that bridges the transition between baseboard and floor.
This technically works—it covers the gap. But it looks like exactly what it is: a band-aid fix to avoid replacing baseboards. Quarter round stacked on top of baseboard creates a visually busy transition with multiple shadow lines and breaks the clean vertical line from floor to wall that proper-height baseboard provides.
In historic homes or period architecture where quarter round was original to the design, it's appropriate. In modern homes or renovations where clean lines are the aesthetic goal, quarter round reads as a shortcut—and buyers, real estate agents, and anyone with design awareness will notice.
The Removal Problem: Why Old Baseboards Don't Come Off Cleanly
Even in cases where baseboard height isn't an issue—for example, when refinishing existing hardwood rather than installing new—removal and reinstallation is far more complicated than homeowners expect.
How Baseboards Are Actually Installed
Baseboards in Pennsylvania and New Jersey homes built over the past 50 years are typically installed using:
Finish nails (15-gauge or 16-gauge) driven through the baseboard into wall studs, spaced 16" to 24" apart. Each nail penetrates 1.5" to 2" into framing.
Construction adhesive applied to the back of the baseboard before nailing, creating a secondary bond to drywall or plaster.
Caulk along the top edge where baseboard meets the wall, sealing gaps and creating a finished appearance.
Paint applied after installation, often multiple coats over years, creating a painted seal between baseboard and wall.
This installation method is designed for permanence, not removability. The combination of nails, adhesive, caulk, and paint creates a bond that resists separation—and when you force separation, something breaks.
What Happens During Baseboard Removal
When removing baseboards installed with the methods above, here's the typical outcome:
Nails tear through the baseboard. As you pry the baseboard away from the wall, the nails either pull through the wood (leaving large holes) or bend and tear the wood as they're forced out. Finish nail holes that were invisible when the baseboard was installed become enlarged, splintered gaps after removal.
Paint seals crack and chip. The painted edge where baseboard meets wall has formed a bond over years. Separating the baseboard cracks this seal, pulling paint chips off both the baseboard and the wall. Even careful removal creates paint damage requiring touch-up or complete repainting.
Caulk tears irregularly. Caulk along the top edge doesn't separate cleanly—it tears in ragged lines, leaving residue on both baseboard and wall. Removing old caulk completely requires scraping and sanding, which damages the baseboard's painted finish.
Adhesive bond rips drywall paper. If construction adhesive was used, the bond between adhesive and drywall is often stronger than the drywall paper's bond to the gypsum core. Pulling off the baseboard tears the paper facing, requiring drywall repair before new baseboard can be installed.
Baseboard warps or splits. Wood baseboards installed for 10-20+ years have acclimated to your home's humidity and temperature. Removing them—especially if they're painted, which seals moisture in—often causes warping or splitting as internal stresses are released.
The "Careful Removal" Myth
Contractors occasionally claim they can remove baseboards carefully for reinstallation. In our 20+ years of experience, the success rate for usable reinstallation is below 25%—and that's with experienced crews using proper techniques.
The reality is that baseboard removal is destructive by nature. You're forcing apart elements that were bonded with nails, adhesive, caulk, and paint specifically to create a permanent installation. "Careful" removal means minimizing damage, not eliminating it.
Even when baseboards physically survive removal intact, they require:
Filling all enlarged nail holes
Sanding damaged areas where paint chipped
Removing old caulk residue
Straightening any warping or bending
Complete repainting (not just touch-up, because patches won't match aged paint)
By the time you pay for these repairs plus labor to reinstall, you're spending 60-80% of what new baseboard would cost—while accepting a result that's still inferior to new material.
When You Can (Sometimes) Reuse Baseboards
There are limited scenarios where baseboard reuse makes sense:
Refinishing existing hardwood (no floor height change): If you're refinishing floors without changing height, and if baseboards are removable without severe damage, and if they need repainting anyway, reuse can work. This is most common when baseboards were installed recently (within 5 years) and haven't been painted multiple times.
Historic or custom baseboards with significant value: In historic Main Line, Newtown, or Philadelphia homes with original wide baseboards (6" to 8"+), crown molding details, or period-appropriate profiles, preservation makes sense even with significant restoration costs. These elements have architectural and monetary value that justifies the effort.
Very recent baseboard installation: If baseboards were installed within the past 1-2 years and haven't been repainted, removal and reinstallation is more feasible. Newer installations have less paint buildup, less adhesive bonding, and less time for wood to acclimate and stress.
DIY projects where labor cost isn't a factor: If you're doing the work yourself and have the skills to repair and refinish damaged baseboards, reuse becomes more economically viable. The material cost savings justify the time investment if your labor is free.
For the majority of hardwood installation projects—particularly in homes 10+ years old with painted baseboards—replacement is the more practical and cost-effective choice.
What Baseboard Replacement Actually Costs
Baseboard replacement cost varies based on material choice, home size, and complexity, but here are realistic numbers for Pennsylvania and New Jersey installations:
Material Costs
Primed MDF baseboard (finger-jointed medium-density fiberboard): $0.60 to $1.20 per linear foot for 3.25" to 5.25" heights. This is the most common modern baseboard material—consistent profile, no knots, takes paint beautifully.
Pine baseboard (solid wood): $1.50 to $3.00 per linear foot depending on width and grade. Pine is traditional and appropriate for historic homes but shows knots and grain that may require extra paint coats for smooth finish.
Poplar baseboard (paint-grade hardwood): $2.00 to $4.00 per linear foot. Harder than pine, no knots, superior paint finish. Often used in higher-end installations.
Prefinished baseboards (factory painted): $2.50 to $5.00 per linear foot. These eliminate painting but limit color choice and require perfect installation since touch-ups show.
Custom profiles (crown cap, ornate molding): $4.00 to $10.00+ per linear foot depending on complexity. Used in historic restoration or luxury homes where period-appropriate details matter.
For a typical 1,500 square foot home with 200 linear feet of baseboard, material costs range from $120 (basic MDF) to $600+ (custom profiles).
Installation Labor Costs
Professional installation includes removing old baseboard, preparing walls, installing new baseboard with proper nailing and adhesive, caulking, and either priming or finish painting.
Basic installation (MDF, simple profile): $2.00 to $3.00 per linear foot for labor.
Standard installation (wood baseboard, multiple rooms): $3.00 to $4.50 per linear foot.
Complex installation (custom profiles, historic restoration, detailed paint work): $5.00 to $8.00+ per linear foot.
For that same 200 linear foot home, labor costs range from $400 to $1,600 depending on complexity.
Total Project Cost
Combining materials and labor:
Budget installation (MDF baseboard, basic profile): $3.00 to $4.00 per linear foot total = $600-800 for 200 LF
Standard installation (primed wood baseboard, professional finish): $5.00 to $7.00 per linear foot total = $1,000-1,400 for 200 LF
Premium installation (custom profiles, historic matching, specialty finishes): $8.00 to $15.00+ per linear foot total = $1,600-3,000+ for 200 LF
These costs are in addition to flooring installation but are necessary to achieve a finished, professional result. Attempting to save $600-1,000 by reusing inadequate or damaged baseboards results in a floor installation that looks incomplete or amateur regardless of the hardwood quality.
Why Contractors Include Baseboard Replacement in Quotes
Experienced hardwood contractors build baseboard replacement into project quotes from the beginning for several reasons:
Prevents mid-project surprises: When clients discover baseboard issues after flooring installation has started, projects stall while decisions are made about replacement. Including it upfront keeps projects on schedule.
Ensures professional finished appearance: We stake our reputation on completed projects that look exceptional. Short, damaged, or poorly reinstalled baseboards undermine even the most beautiful hardwood installation.
Simplifies project logistics: Coordinating baseboard removal, floor installation, and baseboard reinstallation with damaged materials creates scheduling headaches. New baseboard installation is straightforward and predictable.
Protects the new floor: Reinstalling old baseboards often requires on-site repairs—sanding, filling, priming—that create dust and debris that can scratch or damage newly finished hardwood. Installing new primed baseboard is cleaner and safer for the floor.
Provides warranty coverage: When we install both flooring and baseboards, we warranty the complete installation. If we're reinstalling customer-supplied or existing baseboards, warranty coverage becomes complicated.
What Homeowners Should Know Before Starting a Flooring Project
If you're planning hardwood installation in your Bucks County, Montgomery County, or Philadelphia home, here's how to approach the baseboard question:
Budget for baseboard replacement from the start. Assume $3-6 per linear foot as part of your total flooring budget. For most homes, this adds $600-1,200 to the project cost—significant but not project-killing.
Measure your perimeter: Walk your rooms with a tape measure and calculate linear feet of baseboard. This gives you accurate numbers for quote comparison and budgeting.
Understand what you have: Look at your existing baseboards. Are they 3" or shorter? Painted multiple times? Installed more than 10 years ago? If yes to these questions, plan on replacement rather than hoping for reuse.
Ask contractors to explain: When getting quotes, ask specifically about baseboard handling. Contractors who say "we'll just remove and replace them" without discussing condition, height, or repainting costs are either inexperienced or setting you up for mid-project change orders.
Consider timing: If you're planning to repaint the entire room after flooring installation anyway, new primed baseboards make sense—you're painting once rather than repairing and repainting old baseboards.
Think long-term: Baseboard replacement as part of a flooring project is a one-time cost that results in a complete, professionally finished space. Attempting to reuse problematic baseboards saves money upfront but creates an incomplete appearance that bothers you for years.
Our Approach to Baseboard Replacement
At Cyclone Hardwood Floors, we address baseboard replacement as part of every installation consultation:
Honest assessment: We evaluate your existing baseboards and explain whether reuse is feasible or if replacement is necessary. We show you the height issues, paint condition, and installation method so you understand why replacement is recommended.
Material guidance: We help you choose baseboard materials and profiles that match your home's style, your budget, and the aesthetic you're trying to achieve. We explain the difference between MDF, pine, and poplar and when each makes sense.
Complete installation: We handle removal of old baseboards, installation of new baseboards with proper nailing and adhesive, caulking, and priming. This ensures a finished project where all elements work together.
Coordination with painters: If you're hiring a painter for final color coats, we coordinate timing so primed baseboards are ready for painting after floor finishing is complete. If you're painting yourself, we provide guidance on appropriate paint types and techniques.
Protection of new floors: We install baseboards after floor finishing is complete and cured, protecting your investment while completing the final trim work.
The Bottom Line on Baseboards and Hardwood Installation
Baseboard replacement during hardwood installation isn't a contractor upsell or unnecessary expense—it's a practical necessity driven by floor height changes and the reality of removing decades-old trim that was never designed for reuse.
Yes, it adds cost to your project. But attempting to avoid this cost by reusing inadequate or damaged baseboards results in a finished space that looks incomplete or unprofessional, undermining your entire flooring investment.
The difference between a hardwood floor installation with proper baseboards and one with reused, too-short, or damaged baseboards is immediately visible and affects both daily satisfaction and home value. For an additional $600-1,200 on a $10,000-15,000 flooring project, you ensure the final result meets professional standards.
Planning a hardwood installation project in Bucks County, Montgomery County, or Philadelphia? Contact Cyclone Hardwood Floors for a comprehensive consultation that includes honest assessment of baseboard replacement needs. We'll explain your options, provide transparent pricing, and ensure your finished project looks exceptional from floor to ceiling.
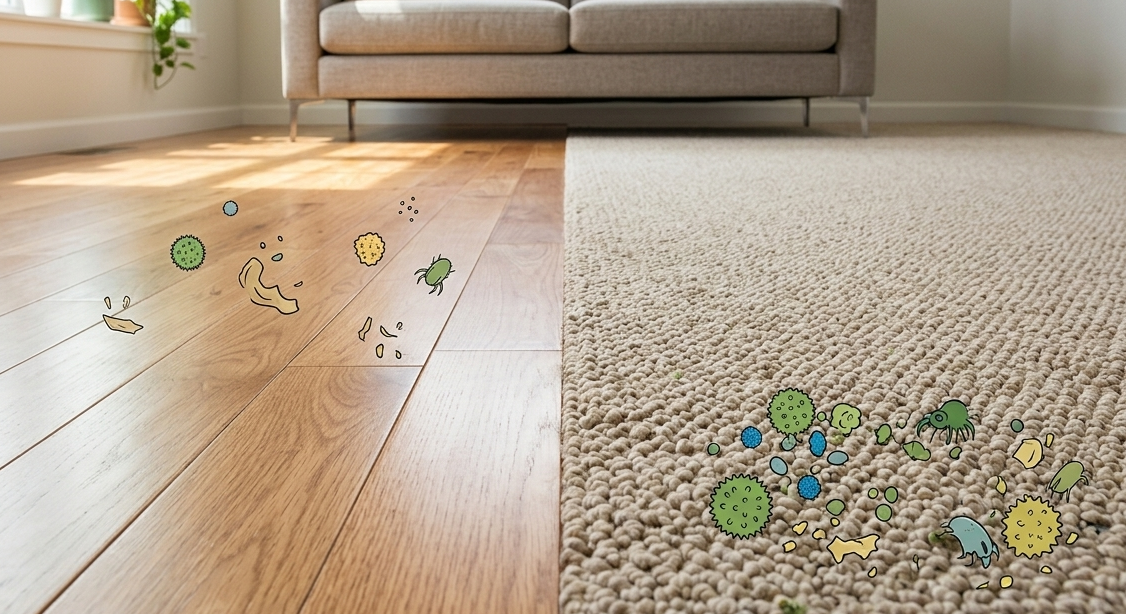
Why Hardwood Floors Are Dramatically Better for Allergies and Asthma Than Carpet
Carpet traps pollen, dust mites, pet dander, and mold spores deep in fibers where vacuuming can't reach them. Hardwood floors keep allergens on the surface where they're easily removed with sweeping or mopping. For Pennsylvania and New Jersey families dealing with allergies and asthma, switching from carpet to hardwood produces measurable health improvements. Allergists and pulmonologists consistently recommend hard flooring as part of comprehensive allergy treatment. Learn why hardwood is medically superior to carpet for allergen management.

If you or someone in your household suffers from allergies, asthma, or respiratory sensitivities, your flooring choice isn't just about aesthetics or resale value—it's about daily quality of life and long-term health. The difference between hardwood floors and carpet in terms of allergen management is so significant that allergists and pulmonologists routinely recommend hardwood as part of comprehensive allergy treatment plans.
After 20+ years installing and refinishing hardwood floors throughout Pennsylvania and New Jersey, we've heard the same story countless times: families who lived with constant allergy symptoms for years experience dramatic improvement within weeks of replacing carpet with hardwood. This isn't placebo effect or coincidence—it's the predictable result of eliminating the single largest allergen reservoir in most homes.
Here's what you need to know about flooring and allergies, backed by medical research and two decades of real-world experience with allergy-prone clients.
The Allergen Problem with Carpet
Carpet functions as a three-dimensional filter that traps and holds allergens indefinitely. Unlike hard surfaces where particles rest temporarily on top, carpet fibers create a maze of spaces where microscopic allergens become embedded and nearly impossible to remove.
Pollen Accumulation in Carpet
Tree, grass, and weed pollen enter your home on clothing, shoes, pets, and through open windows and doors. Each pollen grain is microscopic (15-100 microns), perfectly sized to settle deep into carpet pile where it remains long after the outdoor pollen season ends.
Studies measuring allergen levels in homes show that carpet can harbor 100 times more pollen per square foot than hard flooring. When you walk across carpet, compression and release of fibers launches these trapped pollen particles back into the air you breathe. This is why allergy sufferers often experience symptoms indoors even when outdoor pollen counts are low—their carpet is releasing last month's (or last year's) pollen with every footstep.
Standard vacuuming removes only surface-level pollen. The particles embedded deep in pile, backing, and padding remain untouched. Professional carpet cleaning provides temporary relief but doesn't solve the fundamental problem: carpet's structure is designed to trap particles, and pollen is exactly the size and weight to be trapped permanently.
Dust Mites: The Invisible Carpet Residents
Dust mites are microscopic arachnids that feed on dead human skin cells and thrive in warm, humid environments—conditions that describe the interior of most carpets perfectly. A single gram of carpet dust can contain 100-10,000 dust mites, and their fecal matter is one of the most potent allergens in indoor environments.
Dust mites don't live well on hard surfaces. They require the humidity, warmth, and food supply provided by carpet fibers and padding. Hardwood floors don't provide the ecosystem dust mites need to establish colonies, which is why homes with hardwood consistently show dramatically lower dust mite populations than carpeted homes.
For people with dust mite allergies (estimated at 20 million Americans), this difference is life-changing. Symptoms that required daily antihistamines and nasal sprays often improve significantly or resolve entirely when carpet is removed.
Pet Dander and Hair Embedding
Pet dander—microscopic skin flakes shed by cats, dogs, and other animals—is lightweight and sticky, making it particularly problematic in carpet. Unlike pollen that eventually settles, pet dander becomes electrostatically charged and clings to carpet fibers, resisting removal even with HEPA-filter vacuums.
Pet hair creates additional problems by tangling in carpet pile and acting as a collection point for other allergens. A single pet hair can accumulate pollen, dust mite waste, and mold spores, creating a concentrated allergen bundle that standard cleaning can't remove.
Cats are particularly problematic because Fel d 1 (the primary cat allergen protein) is produced in saliva, skin, and sebaceous glands and becomes airborne easily. In carpeted homes with cats, Fel d 1 levels remain elevated for months or years after the cat is removed because the allergen is embedded throughout the carpet and padding.
On hardwood floors, pet dander and hair remain on the surface where they're visible and easily removed with sweeping, vacuuming, or damp mopping. There's no hidden reservoir building up over time.
Mold and Mildew Growth in Carpet
Carpet and padding in humid climates (like Pennsylvania and New Jersey summers) or in homes with moisture issues can develop mold and mildew growth that releases allergenic spores into indoor air. Basements, bathrooms, and ground-floor rooms with carpet are particularly susceptible.
Even small amounts of moisture—from humidity, spills, pet accidents, or flooding—can trigger mold growth in carpet backing and padding where it's invisible but actively producing spores. Mold allergies cause symptoms identical to pollen allergies: sneezing, congestion, itchy eyes, and respiratory irritation.
Hardwood floors don't support mold growth the way carpet does. Surface moisture on hardwood is visible and can be wiped up immediately. There's no hidden padding harboring moisture and mold colonies.
Chemical Off-Gassing from Carpet Materials
Beyond biological allergens, new carpet releases volatile organic compounds (VOCs) from adhesives, dyes, stain treatments, and synthetic fibers. These chemicals can trigger respiratory irritation, headaches, and allergy-like symptoms in sensitive individuals—a condition sometimes called "new carpet syndrome."
Carpet treatments like stain resistance and antimicrobial coatings add additional chemicals that off-gas over time. While these emissions decrease after initial installation, low-level VOC release continues for months or years.
Hardwood floors—particularly when finished with low-VOC or zero-VOC water-based polyurethanes or natural oil finishes—don't produce ongoing chemical exposure after the initial finish curing period (typically 7-14 days).
Why Hardwood Floors Are Superior for Allergy Management
Hardwood eliminates the allergen reservoir problem that defines carpet. Here's why hardwood performs better for every category of indoor allergen:
Surface-Only Allergen Presence
Allergens on hardwood floors remain on the surface where they're visible and easily removed. Pollen that lands on hardwood doesn't penetrate or embed—it sits on top until swept, vacuumed, or mopped away.
This surface-only presence means daily or every-other-day cleaning actually removes allergens from your home rather than just redistributing them like carpet vacuuming often does.
Effective Cleaning in Minutes
Removing allergens from hardwood requires simple tools and minimal time: a microfiber dust mop or vacuum with hard floor attachment removes 95%+ of surface allergens in minutes. Damp mopping with water or pH-neutral hardwood cleaner captures remaining particles that dry methods miss.
Compare this to carpet, which requires: regular vacuuming with HEPA filtration (15-20 minutes per room to be effective), periodic professional steam cleaning ($200-500+ per cleaning), and ultimately still leaves embedded allergens in place.
For allergy sufferers, the ability to actually remove allergens rather than just managing their surface presence is transformative.
No Dust Mite Habitat
Hardwood's smooth, non-porous surface doesn't provide the warmth, humidity, or food supply dust mites require. Studies comparing dust mite populations in carpeted versus hard-floored homes show 10-100 times fewer mites in homes with hardwood or other hard surfaces.
For the 20 million Americans with dust mite allergies, this elimination of mite habitat often provides more symptom relief than any medical intervention.
Visible Pet Hair and Dander
Pet allergens on hardwood are immediately visible—you see the hair, you sweep it up. There's no mystery about whether cleaning was effective because you can see the results.
This visibility also helps with maintenance timing. You know when floors need cleaning rather than following an arbitrary schedule that may leave allergens accumulating between cleanings.
No Hidden Moisture or Mold
Water spills on hardwood are obvious and cleaned immediately. There's no hidden padding absorbing moisture and developing mold colonies. Hardwood doesn't support mold growth the way organic carpet materials do, and any surface mold (extremely rare) is visible and easily treated.
Low-VOC Finish Options
Modern hardwood finishes—particularly water-based polyurethanes and natural oil finishes like Rubio Monocoat or Osmo—emit minimal VOCs and complete off-gassing within days of application. Once cured, these finishes are inert and don't continue releasing chemicals into your home's air.
For clients with chemical sensitivities or multiple chemical sensitivity (MCS) that need their floors refinished, we can specify zero-VOC finishes that provide excellent durability without ongoing emissions.
Medical Professional Recommendations
Allergists, pulmonologists, and environmental medicine specialists consistently recommend hard flooring over carpet for patients with:
Seasonal allergies (allergic rhinitis)
Asthma (particularly allergic asthma triggered by environmental factors)
Dust mite allergies
Pet allergies
Mold allergies
Chemical sensitivities
The American Lung Association, Asthma and Allergy Foundation of America, and similar organizations all recommend removing carpet and using hard flooring as a key component of allergen reduction strategies.
This isn't theoretical or based on minor differences—the allergen load reduction from switching carpet to hardwood is measurable, significant, and directly correlates with symptom improvement in clinical studies.
Real-World Client Experiences
Over 20+ years working throughout Bucks County, Montgomery County, and Philadelphia, we've installed and refinished hardwood for hundreds of families dealing with allergies and asthma. The pattern is consistent:
Week 1-2 after carpet removal: Immediate reduction in airborne dust and visible allergens. Clients report less frequent sneezing and eye irritation.
Week 3-4: Noticeable improvement in morning congestion and nighttime symptoms. Many clients reduce daily allergy medication.
Month 2-3: Significant symptom reduction. Clients who previously required daily antihistamines often find they need medication only during peak outdoor pollen season.
Month 6+: Long-term symptom management improves dramatically. Children with asthma often show reduced inhaler dependence and fewer nighttime attacks.
Parents consistently report the biggest improvements in children's symptoms—kids spend more time on the floor playing, and their smaller airways are more sensitive to allergen exposure. Removing carpet from children's bedrooms and play areas often produces the most dramatic health improvements.
Common Questions About Hardwood and Allergies
"Don't hardwood floors stir up more dust than carpet?"
This is a common misconception. Carpet doesn't "trap" dust in a beneficial way—it hides dust and allergens where you can't see or remove them. Yes, you can see dust on hardwood floors, but that's an advantage: you know it's there and you can remove it completely.
Carpet appears cleaner because allergens are hidden in the pile. Out of sight doesn't mean out of your lungs—every footstep releases trapped particles into the air you breathe.
"What about area rugs on hardwood?"
Small area rugs (4'x6' or smaller) used in specific areas don't create the same allergen reservoir problems as wall-to-wall carpet. You can:
Shake rugs outside weekly to remove trapped allergens
Wash rugs regularly (most area rugs are machine washable or easily cleaned)
Replace rugs affordably if allergen buildup becomes problematic
The key is keeping rugs small enough to move and clean regularly, and ensuring 80%+ of your floor area is hard surface.
"Is engineered hardwood as good as solid for allergies?"
Yes. The allergen resistance comes from the smooth, non-porous top surface, not from whether the product is solid or engineered. Both perform identically for allergen management.
Engineered hardwood is actually preferable in basements or ground-floor rooms with higher humidity because it resists moisture-related issues better than solid hardwood, reducing any potential for mold concerns.
"What about luxury vinyl plank (LVP)?"
LVP and other hard-surface alternatives (tile, laminate) also provide allergen resistance superior to carpet. The smooth, non-porous surface is what matters.
Hardwood has advantages in terms of longevity (can be refinished multiple times vs. LVP which must be replaced when worn) and lack of ongoing VOC emissions (some LVP products emit phthalates and other plasticizers over their lifespan).
For pure allergen management, any hard surface is dramatically better than carpet. The choice between hardwood, LVP, and tile comes down to aesthetics, budget, and long-term performance rather than allergy considerations.
"How often do I need to clean hardwood floors for allergy control?"
For effective allergen removal, we recommend:
Daily or every-other-day: Dry mopping or vacuuming with hard floor attachment (5-10 minutes for typical rooms)
Weekly: Damp mopping with water or pH-neutral hardwood cleaner
As needed: Spot cleaning spills and visible dirt
This maintenance schedule sounds intensive but takes far less time than the vacuuming, spot treatment, and professional cleaning carpet requires—and actually removes allergens rather than just managing them.
Hardwood Installation Considerations for Allergy-Prone Homes
If you're installing hardwood specifically for allergy management, certain choices optimize allergen resistance:
Finish Selection
Water-based polyurethane produces minimal VOC emissions and cures quickly (7-10 days until safe for sensitive individuals). Brands like Bona Traffic HD and Loba 2K are specifically formulated for low emissions.
Natural oil finishes (Rubio Monocoat, Osmo) are virtually zero-VOC and safe for chemically sensitive individuals. They penetrate wood rather than creating a surface film, resulting in a natural feel with excellent allergen resistance.
Avoid: Oil-based polyurethane if you have chemical sensitivities. While durable, it requires 2-3 weeks for full VOC off-gassing and can trigger symptoms during curing.
Species Selection
All hardwood species provide equal allergen resistance—the finish creates the smooth, cleanable surface. Choose species based on durability, aesthetics, and cost rather than allergy considerations.
White oak is slightly more moisture-resistant than red oak, making it preferable in humid climates where any moisture issues could theoretically support mold.
Installation Method
Nail-down installation (solid hardwood nailed to wood subfloor) uses no adhesives, eliminating VOC exposure from glues.
Floating installation (engineered hardwood with click-lock) also avoids adhesive exposure.
Glue-down installation requires adhesive but modern products are available in low-VOC and zero-VOC formulations if you're concerned about chemical sensitivity.
The Financial Case for Hardwood Over Carpet for Allergy Sufferers
Beyond health benefits, hardwood makes financial sense for families managing allergies:
Reduced medical costs: Less frequent doctor visits, reduced medication use, fewer missed work/school days from allergy and asthma symptoms.
Eliminated carpet replacement costs: Carpet in high-traffic areas needs replacement every 5-10 years ($2,000-5,000+ depending on home size). Hardwood lasts 50-100+ years and can be refinished multiple times.
No professional carpet cleaning: $200-500 annually for effective allergen removal vs. simple DIY maintenance for hardwood.
Home value: Hardwood adds resale value, carpet is neutral or negative (buyers often view it as something to replace).
For a family spending $1,000-2,000 annually on allergy medications, doctor visits, and carpet maintenance, hardwood pays for itself within 3-5 years while providing superior quality of life.
Making the Switch: What to Expect
If you're considering replacing carpet with hardwood for allergy management, here's what the process looks like:
Carpet removal: We remove existing carpet and padding, ensuring all backing material and tack strips are eliminated (these can harbor residual allergens).
Subfloor cleaning and preparation: We vacuum and clean the subfloor thoroughly to remove any allergen accumulation before installing hardwood.
Low-emission installation: We use low-VOC or zero-VOC products throughout the process, ensuring the installation itself doesn't trigger symptoms.
Finish curing time: Water-based finishes are safe for sensitive individuals within 7-10 days. Natural oil finishes cure in 24-48 hours but we recommend a week before moving furniture back.
Immediate improvement: Most clients notice reduced airborne dust and improved air quality within days of carpet removal, even before hardwood installation is complete.
Our Approach to Allergy-Friendly Hardwood Installation
At Cyclone Hardwood Floors, we've worked with allergy-prone families throughout Pennsylvania and New Jersey for over 20 years. We understand that for these clients, flooring isn't just about appearance—it's about health and quality of life.
We offer:
Low-VOC and zero-VOC finish options from manufacturers like Bona, Loba, Rubio Monocoat, and Osmo specifically for chemically sensitive clients.
Dust-free installation and refinishing using commercial-grade containment systems that capture 99%+ of sanding dust, preventing allergen exposure during the work.
Coordination with medical timelines if you have severe allergies or asthma requiring temporary relocation during installation, we work with your schedule to minimize disruption.
Honest guidance about what to expect regarding VOC off-gassing times, finish curing, and when it's safe to return to the space based on your specific sensitivities.
Post-installation maintenance education so you know how to keep your new hardwood floors allergen-free with minimal effort.
The Bottom Line on Hardwood and Allergies
If you or someone in your home suffers from allergies, asthma, or respiratory sensitivities, carpet is actively working against your health every day. The allergen load reduction from switching to hardwood is measurable, significant, and directly translates to symptom improvement for the majority of allergy sufferers.
This isn't about choosing the prettier option—it's about choosing the option that lets you breathe easier, sleep better, and spend less time managing symptoms and more time living comfortably in your home.
Ready to improve your home's air quality and reduce allergy symptoms? Contact Cyclone Hardwood Floors for a free consultation. We'll explain your options for hardwood installation or refinishing with allergen reduction and chemical sensitivity in mind, serving Bucks County, Montgomery County, Philadelphia, and surrounding Pennsylvania and New Jersey communities.

The Hardwood Floor Finishes That Sell Homes Fast (And The Ones That Don't)
Not all hardwood floor finishes sell homes equally in Bucks and Montgomery Counties. Matte and satin sheens photograph better than high-gloss. Natural and light stains make spaces feel larger and appeal to more buyers in Wayne, Radnor, Newtown, and Doylestown markets. Wide plank flooring (5"+) conveys luxury. White oak outperforms red oak for resale. After 20+ years refinishing homes throughout Bucks and Montgomery Counties, we've seen which aesthetic choices move properties fast and which add weeks to market time.
You're updating hardwood floors before listing your home, and every contractor gives you the same advice: "Pick whatever you like—it's personal preference."
That's terrible advice if you're trying to sell. Personal preference matters when you're living in the house for 20 years. When you're listing in 60 days, you need floors that appeal to the widest range of buyers and photograph well in listing photos. The wrong finish choice can add weeks to your time on market or cost you thousands in sale price.
After 20+ years refinishing hardwood floors throughout Bucks County and Montgomery County—from Wayne, Radnor, and Bryn Mawr on the Main Line to Newtown, Doylestown, and Yardley in Bucks County—we've seen which aesthetic choices move properties fast and which ones sit. Here's what actually works in markets where homes regularly sell for $600k to $3M+.
Matte and Satin Finishes Outsell High-Gloss By a Mile
Walk into any recently sold Main Line home and you'll notice the floors have a soft, natural sheen—not the mirror-like gloss that was popular in the 1990s and 2000s. This isn't coincidence. Buyer preferences have shifted dramatically toward matte and satin finishes, and homes with these finishes consistently sell faster.
Why matte and satin work for selling:
They photograph better. High-gloss finishes create reflections and hot spots in listing photos, especially with flash photography. Windows, light fixtures, and the photographer themselves all show up as bright reflections that distract from the room. Matte and satin finishes absorb light rather than reflecting it, resulting in clean, professional photos where buyers focus on the space instead of glare.
Professional real estate photographers will tell you the same thing: matte floors are easier to shoot and produce better listing images. Since 95% of buyers start their search online, your listing photos determine whether they schedule a showing. Floors that photograph poorly hurt your chances before anyone walks through the door.
They hide imperfections. High-gloss finishes show every scratch, scuff, and dust particle. Buyers doing walk-throughs will notice minor flaws that wouldn't be visible with a softer sheen. Matte and satin finishes diffuse light across the surface, making small imperfections nearly invisible unless you're looking closely.
This matters because buyers scrutinize floors during showings. If they see scratches and wear, they mentally deduct money for refinishing—even if the floors are structurally sound. A matte finish that hides minor wear keeps buyers focused on the home's positives instead of calculating repair costs.
They feel current and sophisticated. Design trends move in cycles, but the shift toward matte and satin finishes has been consistent for over a decade. High-gloss reads as dated—it signals 1990s McMansion aesthetics rather than contemporary design. Buyers want homes that feel current, and floor finishes contribute significantly to that perception.
Matte finishes in particular align with the modern farmhouse, Scandinavian, and transitional design aesthetics that dominate current buyer preferences. If your home has updated kitchens, neutral paint, and modern fixtures, high-gloss floors will clash with everything else. Matte or satin creates visual cohesion that buyers respond to.
The exception: Historic properties in Wayne, Radnor, Bryn Mawr, Haverford, Ardmore, and similar Main Line towns—plus older estates in Newtown, Doylestown, New Hope, and Perkasie—with original 1920s-1940s architecture can sometimes carry semi-gloss finishes if the home is being marketed as a period restoration. But even then, satin is safer.
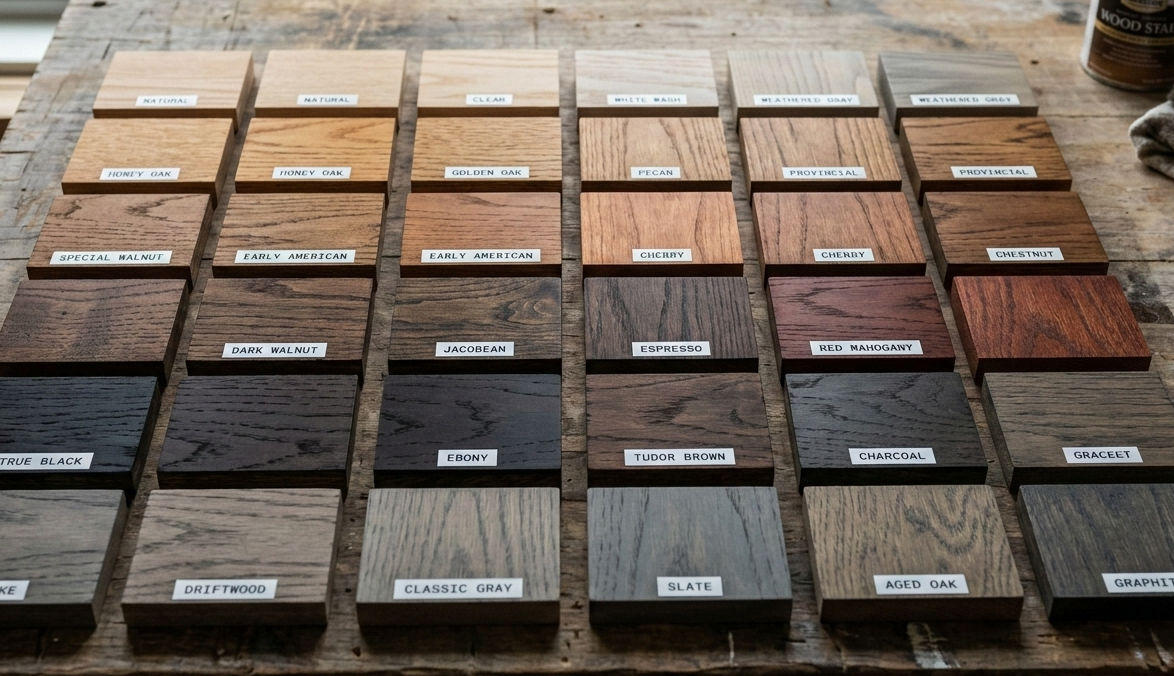
Natural and Light Stains Sell Faster Than Dark
Ten years ago, dark espresso and ebony stains were everywhere—particularly on red oak floors where homeowners wanted to hide the natural grain and create a more exotic look. That trend has reversed. Today's buyers overwhelmingly prefer natural, light, and medium-toned stains that showcase wood grain rather than obscuring it.
Why light stains dominate the resale market:
They make spaces feel larger and brighter. Dark floors absorb light, making rooms feel smaller and requiring more artificial lighting to achieve the same brightness. Light and natural stains reflect light, opening up spaces and creating an airy feel that buyers associate with move-in ready homes.
This is especially critical in Pennsylvania where natural light is limited during fall and winter—the peak home-selling seasons. A home with dark floors photographed on a cloudy November afternoon in Ambler, Lansdale, or Warrington looks dim and cave-like in listing photos. The same home with natural or light-stained floors looks bright and welcoming.
They're more versatile for staging and furnishing. Buyers imagine their furniture in your space. Dark floors limit color palettes and design choices—they pair well with certain styles but clash with others. Natural and light stains work with virtually any furniture style, paint color, or decor aesthetic.
Real estate agents know this. When staging a home for sale, light floors give them flexibility to use bold accent colors, varied furniture styles, and eye-catching accessories without worrying about visual conflict. Dark floors demand specific staging choices that narrow the potential buyer pool.
They hide dust and pet hair better. Every homeowner with dark floors knows the frustration: vacuum in the morning, and by afternoon you can see dust and pet hair again. Buyers notice this during showings. Light and natural stains camouflage dust, making homes look cleaner with less effort.
This matters for showings because sellers can't deep-clean before every walk-through. Floors that show every speck of dust create the impression of a poorly maintained home, even if everything else is pristine.
They age more gracefully. Dark stains show scratches, wear patterns, and fading more obviously than natural tones. High-traffic areas develop lighter patches where the stain wears through, creating a shabby appearance that costs you negotiating power. Natural and light stains wear more evenly, and when wear does occur, it blends into the overall patina rather than standing out as damage.
What about gray stains? Gray was the hottest trend of the 2010s, and it still works—but only with the right application. True gray (not gray-brown or "greige") requires water-based polyurethane to maintain color. Oil-based poly adds an amber tone that turns gray into muddy taupe within months. If you're selling within a year and want gray, insist on water-based finish or you'll regret it when the floors shift color before closing.
Wide Plank Floors Photograph Better and Feel More Luxurious
Buyers browsing Zillow and Realtor.com scroll through dozens of listings in minutes. The properties that get saved and scheduled for showings have one thing in common: they look expensive in photos. Wide plank hardwood (5" to 7"+ width) conveys luxury and quality in ways that standard 2.25" strip flooring simply doesn't.
Why width matters for selling:
Visual impact in listing photos. Wide planks create clean, horizontal lines that make rooms appear larger and more elegant. Narrow strip flooring creates visual busyness—hundreds of thin lines competing for attention. Wide planks simplify the visual field, allowing other design elements (furniture, architectural details, natural light) to shine.
Real estate photographers prefer wide plank floors because they're easier to shoot. Fewer seams mean fewer distracting lines, and the grain patterns of wide planks photograph beautifully with proper lighting.
Perception of quality and value. Buyers associate wide plank flooring with higher-end construction and renovation. Whether that perception is accurate doesn't matter—what matters is that wide planks signal "premium home" in ways that narrow flooring doesn't.
This is particularly important in competitive markets like Montgomery County (Conshohocken, Narberth, Jenkintown, Lower Gwynedd) and Bucks County (Yardley, Newtown, Richboro, Holland) where buyers are comparing similar homes at similar price points. Two identical colonials listed at $850k—one with 2.25" oak strip, one with 5" white oak planks—the wide plank home will generate more showing requests and stronger offers.
They showcase wood character. Wide planks display grain patterns, color variation, and natural wood character more prominently. Buyers who want "real hardwood" rather than the laminate or LVP they see in new construction are drawn to this authenticity.
Premium species like white oak, walnut, and hickory particularly benefit from wide plank installation because their distinctive grain patterns become focal points rather than getting lost in narrow strips.
The trade-off: Wide plank costs more—both in material (less yield from each log) and installation (more precision required). But if you're updating floors specifically to sell, the incremental cost is recovered through faster sale time and potentially higher offers. It's an investment that pays for itself.
White Oak Outperforms Red Oak in Today's Market
For decades, red oak was the default hardwood choice in Pennsylvania and New Jersey—it's locally available, affordable, and takes stain well. But buyer preferences have shifted decisively toward white oak, particularly in homes selling above $600k throughout Bucks County, Montgomery County, and Delaware County.
Why white oak dominates the resale market:
It's the species of choice in high-end design. Every design magazine, Pinterest board, and home renovation show from the past decade features white oak. It's become synonymous with contemporary luxury in ways that red oak simply isn't. Buyers who've been browsing design content expect white oak in updated homes.
Subtler grain pattern. Red oak has pronounced cathedral grain with visible rays and flecks. White oak has a straighter, more uniform grain that reads as sophisticated and modern. In an era where minimalism and clean lines dominate design, white oak's understated beauty aligns with buyer expectations.
Better with natural finishes. The current trend is natural or lightly stained hardwood that showcases wood character. White oak's neutral tone works beautifully with clear or natural finishes. Red oak's pinkish undertone requires staining to achieve the looks buyers want—and even then, the underlying warmth shows through.
More versatile for future owners. Buyers know they might want to change finishes or refinish floors eventually. White oak's neutral base accepts any stain color beautifully—from natural to gray to dark walnut. Red oak's pink undertone limits staining options and requires specific techniques to neutralize.
The cost reality: White oak costs 30-50% more than red oak in material costs. For a typical 1,500 sq ft installation, that's an extra $1,500-2,500. But in competitive markets throughout Bucks and Montgomery Counties—from Villanova and Bryn Mawr to Doylestown and Newtown—that investment translates to faster sales and potentially $5k-10k higher sale prices where buyers expect premium finishes.
If you're replacing floors specifically to sell and your budget allows, white oak is the safer bet for maximizing return.
European Oil Finishes vs. Polyurethane: When Each Makes Sense
Most Pennsylvania hardwood floors are finished with polyurethane—it's durable, affordable, and familiar to contractors. But a growing segment of buyers (particularly those purchasing $1M+ homes) expect European oil finishes, and the presence or absence of this finish can influence sale price and time on market.
European oil finishes (Rubio Monocoat, Osmo, Loba):
These penetrate wood rather than sitting on top like polyurethane. They create a natural, matte appearance that feels like raw wood but with stain and moisture resistance. The look is warm, organic, and unmistakably high-end.
When oil finishes help selling:
Historic Main Line properties (Wayne, Radnor, Haverford, Ardmore) where buyers want authentic period character
Bucks County estates (New Hope, Solebury, Buckingham) where natural materials are priorities
Modern/contemporary homes in Conshohocken, Ambler, or Narberth where natural materials are design priorities
Luxury market ($1M+) throughout Montgomery and Bucks Counties where buyers expect boutique finishes
Homes marketed as eco-friendly or sustainability-focused (oils are lower VOC)
When polyurethane is smarter:
Mid-market homes ($400k-800k) where buyers prioritize durability over aesthetics
Families with young children or pets who need maximum protection
Buyers planning to rent the property (polyurethane handles tenant abuse better)
Any situation where budget is tight (oils cost 40-60% more in material and labor)
The truth is that most buyers can't tell the difference between a well-applied matte polyurethane and an oil finish by looking at listing photos. The difference becomes apparent when they walk the floors and feel the texture—oil finishes have a warmer, softer feel underfoot.
If you're selling a Main Line estate, a Bucks County historic property, or luxury homes in competitive Montgomery County markets, oil finishes can justify premium pricing. For typical suburban homes throughout the region, matte polyurethane delivers similar visual appeal at a fraction of the cost.
The Finishes That Hurt Resale Value
Just as certain finishes help homes sell, others actively harm sale prospects. Avoid these if resale is your goal:
High-gloss polyurethane on anything but formal spaces. Acceptable in grand foyers or formal dining rooms of historic homes. Anywhere else, it reads as dated and creates difficult-to-photograph glare.
Pickled, whitewashed, or heavily distressed finishes. These were trendy in the early 2000s but now signal that the home hasn't been updated in 20 years. Buyers see them as projects requiring immediate refinishing.
Painted hardwood floors. Unless you're selling a beach cottage or historic farmhouse where painted floors are architecturally appropriate, this destroys value. Buyers want hardwood, not painted wood.
Extreme gray tones. Soft gray and greige work well. Blue-gray or charcoal gray are polarizing—buyers either love them or hate them, which narrows your potential market.
Red mahogany and cherry stains on oak. These stains were popular in the 1990s but now look obviously artificial. Natural wood tones or honest staining that works with the species performs better.
How to Choose When Selling is the Priority
If you're refinishing or installing hardwood specifically to sell your home, make decisions based on broad market appeal rather than personal preference:
Finish sheen: Matte or satin (not high-gloss)
Stain color: Natural, light, or medium tones (avoid dark unless architecturally appropriate)
Plank width: 5" or wider if budget allows (3.25" minimum)
Species: White oak if budget allows, red oak is acceptable with the right stain
Topcoat: Matte water-based polyurethane for versatility, oil finish for luxury market
These choices create floors that photograph beautifully, appeal to the widest buyer demographic, and support asking price rather than inviting lowball offers.
The Return on Investment Reality
Hardwood floor refinishing and installation are among the highest-ROI home improvements when done correctly. National Association of Realtors data shows 147% ROI for refinishing and 118% for new installation—meaning you recover more than the cost at sale.
But that ROI assumes you make smart aesthetic choices. Refinish floors with high-gloss polyurethane and dark stain, and you might only recover 80% of cost. Choose matte finish with natural or light stain, and you'll exceed 100% recovery while also reducing days on market.
The difference between smart and poor flooring choices isn't just aesthetic—it's financial. And in competitive markets throughout Bucks County (Newtown, Yardley, Doylestown) and Montgomery County (Wayne, Radnor, Conshohocken, Ambler), the difference between 45 days on market and 90 days on market costs thousands in carrying costs and potentially tens of thousands in sale price negotiation.
Planning to sell your Bucks County or Montgomery County home this spring or summer? Contact Cyclone Hardwood Floors for a consultation on finishes that maximize resale value. We serve Wayne, Radnor, Bryn Mawr, Villanova, Newtown, Doylestown, Yardley, Ambler, and surrounding communities. We'll assess your current floors, explain which updates will deliver the strongest return, and provide honest recommendations based on your timeline and budget—not what's easiest for us to install.
The Homeowner’s Guide to Kitchen Hardwood: Why Water is Your Floor’s Number One Enemy
Stop moisture from ruining your investment. Discover professional tips for sealing, maintenance, and water damage prevention for kitchen hardwood floors. Protect your home's value today.

The Reality of Hardwood in a Kitchen
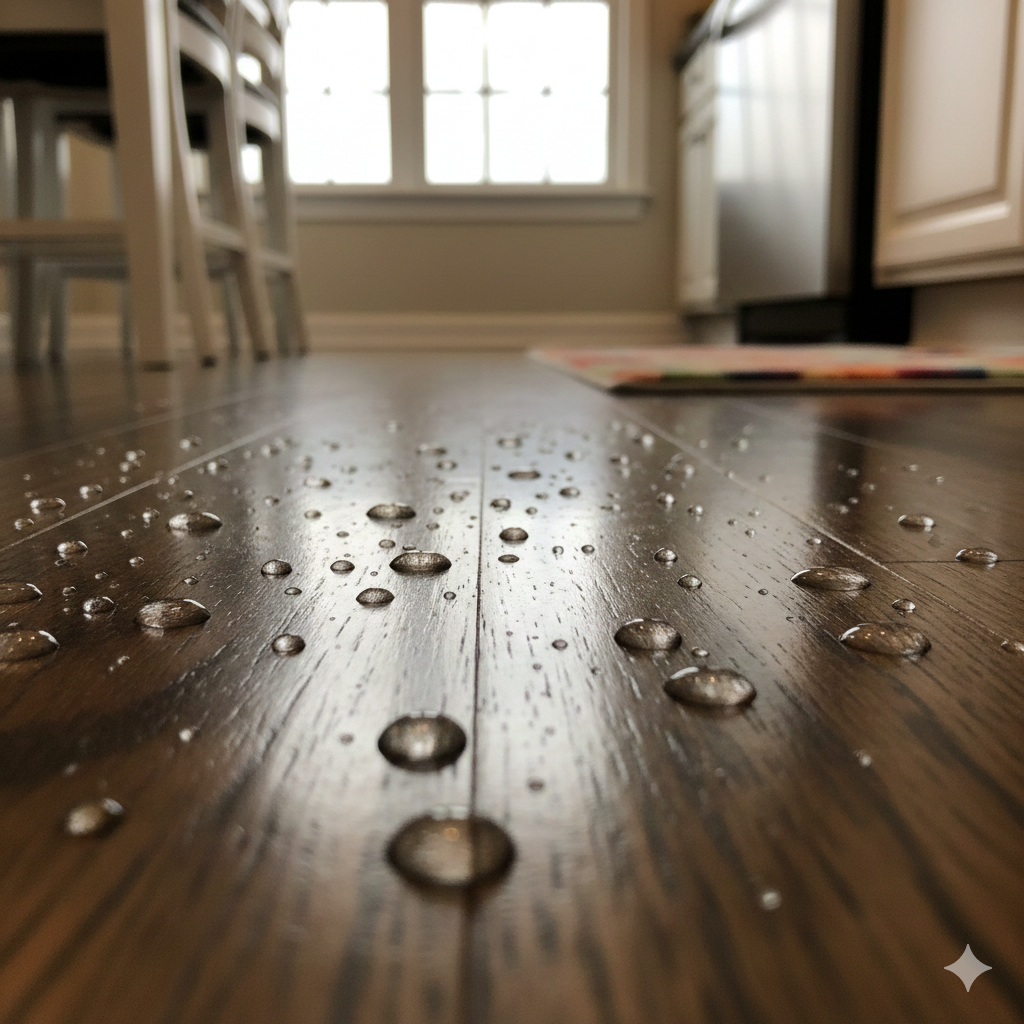
Many "experts" will tell you that hardwood doesn't belong in a kitchen. They’re wrong. Hardwood is one of the most durable surfaces you can own—if you understand how it reacts to water. In Bucks county, Montgomery county, in fact all over the Philly metro area, where humidity swings from 20% in the winter to 90% in the summer, your kitchen floor is under constant stress.
When you drop water on a wood floor, you aren’t just getting it wet; you’re triggering a structural change in the material. Here is the technical breakdown of how that happens and how to stop it.
1. The Physics of Wood: "Cupping" vs. "Crowning"
Wood is a cellular material. Think of a hardwood plank like a stack of tiny straws.
Cupping: This happens when the bottom of the board gets wetter than the top. The bottom expands, forcing the edges of the board up. This often happens because of a slow leak under a dishwasher or a damp subfloor.
Crowning: This is the opposite. It happens when the top of the board is sanded while it's still damp, or when a massive surface spill isn't dried properly.
The Fix: You cannot sand a cupped floor immediately. A professional contractor uses a moisture meter to ensure the wood has returned to its "equilibrium moisture content" (EMC) before any repair begins. Sanding too early leads to permanent structural damage.
2. The Three Levels of Water Damage
Not every water spot requires a full sand and finish. You need to know which "level" of damage you're dealing with:
Level 1: Surface Clouding
This is a white, hazy spot. It means moisture is trapped in the topcoat of the finish, but hasn't reached the wood.
The Solution: Often, a professional "screen and coat" (buffing the top layer and applying a new coat) will fix this without a full sand.
Level 2: Graying or "Tannin Pull"
If the wood is turning gray or black, the water has reached the wood fibers. The water reacts with the natural tannins in the wood (especially in White Oak). We just did a job in Doylestown where the customer had this effect on their floor which we repaired.
The Solution: This requires a full sand down to raw wood. If the staining is deep, we may have to use wood bleach or replace the specific boards.
Level 3: Fiber Crush
If a board has stayed wet for too long, the cells actually crush against each other. Even after it dries, the board will look "shrunken" or have gaps.
The Solution: Board replacement is the only way to restore the floor's integrity.
3. Professional Grade Protection: What Actually Works
In a kitchen, "off-the-shelf" hardware store polyurethanes aren't enough. They are often too brittle.
Commercial-Grade Finishes: We use waterborne finishes with "catalysts." These create a flexible, chemical-resistant shield. They can withstand the acidic nature of a spilled orange juice or a dropped jar of pickles—things that would eat right through a standard oil-based finish.
Sealing the Perimeter: Water often kills a floor by running under the baseboards. We recommend a tight seal around the refrigerator water line and dishwasher area.
4. Maintenance: The "Squeaky Clean" Myth
The biggest mistake homeowners make is using "Oil Soaps" or steam mops.
Steam Mops: They force high-pressure moisture into the grain. It’s the fastest way to ruin a kitchen floor.
Oil Soaps: They leave a residue that makes it impossible to "screen and coat" your floor later. You’ll be forced to do a full, expensive sand-down because the new finish won't bond to the old wax.
Conclusion: Get a Professional Assessment
If your kitchen floor feels "wavy" under your feet or you see black spots near the sink, the damage is already moving into the subfloor. Don't wait for it to rot.
Get a No-Nonsense Moisture Check & Quote from Cyclone Hardwood Floors, LLC!

When Is the Best Time to Install or Refinish Hardwood Floors? (And Why Most Contractors Won't Tell You the Truth)
Most contractors say hardwood can be installed year-round, but timing significantly affects cost, quality, and long-term performance. Spring and fall offer ideal conditions—moderate humidity, stable temperatures, and minimal seasonal wood movement. Summer requires extended acclimation and longer cure times due to high humidity. Winter demands strict environmental controls and moisture management. Learn how seasonal conditions impact hardwood installation and refinishing in Pennsylvania and New Jersey, and when to schedule your project for best results.
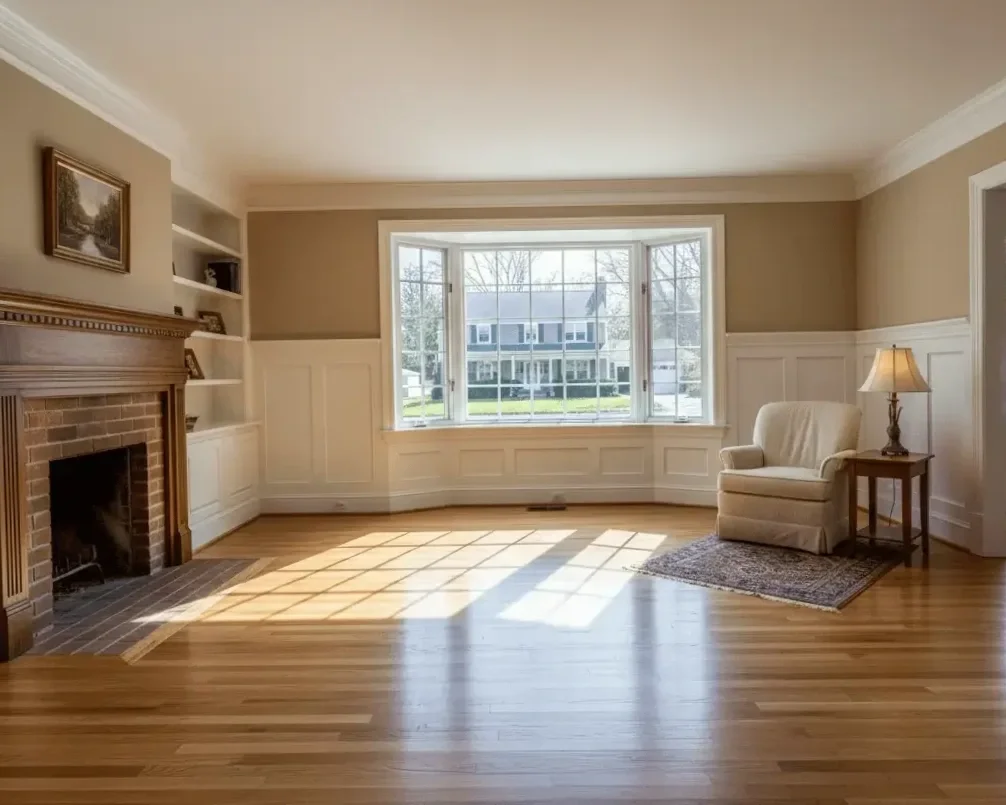
Ask ten hardwood flooring contractors when's the best time to install or refinish floors, and nine will tell you "whenever works for your schedule." They're not wrong—modern HVAC systems and professional techniques allow quality installations year-round—but they're not giving you the full picture.
The truth is that timing affects cost, installation quality, long-term performance, and how quickly your project gets completed. Some seasons are objectively better than others for hardwood work, and understanding why helps you make smarter decisions about when to schedule your project.
After 20+ years installing and refinishing hardwood floors throughout Pennsylvania and New Jersey, we've seen how seasonal conditions impact every aspect of flooring work. Here's what you need to know before you book your project.
Why Season Matters for Hardwood Flooring
Wood is a natural, hygroscopic material that constantly exchanges moisture with its environment. It swells when humidity is high and contracts when humidity is low. This movement is normal and expected, but the rate and degree of movement varies significantly with seasonal conditions.
When hardwood is installed or refinished, the goal is to do the work when the wood is at its average moisture content for your home's typical conditions. Install when moisture content is too high, and the wood will shrink and gap when winter heating dries it out. Install when it's too low, and the wood will swell and potentially buckle when summer humidity arrives.
Beyond moisture considerations, temperature affects finish curing times, worksite conditions impact installation efficiency, and seasonal demand determines pricing and contractor availability.
Spring (March - May): The Sweet Spot
Spring is the ideal season for hardwood installation and refinishing throughout Pennsylvania and New Jersey. Here's why:
Moderate humidity levels: Spring humidity typically ranges from 35-55% in the Mid-Atlantic region. This is close to the year-round average, which means wood installed in spring experiences minimal seasonal movement after installation. Gaps that appear in winter and swelling that occurs in summer are both minimized when installation happens at moderate humidity.
Stable temperatures: Daytime temps in the 60s and 70s allow finishes to cure at optimal rates. Polyurethane and oil-based finishes cure more consistently at moderate temperatures, resulting in harder, more durable surfaces. Water-based finishes also perform better when temperatures aren't extreme.
Ideal working conditions: Contractors can open windows for ventilation without worrying about freezing temperatures or excessive heat. Finish odors dissipate faster with natural airflow, and dust containment systems work more effectively.
Comfortable for homeowners: If you're living in the house during the work, spring temperatures mean you can ventilate rooms without making your home uncomfortable. You're not choosing between finish fumes and freezing temps or sweltering heat.
Predictable scheduling: Weather is generally mild, so material deliveries and work schedules aren't disrupted by snowstorms or extreme heat. Projects stay on timeline without weather delays.
The downside? Spring is peak season for home renovations, which means contractor calendars fill up fast. If you want April or May installation, book in January or February. Waiting until March often means pushing into June for availability.
Summer (June - August): Workable But Requires Adjustments
Summer installations are common and can produce excellent results, but high humidity and heat create challenges that require professional expertise to manage properly.
High humidity affects wood stability: Pennsylvania and New Jersey summers often see 60-80% relative humidity. Wood absorbs this moisture and expands. If hardwood is installed during peak summer humidity, it will contract when winter heating dries the air—potentially creating gaps between planks by January.
Experienced contractors account for this by allowing extra acclimation time (7-14 days instead of 3-5 days) and sometimes installing planks slightly tighter than normal, anticipating winter shrinkage. But this requires knowing your home's typical winter conditions and calculating expected movement—something not all contractors do properly.
Extended drying times: High humidity slows polyurethane curing. What takes 3-4 hours to dry in spring might take 6-8 hours in August. This extends project timelines because you can't apply subsequent coats or allow foot traffic until each layer is fully cured.
Water-based finishes handle humidity better than oil-based, which is why many contractors switch to water-based products in summer. But if you specifically want oil-based for its warmth and durability, summer installations may require extra days to allow proper curing.
Heat and working conditions: Temperatures above 85°F make physical labor exhausting and can affect finish application. Polyurethane becomes thinner in heat, which can lead to application issues if the contractor isn't adjusting technique. Some finishes have maximum application temperatures (usually 90-95°F), and we've had to pause projects during heat waves to avoid finish failures.
Indoor comfort during the work: If you're living in the house, summer installations mean keeping windows closed and AC running during finish application to control temperature and humidity. This traps odors inside longer than spring or fall installations where natural ventilation works better.
The advantage of summer? Contractor availability is often better in late June and July (before the fall rush starts), and if your home has good climate control, summer installations work fine with proper planning.
Fall (September - November): Second-Best Season
Fall conditions in Pennsylvania and New Jersey mirror spring: moderate temperatures, stable humidity, and comfortable working conditions. It's the second-best season for hardwood work, with a few unique considerations.
Similar benefits to spring: Humidity levels return to the 35-55% range after summer moisture dissipates. Temperatures are moderate, finishes cure consistently, and wood movement after installation is minimal.
Preparing for holiday gatherings: Many homeowners schedule fall floor work to have fresh floors ready for Thanksgiving and holiday entertaining. This creates a minor rush in September and October, so booking in July or August is advisable.
Shorter days affect scheduling: By November, daylight hours are limited. Contractors working on natural light may have shorter workdays, which can extend project timelines slightly. This matters less for refinishing (which is often done with artificial light anyway) but can affect new installations where contractors are reading wood grain and matching patterns.
Leaf and debris season: Fall means leaves, acorns, and outdoor debris that gets tracked indoors. This isn't a deal-breaker but requires extra attention to entry mats and site cleanliness during the installation.
The main advantage of fall? It's slightly less busy than spring, so you might get better availability and potentially better pricing in September and early October before the holiday rush hits.
Winter (December - February): Challenging But Possible
Winter hardwood installations are the most challenging season, but they're done successfully every day by contractors who understand how to manage extreme conditions. The key is proper environmental controls and realistic expectations.
Extremely low humidity: Forced-air heating drives indoor humidity down to 15-25% in most Pennsylvania and New Jersey homes. This is well below the ideal range for hardwood (30-50% RH), which means wood contracts significantly. If hardwood is installed in these dry conditions, it will expand when spring and summer humidity returns—potentially causing buckling if the contractor doesn't leave adequate expansion gaps.
Professional installations in winter require measuring subfloor and material moisture content before starting, using humidifiers to raise indoor humidity to at least 30% during acclimation and installation, and calculating expansion gaps based on expected summer swelling.
Homeowners who don't maintain proper humidity levels during and after installation often experience problems. The contractor can control conditions during the work, but if you turn off humidifiers after they leave, the floor will suffer.
Cold affects finish curing: Polyurethane cures chemically, and that chemical reaction slows dramatically in cold temperatures. If your home is kept at 60°F to save on heating, finishes may take twice as long to cure. We require homes to maintain 65°F minimum during hardwood work and for 72 hours after final coat application.
Oil-based finishes are particularly sensitive to cold—they can fail to cure properly if temperatures drop below 55°F. Water-based finishes handle cold slightly better but still require adequate warmth for proper film formation.
Weather delays and material delivery: Snowstorms and ice can delay material deliveries and prevent contractors from accessing job sites. What should be a 5-day project might stretch to 7-10 days if weather disrupts the schedule. This isn't a reflection on the contractor—it's reality in the Mid-Atlantic winter.
Ventilation challenges: You can't open windows for ventilation when it's 20°F outside. This means finish odors linger longer, and proper ventilation requires running exhaust fans or temporarily moving to another part of the house. For oil-based finishes with strong odors, this can be uncomfortable.
The advantages of winter? Contractor availability is often best in January and February (the slowest months), and pricing may be slightly more competitive as companies try to fill calendars. If you have proper HVAC controls, maintain consistent temperature and humidity, and can tolerate longer cure times, winter installations can work fine.
Special Considerations for Refinishing vs. New Installation
The seasonal factors above apply to both refinishing and new installation, but there are some differences:
Refinishing is less weather-dependent: Since you're working with wood that's already acclimated to your home, seasonal humidity changes matter less. The main concern is finish curing, which is affected by temperature and humidity but doesn't involve new wood movement.
New installation requires more acclimation time: Hardwood that's been sitting in a warehouse or truck needs 3-14 days to acclimate to your home's conditions before installation. The greater the difference between storage conditions and your home, the longer acclimation takes. Summer and winter installations often require extended acclimation compared to spring and fall.
Refinishing can be done year-round more easily: If your home has good climate control (consistent 65-70°F and 35-50% humidity), refinishing works well any season. The existing floor is already stable, and you're only dealing with finish application.
How to Schedule Your Hardwood Project
If you have flexibility on timing, here's our recommendation based on 20+ years of experience:
First choice: April, May, September, or October. These months offer ideal conditions, and if you book 6-8 weeks in advance, you can usually secure your preferred dates.
Second choice: March or November. Conditions are generally good, though you might encounter occasional weather delays in March or shorter workdays in November.
Third choice: June or July. Summer humidity requires extra acclimation and extended cure times, but with proper planning, results are excellent.
Last choice: December, January, or February. Winter work is fine if your home has excellent climate control and you're willing to manage humidity levels. Expect longer cure times and potential weather delays.
If you don't have flexibility—for example, you're selling your house and need floors done before listing—then the season doesn't matter as much. A skilled contractor can produce quality work year-round by adjusting techniques, acclimation times, and finish schedules to compensate for seasonal challenges.
Questions to Ask Your Contractor About Seasonal Installation
Not all contractors account for seasonal conditions properly. Here's what to ask before booking:
"How long do you acclimate materials before installation?" The answer should vary by season—longer in summer and winter, shorter in spring and fall. If they say "a few days" regardless of season, they're not adjusting for conditions.
"What humidity levels do you require during installation?" For winter work especially, they should specify 30-40% minimum RH and may require you to run humidifiers. If they say it doesn't matter, find someone else.
"How does season affect your finish schedule?" They should explain that summer installations need longer cure times and winter requires warmer temps. If they claim one finish schedule works year-round, they're either using fast-cure commercial products or cutting corners.
"Do you measure moisture content before installation?" The answer should be yes, always. Reputable contractors use moisture meters on both subfloor and hardwood materials before starting work.
Our Approach to Seasonal Installation
At Cyclone Hardwood Floors, we adjust our process based on seasonal conditions:
Spring and fall: Standard acclimation (3-5 days), normal finish schedules, and predictable timelines.
Summer: Extended acclimation (7-10 days), water-based finishes when appropriate, longer cure times between coats, dehumidifiers if indoor humidity exceeds 60%.
Winter: Moisture content testing on all materials, humidifiers required to maintain 30%+ RH, extended cure times, and we won't start work if the home can't maintain 65°F consistently.
We're upfront about seasonal challenges and realistic about timelines. If conditions aren't right, we'll tell you—even if it means delaying the project. Our reputation depends on quality installations that perform well for decades, not rushing jobs to hit arbitrary deadlines.
The Bottom Line on Timing
The best time to install or refinish hardwood floors in Pennsylvania and New Jersey is spring (March-May) or fall (September-November) when conditions are most favorable for quality work and long-term performance.
Summer works well with proper planning and extended timelines. Winter is fine if your home has excellent climate control and you're willing to manage humidity.
But here's the real answer: The best time is when it works for your life and your contractor can commit to doing it right.
A skilled contractor can produce excellent results in any season by adjusting for conditions. An inexperienced contractor will create problems even in ideal spring weather. Choose your contractor based on their knowledge, experience, and willingness to adapt their process to seasonal realities—not just on who has availability tomorrow.
Planning a hardwood installation or refinishing project? Contact Cyclone Hardwood Floors for a free consultation. We'll discuss timing, seasonal considerations for your specific project, and help you schedule work for optimal results.

How Winter Weather Damages Hardwood Floors (And What You Can Do About It)
Pennsylvania and New Jersey winters are brutal on hardwood floors. Forced-air heating drops indoor humidity to 15-25%, causing wood to contract and gaps to form between planks. Road salt tracked indoors etches protective finishes, creating dull white spots that don't buff out. Wet boots leave standing water that seeps between planks, causing cupping and black water stains. Learn how winter weather damages hardwood, signs of winter floor damage, and proven strategies to protect your investment through the cold months.
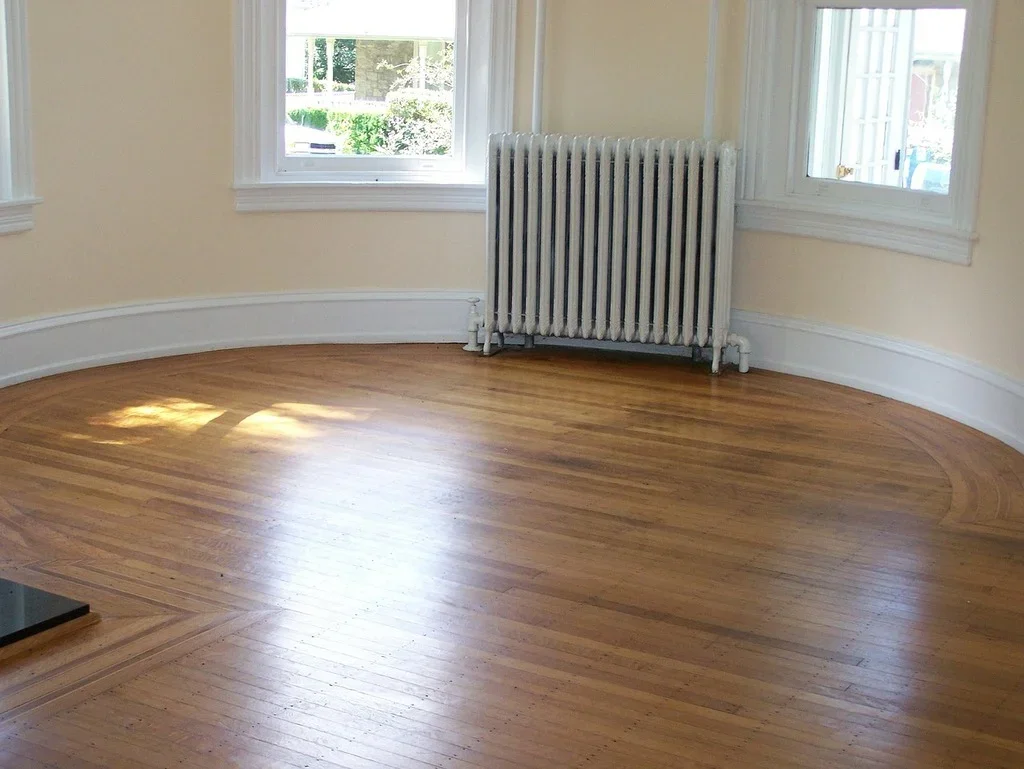
February in Pennsylvania and New Jersey brings freezing temperatures, forced-air heating running constantly, and wet conditions from snow and ice melt tracked indoors. If you have hardwood floors, this combination creates the perfect storm for damage that accumulates throughout the winter season.
Understanding how cold weather affects hardwood—and what you can do to minimize that damage—can save you thousands of dollars in repair costs and extend the life of your floors by years.
Why Hardwood Floors Struggle in Winter
Wood is a hygroscopic material, meaning it absorbs and releases moisture based on the surrounding environment. In summer, humidity causes wood to swell. In winter, dry indoor air causes wood to contract. This seasonal movement is natural and expected, but the extreme conditions of Pennsylvania and New Jersey winters accelerate wear in ways that surprise most homeowners.
Low Humidity and Gap Formation
When outdoor temperatures drop below freezing and you run forced-air heating to keep your home comfortable, indoor relative humidity often falls to 15-25%. Hardwood floors perform best at 30-50% relative humidity. Below that threshold, the wood releases moisture and contracts.
This contraction causes gaps to appear between planks. In most cases, these are seasonal gaps that will close when humidity returns in spring. But repeated winter shrinkage over many years can cause planks to lose their structural integrity along the tongue-and-groove joints. Eventually, those gaps stop closing completely, and you're left with permanent separation that requires professional repair.
The drying effect is particularly severe near exterior walls, heating vents, and fireplaces where temperature differentials are greatest. You'll often see wider gaps in these areas compared to interior sections of the floor.
Road Salt and Ice Melt Damage
Rock salt (sodium chloride), calcium chloride, and magnesium chloride are the most common ice melts used on driveways, sidewalks, and roads throughout the region. These chemicals are highly effective at melting ice, but they're corrosive to hardwood floor finishes.
When tracked indoors on boots and shoes, salt crystals dissolve into the moisture on your floors and create a caustic solution. This solution etches polyurethane and oil-based finishes, leaving dull white spots and hazy areas that don't buff out. Over time, repeated exposure breaks down the protective finish entirely, exposing raw wood to moisture and staining.
Salt residue also acts as an abrasive. As people walk across floors with salt crystals embedded in the finish, it's similar to walking on sandpaper—microscopic scratches accumulate with every step, dulling the floor's appearance and compromising the protective layer.
Wet Boots and Standing Water
Snow and ice melt tracked indoors creates standing water on hardwood floors. If wiped up immediately, the damage is minimal. But water left to sit—even for 15-20 minutes—can penetrate between planks, under area rugs, and into the wood itself.
Hardwood floors are finished on the top surface, but the edges and undersides are often unfinished or less protected. Water that seeps between planks soaks into these vulnerable areas, causing localized swelling, cupping, and eventually black water stains or mold growth if the moisture isn't dried completely.
Entryways, mudrooms, and high-traffic areas near exterior doors see the most water exposure. These sections often show cupping or edge swelling by late winter, particularly if water has been repeatedly tracked in and not cleaned up promptly.
Freeze-Thaw Cycling and Structural Movement
Homes without consistent heating—vacation properties, foreclosures, homes in transition—experience freeze-thaw cycling where interior temperatures fluctuate dramatically. This causes hardwood to expand and contract rapidly, stressing the wood fibers and causing splits, checks, and delamination in engineered flooring.
Even in occupied homes, cold drafts from poorly insulated windows and doors create temperature gradients across the floor. Sections near exterior walls may be 10-15 degrees colder than interior areas, causing uneven expansion and contraction that leads to warping or buckling over time.
Signs Your Hardwood Floors Have Winter Damage
Most winter damage isn't immediately obvious. By the time you notice the problem, it's often progressed beyond simple maintenance. Here's what to look for:
Widening gaps between planks: Normal seasonal gaps are 1/16" or less and appear uniformly across the floor. Gaps wider than a dime's thickness, or gaps that vary dramatically in width, indicate excessive moisture loss or structural issues.
White haze or dull spots: Salt residue leaves a cloudy appearance that doesn't improve with regular cleaning. If you see white streaks or hazy areas near entryways, salt has likely etched the finish.
Cupping along plank edges: When the edges of planks are higher than the center, creating a concave surface, it indicates moisture absorption from below or between planks. This often happens near entry doors where water is tracked in.
Scratches that weren't there in fall: Winter brings sand, salt, and grit that acts as an abrasive. If your floors look significantly more scratched by March than they did in November, abrasive particles are being tracked in and grinding into the finish.
Dark water stains: Black or gray staining between planks or along edges means water has penetrated the wood and either caused tannin bleeding or mold growth. This requires professional attention.
Soft spots or spongy areas: If sections of your floor feel unstable underfoot, water has likely compromised the subfloor or caused rot in the hardwood itself. This is serious damage that won't resolve on its own.
How to Protect Hardwood Floors During Winter
You can't eliminate winter's effects entirely, but you can minimize damage with consistent maintenance and environmental controls.
Control Indoor Humidity
Invest in a whole-house humidifier or use portable humidifiers to maintain 30-40% relative humidity throughout winter. A hygrometer (available for $10-20) lets you monitor levels accurately. Don't over-humidify—above 50% can cause condensation on windows and walls, creating different problems.
Humidifiers are particularly important if you have radiant floor heating, which dries out wood faster than forced-air systems.
Use Entry Mats and Boot Trays
Place absorbent mats both outside and inside every exterior door. The mat outside scrapes off salt and snow; the mat inside absorbs moisture before it reaches your hardwood. Replace or wash these mats weekly during winter—a saturated mat just spreads water around instead of absorbing it.
Use boot trays in entryways to contain melting snow and salt. Empty these daily rather than letting water sit and evaporate onto nearby floors.
Clean Salt Residue Properly
Never use vinegar, ammonia, or harsh cleaners on hardwood floors. These can damage the finish as much as the salt itself.
Instead, use a pH-neutral hardwood floor cleaner diluted according to manufacturer instructions. For stubborn salt residue, damp-mop the area (not soaking wet—just damp) and immediately dry with a clean towel. The goal is to dissolve the salt and remove it, not push it deeper into the wood or leave it to dry in place.
For heavy salt buildup, professional cleaning may be necessary. We use specialized solutions that neutralize salt without damaging finishes.
Wipe Up Water Immediately
Keep microfiber cloths or old towels near entry doors and wipe up tracked-in snow and water as soon as you notice it. Don't wait until later—even 20 minutes of standing water can cause problems.
If water does sit long enough to cause swelling or cupping, don't try to sand it down immediately. Let the wood dry completely (this can take weeks), then assess whether the cupping has resolved on its own. Often it will, particularly if caught early.
Avoid Area Rugs in Wet Areas
It's tempting to put area rugs near entry doors to protect floors, but rugs trap moisture underneath and prevent drying. This creates ideal conditions for mold and water staining.
If you must use rugs, choose ones with breathable backing (avoid rubber or vinyl), and lift them daily to check for moisture underneath. Better yet, use washable mats specifically designed for entryways that allow airflow.
When to Call a Professional
Some winter damage requires professional assessment and repair:
Gaps wider than 1/4": These won't close on their own and may indicate subfloor movement or improper installation, not just seasonal contraction.
Widespread cupping or crowning: If more than a few planks are affected, the problem is likely environmental (subfloor moisture, humidity extremes) rather than isolated water exposure.
Finish failure: If your polyurethane is peeling, flaking, or worn through to raw wood in high-traffic areas, refinishing is necessary. Waiting will allow water and dirt to penetrate the wood, making repair more expensive.
Black staining or musty odors: Both indicate moisture has been present long enough for mold or tannin bleeding. This requires professional cleaning and possibly plank replacement.
Structural instability: Soft spots, squeaks, or bouncing floors mean the subfloor or joists are compromised. This is a safety issue that needs immediate attention.
Long-Term Winter Strategies
If you live in Pennsylvania or New Jersey long-term, investing in preventive measures pays off:
Upgrade to water-resistant finishes: Modern water-based polyurethanes and aluminum oxide finishes resist salt and moisture better than traditional oil-based poly. When it's time to refinish, discuss these options with your contractor.
Consider engineered flooring in entryways: Engineered hardwood has a plywood core that's more dimensionally stable than solid wood. It handles humidity swings and moisture exposure better, making it ideal for entry areas while solid hardwood works fine in interior rooms.
Improve insulation and air sealing: Reducing drafts and cold spots near exterior walls minimizes temperature differentials across your floor, which reduces stress on the wood.
Schedule annual maintenance: Professional cleaning and recoating every 3-5 years extends the life of hardwood floors significantly. This is far cheaper than waiting until the finish is completely gone and you need full refinishing.
What We've Learned From 20+ Years of PA/NJ Winters
At Cyclone Hardwood Floors, we've repaired countless floors damaged by winter conditions. The patterns are consistent:
Homes without humidity control always show wider gaps and more finish damage than homes that maintain 30-40% RH. The difference is dramatic—sometimes 10+ years of additional floor life just from using a humidifier.
Salt damage is cumulative. One winter of tracked-in salt won't ruin a floor, but five winters without proper cleaning will. By year three or four, the finish is compromised enough that refinishing becomes necessary.
Water damage near entry doors is almost universal in homes where snow and ice are tracked in regularly. The good news is that this damage is usually localized and can be repaired without refinishing the entire floor—if caught before it spreads.
Seasonal gaps are normal and expected. Homeowners panic when they see gaps appear in January, but unless those gaps are extreme (wider than a nickel) or accompanied by other issues, they'll close when spring humidity returns. The key is knowing the difference between normal movement and a real problem.
The Bottom Line
Winter is hard on Pennsylvania and New Jersey hardwood floors. Low humidity causes gaps, salt etches finishes, wet conditions cause swelling and staining, and freeze-thaw cycles stress the wood. But with proper maintenance—humidity control, regular cleaning, immediate water removal—you can minimize damage and extend your floor's life.
If your floors are showing signs of winter wear, don't wait until spring to address it. Damaged finishes only get worse, and water that's been sitting in your floor all winter can cause mold and rot if not dried and treated.
Need an assessment of winter damage? Contact Cyclone Hardwood Floors for a free evaluation. We'll explain what's repairable, what's cosmetic, and what needs professional attention—so you can make informed decisions about your floors.
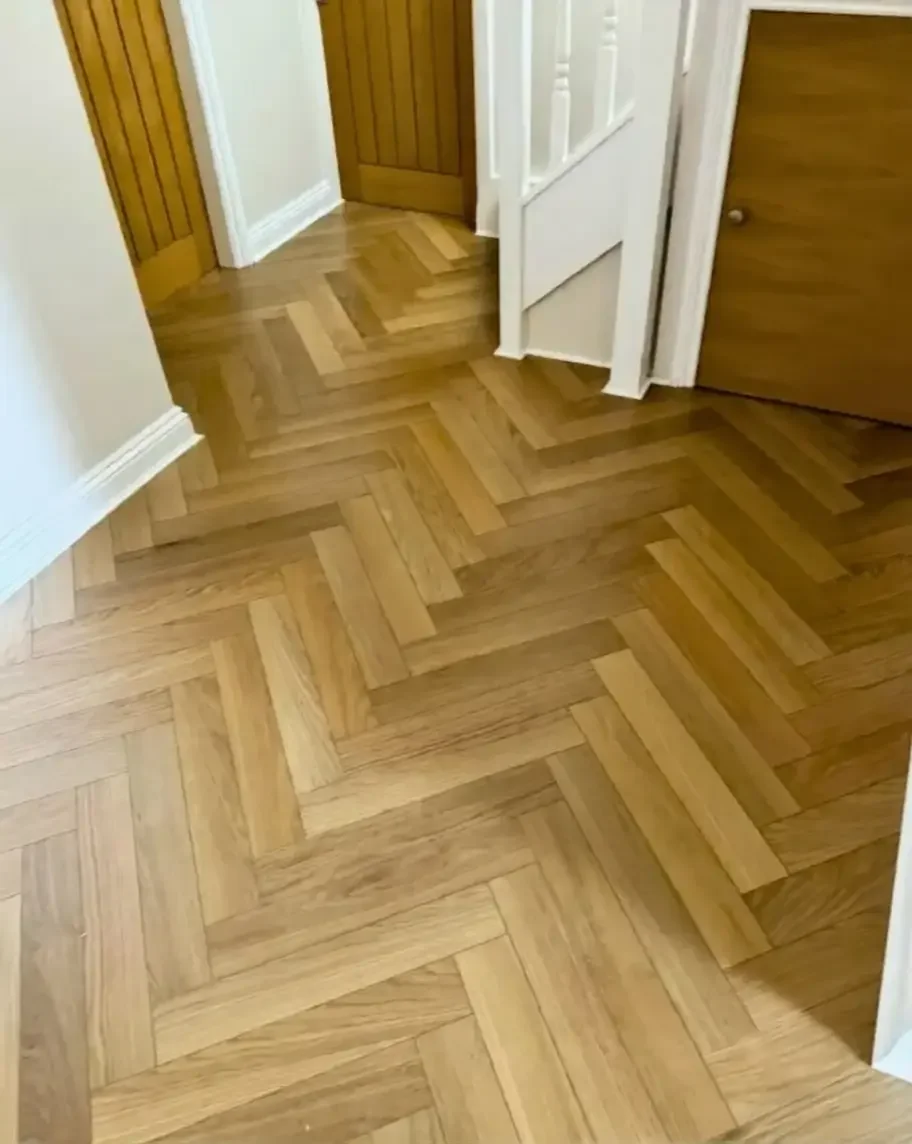
Can Your Wayne or Radnor Home's Thin Parquet Flooring Be Refinished?
Many beautiful historic homes in Wayne, Radnor, and the Main Line feature thin parquet flooring or 5/16" hardwood installed decades ago. After multiple refinishes, homeowners are often told these floors are too thin to refinish and need expensive replacement. But is that true? We specialize in assessing and refinishing delicate floors throughout Wayne, Radnor Township, Villanova, and surrounding Main Line communities. With 20+ years of experience, we can determine if your floors can be restored or if replacement is truly necessary—saving you thousands.

If you own one of the beautiful historic homes in Wayne, Radnor, Villanova, Bryn Mawr, or the surrounding Main Line communities, there's a good chance your hardwood floors have been there for decades. Many of these elegant properties feature thin parquet flooring or 5/16" solid hardwood that was installed in the 1960s, 70s, or 80s—gorgeous patterns and craftsmanship that you can't find in modern construction.
But here's the problem: after 40-50 years and possibly multiple refinishes, those floors are starting to show their age. Scratches, dullness, worn-through finish, uneven color from sun exposure—you know they need attention. The question is whether they can be refinished one more time or if you're looking at an expensive full replacement.
The Challenge with Thin Hardwood and Parquet
Traditional solid hardwood flooring is typically 3/4" thick, which gives you plenty of material to sand through multiple refinishes over the floor's lifetime. But many Main Line homes—especially in Wayne, Radnor Township, and the surrounding estate neighborhoods—were built with thinner materials:
Parquet flooring: Often only 5/16" to 3/8" thick, especially the intricate geometric patterns popular in mid-century luxury homes.
Thin-strip hardwood: Some 1960s-era installations used 5/16" solid oak or other species to save on material costs while still delivering a premium look.
The problem is simple: every time you sand a floor, you remove a layer of wood. If your floors have already been refinished two or three times, there might not be enough material left to sand again without hitting the tongue-and-groove joints or compromising structural integrity.
And replacement? For parquet or thin hardwood in a 2,500-3,500 sq ft Main Line home, you're looking at $20,000-$40,000+ depending on the material you choose. That's a significant investment, especially when the existing floors might still be salvageable.
Why Wayne and Radnor Homes Often Have This Issue
The historic estates and custom-built homes throughout Wayne, Radnor, Villanova, Devon, Berwyn, and Haverford were constructed during an era when craftsmanship mattered but materials were used efficiently. Builders installed beautiful parquet patterns in foyers, dining rooms, and living spaces—intricate designs that showcased skill and elegance.
These floors were built to last, and they have. But they weren't built to be refinished endlessly. After decades of wear and potentially multiple sanding jobs by previous owners or contractors who didn't measure remaining thickness, many of these floors are now in a gray area: too worn to leave as-is, but potentially too thin to refinish safely.
Homeowners in Radnor Township, Wayne, and the surrounding Main Line communities are often surprised to learn that their contractor "can't refinish" their floors. What they're rarely told is that it depends on who's doing the assessment and how much experience they have with thin or delicate flooring.
The Difference Between "Can't Be Done" and "We Can't Do It"
Here's what most homeowners don't realize: when a contractor tells you your floors are too thin to refinish, what they often mean is they don't feel comfortable doing it. And that's fair—sanding thin floors or parquet requires precision, experience, and the right equipment. One mistake and you've sanded through to the subfloor or destroyed an irreplaceable parquet pattern.
Many contractors would rather sell you a full replacement than take the risk. It's safer for them, more profitable, and eliminates liability. But that doesn't mean your floors actually need to be replaced.
At Cyclone Hardwood Floors, we've been working on Main Line estates for over 20 years. We've refinished countless thin parquet floors, 5/16" hardwood, and other delicate installations throughout Wayne, Radnor, Villanova, and the surrounding communities. We know how to assess remaining thickness, how much material can safely be removed, and what techniques to use to get beautiful results without compromising the floor's integrity.
How We Assess Whether Your Floors Can Be Refinished
When we evaluate thin hardwood or parquet flooring in Wayne, Radnor, or nearby Main Line homes, here's what we look at:
Remaining wood thickness: We measure how much material is left above the tongue-and-groove or parquet backing. If there's at least 1/16" to 1/8" of usable wood, refinishing is usually possible.
Previous refinishing history: We look for signs of how many times the floor has been sanded. Uneven wear patterns, visible grain depth, and proximity to fasteners all tell us whether there's enough material left.
Floor condition: Minor scratches, surface wear, and finish degradation are all easily addressed. Deep gouges, water damage that's penetrated the wood, or structural issues might require different approaches.
Parquet pattern integrity: For parquet floors, we assess whether the individual pieces are still securely bonded and whether the pattern can withstand sanding without pieces lifting or edges chipping.
Client goals: Are you trying to restore original character for a historic home, or are you preparing to sell and need the floors to show well in listing photos? Your goals affect our recommendations.
Our Approach to Refinishing Thin Floors
If we determine your Wayne or Radnor home's floors can be refinished, we use techniques specifically designed for thin or delicate materials:
Light sanding with fine-grit abrasives: Instead of aggressive material removal, we use finer grits and lighter passes to remove only what's necessary to eliminate scratches and even out the surface.
Screen and recoat when possible: If your floors are in decent shape and just need a finish refresh, we can screen the existing finish and apply new coats without removing significant wood.
Precision equipment: We use dust-free sanding systems and equipment designed for control and finesse, not speed. This reduces the risk of over-sanding or damaging delicate parquet.
Custom staining and finish: For floors with uneven thickness or areas that can't be sanded uniformly, we can use custom stain blending and finish techniques to create a cohesive, beautiful result.
Honest assessment: If your floors genuinely can't be refinished safely, we'll tell you. We'd rather give you accurate information than take your money for a job that won't hold up.
When Replacement Actually Makes Sense
We're not going to tell you every floor can be saved. Sometimes installation of new hardwood flooring is genuinely the better option:
Severe water damage that's warped or rotted the wood
Structural issues where the subfloor is compromised
Floors that have already been sanded to the limit with no remaining material
Parquet where pieces are delaminating and can't be stabilized
Client preference for a completely different look or modern materials
But even in these cases, partial replacement might be an option. We've replaced damaged sections of parquet or hardwood while preserving the rest of the floor, saving homeowners tens of thousands compared to full replacement.
Why Main Line Homeowners Choose Cyclone for Thin Floor Refinishing
Wayne, Radnor, Villanova, Haverford, Bryn Mawr—these communities are filled with homes that deserve craftsmanship that matches their original quality. We've built our reputation on the Main Line by treating every historic floor with the care and expertise it requires.
When you call us for an assessment, you're getting:
20+ years of experience with thin hardwood and parquet flooring
Honest evaluation of whether refinishing is possible or replacement is necessary
Precision techniques that preserve as much original material as possible
Respect for historic homes and the character that makes Main Line properties special
Licensed and insured service with dust containment systems that protect your home
We've worked on some of the most beautiful estates in Wayne and Radnor Township, and we understand that these floors aren't just surfaces—they're part of your home's history and value.
Get an Expert Assessment Before You Commit to Replacement
If you've been told your Wayne or Radnor home's parquet or thin hardwood floors "can't be refinished," get a second opinion before you spend $30,000+ on replacement. In many cases, we can restore those floors to beautiful condition for a fraction of the cost.
We offer free assessments for homeowners throughout Wayne, Radnor, Villanova, Devon, Berwyn, Haverford, Bryn Mawr, and the surrounding Main Line communities. We'll measure remaining thickness, evaluate condition, and give you honest recommendations about refinishing vs. replacement.
Ready to find out if your floors can be saved? Contact Cyclone Hardwood Floors for a free assessment. We'll help you make an informed decision about the best path forward for your home's hardwood.

How Your Floor Finish Changes Your Stain Color (And Why It Matters)
Your hardwood floor finish doesn't just protect—it changes your stain color. Oil-based polyurethane adds a warm amber tone that enhances browns but muddles grays. Water-based stays crystal clear, perfect for modern gray stains on white oak. Understanding how finish affects color prevents expensive mistakes and ensures your floors look exactly how you envisioned them.
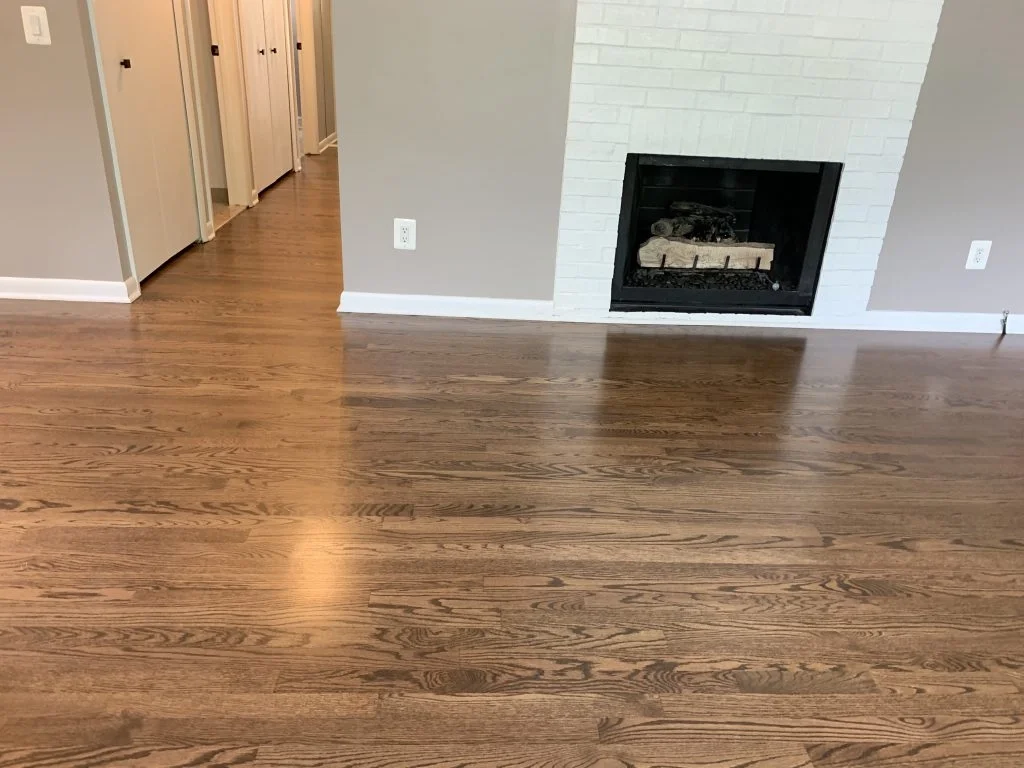
You spent hours picking the perfect stain color for your hardwood floors. You looked at samples, held them up to the light, imagined how they'd look with your furniture. Then the finish goes on and suddenly the color looks completely different than what you expected.
Welcome to the part of hardwood refinishing nobody tells you about: your topcoat doesn't just protect the wood—it changes the color. Sometimes dramatically.
Oil-Based Polyurethane: The Amber Effect
Oil-based polyurethane is the traditional choice for hardwood floors, and for good reason. It's durable, it penetrates well, and it creates that classic warm glow people associate with hardwood. But here's what most homeowners don't realize: oil-based poly has an amber tone that adds warmth to whatever stain you put down.
If you stained your floors a medium brown, oil-based poly will push it toward honey or golden brown. If you went with a dark walnut stain, the finish will add richness and depth. This amber tone intensifies over time as the finish ages and is exposed to sunlight—what starts as subtle warmth can become noticeably golden after a few years.
When oil-based works:
Traditional brown, espresso, or walnut stains that benefit from warmth
Red oak floors where you want to enhance the natural amber undertones
Homes with warm color palettes (creams, tans, golds)
Clients who want that classic, timeless hardwood look
When oil-based doesn't work:
Cool-toned stains like gray, greige, or driftwood (the amber tone will muddy them)
White oak floors with modern gray stains (you'll lose the clean, contemporary look)
Light natural finishes where you want the wood's true color without added warmth
If you're trying to achieve a cool, modern aesthetic with gray or weathered stains, oil-based poly is going to fight you every step of the way. The amber undertone doesn't just add warmth—it fundamentally shifts the color away from what you were aiming for.
Water-Based Polyurethane: Crystal Clear Finish
Water-based polyurethane has come a long way in the past decade. Early formulations were less durable and didn't look as good, but modern water-based finishes rival oil-based in protection while offering one major advantage: they're crystal clear with no amber tone.
What you see when the stain dries is what you get when the finish goes on. Water-based poly doesn't shift the color, doesn't add warmth, and doesn't yellow over time. If you stained your floors gray, they stay gray. If you wanted a pale natural finish, water-based keeps it light and bright.
When water-based works:
Gray, greige, or any cool-toned stain (this is the only way to preserve the color)
White oak floors with modern finishes (white oak + gray stain + water-based poly = clean contemporary look)
Light natural finishes where you want the wood grain to show without darkening
Homes with cool color palettes (grays, whites, blues)
Clients who want the look to stay consistent over decades (no yellowing)
When water-based doesn't work:
Red oak floors where you want to enhance warmth (water-based won't add any)
Very dark stains where depth and richness matter (oil-based gives more visual dimension)
Clients who specifically want that classic amber glow
Water-based finishes also dry faster, which means less downtime between coats and quicker project completion. They have lower VOCs, so there's less smell during application. But the real reason to choose water-based is color fidelity—if you need your stain to look exactly as intended without any shift, water-based is the only option.
Why This Matters More Than You Think
We've redone floors because homeowners didn't understand this. They pick a beautiful gray stain, we explain the finish will affect the color, they say "yeah yeah, whatever," and then oil-based poly goes on and suddenly their gray floors look taupe. Now they're unhappy, we're re-sanding, and everyone's wasted time and money.
The finish isn't just the last step—it's part of the color decision. You can't separate stain choice from finish choice and expect the results to match your vision.
How We Handle This at Cyclone
When clients come to us with a stain color in mind, we don't just show them samples on raw wood. We show them samples with the finish applied—oil-based on one, water-based on the other—so they can see the actual final result. We explain how oil-based will shift the tone, how water-based keeps it true, and we let them make an informed decision based on what they're actually going to live with.
Most contractors skip this step because it's easier to just default to oil-based and hope the client doesn't notice the color shift. We've been doing this for 20+ years and we've learned that an extra ten minutes of explanation upfront saves everyone headaches later.
The Bottom Line
If you want warm, traditional hardwood with depth and richness, oil-based polyurethane enhances brown and walnut stains beautifully. If you want modern, cool-toned floors—especially grays on white oak—water-based polyurethane is the only way to preserve your color choice.
Don't let your finish sabotage your stain. Know what you're getting before the topcoat goes on, because once it's applied, you're living with it until the next refinish.
Ready to refinish your floors the right way? Contact Cyclone Hardwood Floors for a free estimate. We'll show you how stain and finish work together so you get the look you actually want—not a surprise when the job's done.

Why Refinishing Hardwood Floors Takes Experience and Skill
If you've ever searched "hardwood floor refinishing near me," you know there's no shortage of people willing to take your money. The guy with a truck, a sander, and a business card printed at Staples will charge you half what the pros do. Sounds like a deal, right?

If you've ever searched "hardwood floor refinishing near me," you know there's no shortage of people willing to take your money. The guy with a truck, a sander, and a business card printed at Staples will charge you half what the pros do. Sounds like a deal, right?
Wrong.
Refinishing hardwood floors isn't like painting a wall or replacing a faucet. It's not a weekend DIY project, and it's definitely not something you want to trust to someone who learned how to use a drum sander from a YouTube video. Here's why this work requires real experience, actual skill, and someone who knows what the hell they're doing.
One Shot to Get It Right
When you refinish hardwood floors, you're removing a layer of wood. You can only do this so many times before the floor is too thin to sand again. Most residential hardwood can handle 3-5 refinishes in its lifetime, depending on thickness. That means every refinish matters.
An inexperienced worker can take off too much material in one pass, burn the wood with improper sanding technique, or create uneven surfaces that show every imperfection once the stain goes down. You don't get a do-over. Once the wood is gone, it's gone. This isn't drywall where you can mud over mistakes—this is permanent.
Reading the Wood Takes Years, Not Days
Not all hardwood is the same. Oak sands differently than maple. Brazilian cherry has different hardness and grain patterns than domestic hickory. Older floors may have nails, gaps, or previous repairs that need to be addressed before sanding even starts. An experienced refinisher knows how to read the wood, adjust their technique, and anticipate problems before they become expensive disasters.
Amateurs treat every floor the same. They use the same grit sequence, the same pressure, the same speed—regardless of wood type, age, or condition. That's how you end up with wavy floors, chatter marks, gouges, and uneven stain absorption that looks like garbage no matter how much polyurethane you slap on top.
The Sander Is Not Your Friend
A drum sander is one of the most aggressive tools in any tradesman's arsenal. In the right hands, it's efficient and effective. In the wrong hands, it's a floor-destroying machine that will leave deep grooves, waves, and irreversible damage in under 60 seconds.
Experienced refinishers know how to control the sander, how to keep it moving at the right speed, how to feather edges, and how to blend passes so the floor looks uniform. They know when to switch grits, when to use an edger, and when to hand-scrape corners that a machine can't reach. Someone who just rented a sander for the weekend does not.
Staining Is an Art, Not a Step
You'd think staining is the easy part. You'd be wrong.
Stain doesn't just sit on top of wood and magically look even. Different species absorb stain differently. Sap wood and heart wood within the same plank can take color unevenly. End grain soaks up more stain than face grain. An experienced finisher knows how to prep the surface, apply the stain consistently, and manage absorption so the final product looks intentional, not blotchy.
They also know how to mix custom colors, match existing floors in adjacent rooms, and troubleshoot when the stain doesn't behave the way it should. An amateur just brushes it on and hopes for the best. You can always tell.
The Finish Coat Makes or Breaks Everything
Polyurethane, oil-based finishes, water-based finishes—each has different application techniques, dry times, and durability. Applying finish isn't just about rolling it on. It's about controlling thickness, avoiding bubbles, managing temperature and humidity, and knowing how many coats are needed for longevity.
Too thick and it looks plastic. Too thin and it won't hold up. Uneven application shows streaks and lap marks. Dust contamination ruins the gloss. An experienced finisher controls every variable and delivers a glass-smooth, durable surface that will last decades. Someone winging it delivers a floor that looks okay for six months and then starts peeling, scratching, or wearing unevenly.
You Get What You Pay For
Hiring the cheapest guy you can find is penny-wise and pound-foolish. If the work is bad, you're paying twice—once for the botched job and again to have a real professional fix it. And depending on how much wood was removed the first time, fixing it might not even be possible.
Experienced hardwood floor refinishers cost more because they've spent years mastering their craft. They've ruined floors, learned from mistakes, invested in proper equipment, and developed the eye and hand control that separates acceptable work from exceptional work. They carry insurance, guarantee their work, and show up when they say they will.
At Cyclone Hardwood Floors, we've been installing and refinishing hardwood in New Jersey and Pennsylvania for over 20 years. We've seen every type of wood, every condition, and every problem you can imagine. We know how to handle century-old floors in historic homes and brand-new installs that need their first refinish. We use dust-containment systems, premium finishes, and proven techniques that deliver results built to last.
Refinishing hardwood floors isn't just labor—it's skill, experience, and precision. Don't trust your floors to just any workman. Trust them to someone who knows what they're doing.
Ready to refinish your floors the right way? Contact Cyclone Hardwood Floors for a free estimate. We do it right the first time—guaranteed.

White Risers vs. Matching Treads: Which Looks Better and What's the Real Maintenance?
When tackling a staircase renovation, the risers—the vertical boards between each step—often spark the biggest debate: do you match them to the tread, or do you go with the timeless, bright contrast of white? This decision fundamentally changes the entire feel of your entryway, moving the design from classic colonial to sleek modern.
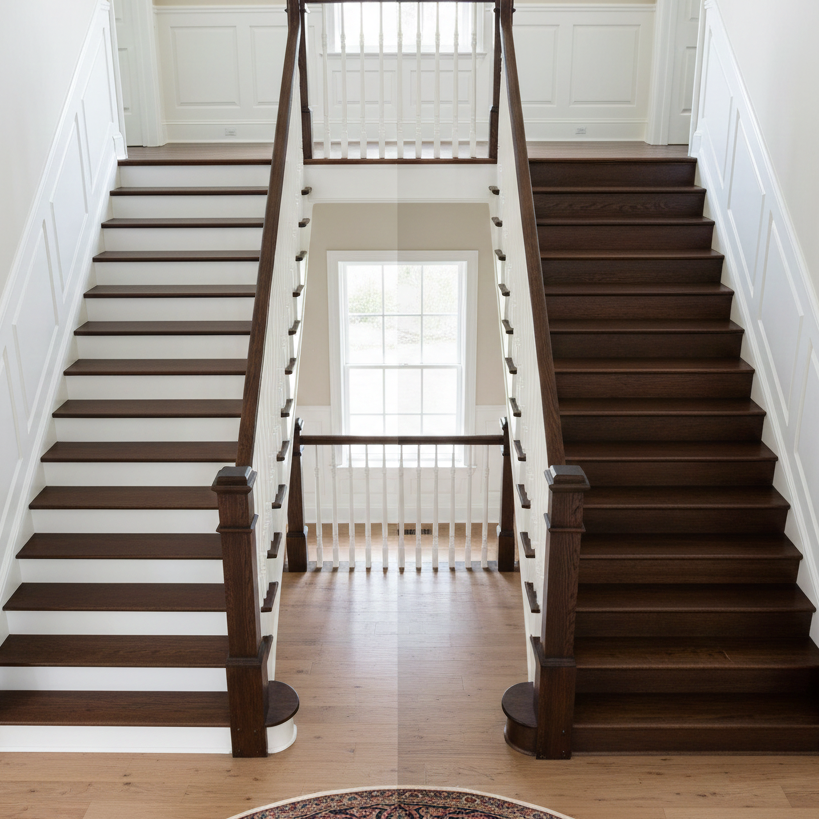
After 20+ years installing and refinishing stairs in PA and NJ, we’ve done both: stairs where everything matches (treads, risers, all stained the same), and stairs with stained treads and painted white risers.
The white riser look is everywhere right now. Open any home design magazine or scroll Instagram, and you'll see it—dark or natural wood treads with crisp white risers. It's clean, modern, and makes staircases look more expensive.
But people always ask: "Does the white get dirty? Is it hard to maintain?"
Fair questions. Let's talk about what actually happens with painted white risers versus matching wood, and what the maintenance really looks like based on what I've seen in hundreds of homes.
Why People Choose White Risers
Before we get into maintenance, let's talk about why this look is so popular.
Visual contrast
White risers against darker wood treads create a strong visual line. Each step is clearly defined, which actually makes stairs easier to navigate (especially for older adults or anyone with vision issues).
The contrast also makes the staircase a design feature instead of just a functional thing you walk on. It draws the eye and adds architectural interest.
Makes stairs look lighter and more open
If you've got a dark, enclosed staircase, painting the risers white brightens the whole space. It reflects light instead of absorbing it.
This is especially helpful in older homes with narrow staircases or limited natural light. White risers make the space feel less closed-in.
Modern aesthetic
All-wood matching stairs can look traditional or dated, depending on the style of your home. White risers give a more contemporary, transitional look that works with most decor styles.
Easier to match than wood stain
If you're replacing treads but keeping the structure, it can be tough to match the stain on old risers perfectly. Painting them white solves that problem—everything looks intentional instead of "we tried to match but it's slightly off."
Why People Stick With Matching Wood
Not everyone wants white risers. Here's why some people prefer everything stained to match:
Consistent, cohesive look
Some people just prefer the unified appearance of wood on wood. It feels more traditional, warmer, and blends into the home rather than standing out as a feature.
Perceived lower maintenance
The assumption is that white paint shows dirt and scuffs more than stained wood. We'll get into whether that's actually true in a minute.
Personal preference
Some people just don't like the look of white risers. That's fine. It's your house.
The Real Maintenance Difference: White Risers vs. Stained Risers
Alright, here's what actually happens after you've lived with these stairs for a few years.
White Risers
What shows up:
Scuff marks from shoes - This is the big one. Every time someone's shoe hits the riser (which happens constantly), it can leave a black or gray scuff mark
Dirt streaks - If people walk on stairs with dirty shoes, you'll see faint streaks or smudges
Hand oils/fingerprints - If people touch the risers (grabbing for balance, kids running their hands along), you'll see marks
How noticeable is it? Depends on your paint choice and your household.
High-gloss or semi-gloss white paint shows every scuff and smudge immediately. It's like a magnet for visible dirt.
Matte or eggshell white paint hides imperfections way better. Scuffs blend in more, and the finish doesn't highlight every fingerprint.
How often do you need to clean it? In a typical household, you'll probably wipe down white risers every 1-2 weeks if you want them to stay crisp and clean.
If you're not bothered by a few scuff marks, you can go a month or more between cleanings.
How do you clean it? Easy. Damp cloth with a little mild soap. Scuffs come off with minimal effort. You're not scrubbing for an hour—it's a 5-minute job for a full staircase.
Magic erasers work great on scuff marks, but don't overuse them because they're mildly abrasive and can dull the paint over time.
Do you need to repaint often? Not really. If you used quality paint and proper prep, white risers can go 5-7 years before needing a fresh coat.
High-traffic households with kids and pets might need to touch up more often—maybe a fresh coat every 3-4 years. But that's just maintenance painting, not a huge project.
Stained/Matching Risers
What shows up:
Dust and dirt - Just like any wood surface, risers collect dust. On dark stain, dust shows up as a light film
Scuffs - Yes, stained risers get scuffed too. The scuffs are just less visually obvious because they're usually darker marks on darker wood
Wear on the finish - Over time, the polyurethane finish can wear down in high-contact areas, making those spots look duller than the rest
How noticeable is it? Stained risers hide dirt better than white paint. Scuff marks blend in. You can go longer without cleaning and the stairs still look decent.
But here's the thing: "hides dirt better" doesn't mean "cleaner." The dirt is still there. You just don't see it as easily.
How often do you need to clean it? You can get away with vacuuming/dusting every couple weeks and wiping down monthly. Stained wood is more forgiving of neglect.
How do you clean it? Vacuum or dust, then damp mop with a wood floor cleaner. Pretty straightforward.
Do you need to refinish often? Not often, but eventually. If the risers are getting foot traffic or hand contact, the finish will wear down over time. Expect to refinish stairs (treads and risers together) every 10-15 years depending on use.
So Which Is Actually More Maintenance?
White risers require more frequent light cleaning (quick wipe-downs every week or two).
Stained risers require less frequent cleaning but eventually need refinishing (a bigger project every 10-15 years).
If you're someone who likes things to look spotless all the time, white risers might drive you crazy because every scuff is visible.
If you're someone who doesn't want to think about your stairs, stained risers are lower-maintenance day-to-day.
But neither option is objectively "high maintenance." It's just different maintenance.
What About Durability?
Painted risers: Paint is tough, especially if you use floor-grade or cabinet-grade paint. It holds up well to normal wear.
The finish matters. Semi-gloss or satin paint is more durable than flat. But even flat paint, if it's quality paint, can last years with just occasional touch-ups.
Stained risers with polyurethane: Polyurethane is extremely durable. It's designed for floors, which take way more abuse than risers.
But polyurethane can wear down where it gets constant contact. If people are always touching the same spot, or if shoes frequently kick the same area, the finish will eventually dull or wear through.
Bottom line: Both hold up fine. This isn't a durability issue. It's a visibility issue—paint shows imperfections more obviously, but that doesn't mean it's less durable.
What Finish Should You Use for White Risers?
If you're going with painted white risers, the paint finish matters a lot.
Flat/Matte:
Hides imperfections best
Scuffs and marks blend in
But: harder to clean (paint can absorb dirt)
Best for low-traffic stairs or if you're not obsessive about spotlessness
Eggshell:
Good middle ground
Hides imperfections reasonably well
Easier to wipe clean than flat
This is what I usually recommend for most homes
Satin/Semi-gloss:
Very easy to clean
Durable finish
But: shows every scuff, smudge, and imperfection
Best if you're committed to frequent cleaning
High-gloss:
Super easy to wipe clean
Extremely durable
But: shows EVERYTHING
Only recommend if you love the shiny look and don't mind constant maintenance
My take: Go with eggshell or satin. You get durability and cleanability without highlighting every tiny mark.
Does It Matter If You Have Kids or Pets?
Kids: Kids are rough on stairs. Dirty shoes, sticky hands, running up and down constantly.
White risers with kids = you'll be wiping them down weekly, maybe twice a week if your kids are especially messy.
Stained risers with kids = you can ignore them longer, but the dirt is still accumulating.
If you have young kids and you're already cleaning constantly, white risers aren't going to add much to your workload. If you're barely keeping up with housework, stained risers might save your sanity.
Pets: Dogs and cats don't really affect risers much unless they're going up and down constantly. Bigger issue is treads (where paws land).
If your dog has dirty paws and runs upstairs, yeah, you'll see marks on white risers. But you'd see them on white walls and furniture too. It's not specific to risers.
Can You Touch Up White Risers, or Do You Have to Repaint Everything?
You can touch up, but it's tricky.
If you've got a small scuff or chip, you can dab on a little matching paint. But even with the exact same paint, touch-ups often show because the surrounding paint has aged slightly (yellowing, subtle color shift, accumulated dirt).
For best results: Every 3-5 years, repaint all the risers with a fresh coat. It's not a huge job—risers are vertical surfaces, so no sanding or floor prep. Just clean, prime if needed, and paint. A full staircase takes a few hours.
If you're handy, you can do this yourself. If not, it's a quick job for a painter.
Our Take After Installing Both for 20+ Years
I've installed stairs both ways hundreds of times. Here's what I tell people:
Go with white risers if:
You want a modern, high-contrast look
Your home has good natural light (white risers enhance brightness)
You're okay with wiping down stairs every week or two
You like things to look crisp and clean
Go with matching stained risers if:
You prefer a traditional or cohesive wood look
You want lower day-to-day maintenance
Your home style is more classic/rustic
You don't want stairs to be a visual focal point
Either way, the maintenance difference is overstated.
White risers aren't some nightmare that requires constant work. They just show dirt more obviously, so you clean them more often. But the cleaning itself is easy.
Stained risers hide dirt better, but that doesn't mean they're cleaner—it just means you notice less.
Pick based on the look you want, not on fear of maintenance. Both are totally manageable.
What We Do When We Install Stairs
When we're installing or refinishing stairs, here's how we handle risers:
For white risers:
We use high-quality floor-grade paint (not cheap wall paint)
Prime properly so the paint adheres and lasts
Apply 2-3 coats for durability
Recommend eggshell or satin finish for best balance
For stained risers:
Match the tread stain (or go with your custom color choice)
Apply the same polyurethane finish as the treads for consistency
Make sure everything is sealed properly so the finish lasts
Either way, you get stairs that look great and hold up.
The Bottom Line
White risers versus matching stained risers is mostly about aesthetics, not maintenance difficulty.
White risers:
Modern, high-contrast look
Show dirt and scuffs more
Easy to wipe clean
Repaint every 3-5 years
Stained risers:
Traditional, cohesive look
Hide dirt better (but dirt is still there)
Refinish every 10-15 years (along with treads)
Neither is "high maintenance." It's just different maintenance. Pick the look you want and commit to keeping it clean—either option will serve you fine.
Thinking about updating your stairs? Get in touch!
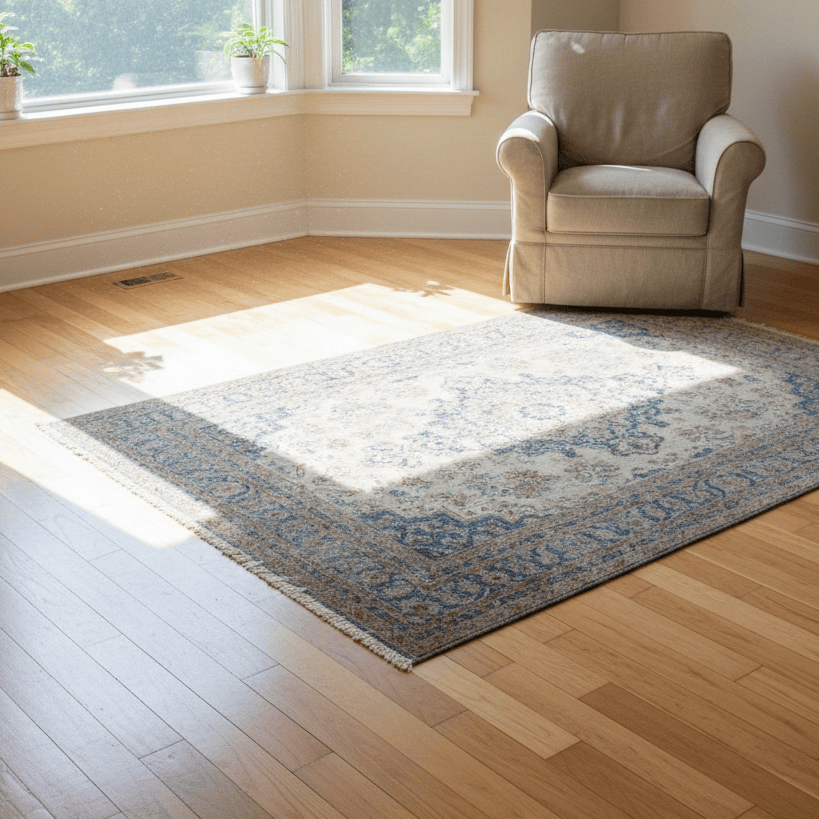
Why Direct Sunlight Fades Your Hardwood Floors (And What You Can Do About It)
After 20+ years refinishing floors, here's the science behind why sunlight fades hardwood—why some species darken, others lighten, and how to fix it.

After 20+ years installing and refinishing hardwood floors in PA and NJ, we’ved walked into a lot of homes where the problem is obvious the second you step inside: the floors near the windows are noticeably lighter (or sometimes darker) than the rest of the room.
"Is this normal?" homeowners ask.
Yeah, it's normal. It's also fixable. But first, let's talk about why it happens, because understanding the science makes it easier to prevent—and easier to know when refinishing is the right solution.
What Actually Causes Hardwood Floors to Fade
Sunlight doesn't just make your floors warm. It chemically changes the wood.
The science behind it:
Sunlight contains ultraviolet (UV) rays. When UV light hits wood, it breaks down lignin—the natural polymer that gives wood its color and helps bind the fibers together. As lignin degrades, the wood's color changes.
But here's the thing: sunlight doesn't affect all wood the same way.
Some species lighten. Some darken. Some barely change at all. And the type of finish on your floor also plays a role.
This isn't like a rug fading where everything just gets lighter. Wood is a natural material that reacts to UV exposure in complex ways, and the results depend on the species, the finish, and how much direct sun hits the floor.
Why Some Floors Lighten and Others Darken
Woods that typically LIGHTEN with sun exposure:
Red oak - Starts reddish-brown, fades to a lighter tan over time
Maple - Can go from cream to almost white in direct sun
Ash - Lightens significantly, especially if unstained
Woods that typically DARKEN with sun exposure:
White oak - Gets richer and more amber over time
Cherry - Starts light pinkish-brown, turns deep reddish-brown (this is dramatic and happens fast)
Walnut - Already dark, but can take on more golden tones
Brazilian cherry - Darkens significantly, going from orange-red to deep burgundy
Woods that are relatively stable:
Hickory - Changes slowly
Bamboo (technically grass, but used like hardwood) - More UV-resistant than most hardwoods
Why the difference?
It comes down to the chemical composition of each species. Woods with high tannin content (like cherry and walnut) tend to darken. Woods with lower tannin levels and lighter natural color (like maple and ash) tend to lighten as UV breaks down the lignin.
And just to make it more complicated: stained floors behave differently than natural floors.
How Stain Affects Fading
If your floors are stained, you're adding another layer of complexity.
Stain sits on top of (or penetrates into) the wood. It has its own pigments that react to UV light differently than the wood itself.
Dark stains (walnut, ebony, espresso) tend to fade faster than light stains. The darker pigments break down under UV exposure, and the floors can develop lighter patches in sunny areas.
Light stains and natural finishes show fading too, but it's often less noticeable because the change is more subtle.
The mismatch problem:
Let's say you have dark-stained red oak floors. In areas with heavy sun exposure, the stain fades and the red oak underneath starts to lighten. Now you've got a floor that's lighter in two ways—the stain is faded AND the wood is lighter. The contrast between sunny spots and shaded areas gets really obvious.
This is why you'll sometimes see dramatic "ghost" patterns on floors—outlines of where rugs used to be, or big rectangles where furniture blocked the sun for years.
How Polyurethane Finish Affects Fading
The finish on your floor (usually polyurethane or oil-based) also plays a role.
Oil-based polyurethane has a natural amber tint. Over time, this amber tone can darken slightly—and UV exposure accelerates that. So even if the wood underneath isn't changing much, the finish itself can turn more yellow or orange, especially in sunny areas.
Water-based polyurethane is clear and doesn't amber. It offers slightly better UV resistance than oil-based finishes, but it's not a magic solution. UV will still affect the wood underneath.
UV-resistant finishes exist (some commercial-grade polyurethanes have UV inhibitors added), but they're not commonly used in residential flooring. They slow down the process but don't stop it entirely.
Bottom line: no finish completely prevents fading. It's a matter of how fast it happens.
How Fast Does Fading Happen?
It depends on how much direct sunlight your floors get.
If you've got south- or west-facing windows with no window treatments, and the sun hits your floors for hours every day, you'll see noticeable fading in 6-12 months.
If you have east-facing windows with sheer curtains, or if furniture blocks most of the direct light, it might take 3-5 years before the fading becomes obvious.
Cherry is the fastest. I've seen cherry floors darken dramatically in just a few months in direct sun. It's actually kind of impressive how fast it happens.
Maple and ash are also quick to show change, especially lightening in high-UV areas.
Red oak and white oak are somewhere in the middle—you'll see change within a year or two in direct sun.
Can You Prevent Fading?
You can slow it down. You can't stop it entirely.
Here's what actually helps:
1. Window treatments Curtains, blinds, or UV-blocking window film reduce the amount of direct sunlight hitting your floors. This is the most effective prevention method.
You don't have to live in the dark. Sheer curtains or solar shades can block a lot of UV while still letting light in.
2. Rugs and furniture placement If you're going to use area rugs, move them occasionally. Otherwise, when you eventually move the rug, you'll have a perfect rectangle of unfaded floor that doesn't match the rest of the room.
Same with furniture. If a couch sits in the same spot for 10 years, the floor underneath will look different when you move it.
3. UV-blocking window film You can have UV-blocking film applied to your windows. It's clear, doesn't darken the room, and blocks a significant amount of UV. It's not cheap, but it works.
4. Accept that it's going to happen Honestly? Some fading is inevitable if you have windows and sunlight. Wood is a natural material. It changes over time. That's part of what makes it beautiful.
If you're the type of person who stresses about every little imperfection, hardwood might not be for you. But if you appreciate the character and evolution of natural materials, a little fading isn't the end of the world.
When Fading Becomes a Problem
So when does normal fading cross the line into "we need to fix this"?
You should consider refinishing if:
There's a dramatic color difference between sunny areas and shaded areas (more than a couple shades)
You've moved furniture or rugs and now have visible "ghosts" on the floor
The fading is uneven and patchy, making the room look messy
You're selling your house and the fading makes the floors look neglected
The finish itself is breaking down (not just faded, but worn through in spots)
If it's just subtle, gradual fading across the whole floor? You can probably live with it.
If you've got a light square where a rug used to be and dark borders around it? That's when refinishing makes sense.
How We Fix Faded Hardwood Floors
The good news: refinishing solves the fading problem completely. We're taking the floor back to bare wood and starting over.
The process:
1. Sand the floor down to bare wood We remove the old finish and the top layer of wood. This eliminates the faded areas and any discoloration from the finish itself.
2. Assess the wood color Once we're down to bare wood, we can see the true color. If the fading was just in the finish or stain, the wood underneath is usually pretty uniform. If the wood itself changed color from UV exposure, we can still even it out with stain.
3. Stain (if needed) If you had a stained floor before, we can match that stain—or you can choose a different color entirely.
If you had a natural (unstained) floor and the wood itself faded unevenly, we can apply a light stain to even out the color. Or we can go darker if you want to hide any remaining variation.
The key: we're not trying to "fix" the faded spots and leave everything else alone. We're refinishing the entire floor so it's all uniform again.
4. Apply fresh finish We put down new polyurethane. Whether you go oil-based or water-based, the fresh finish looks clean and consistent.
And yes, eventually this new finish will fade too. But you've just reset the clock. It'll be years before it becomes noticeable again—and when it does, you can refinish again.
Can You Match The Color Without Refinishing Everything?
People ask this all the time. "Can you just stain the faded spots to match the rest?"
No.
Here's why:
You can't apply stain over existing finish. It won't penetrate. And if you sand just the faded area to apply stain, you'll create a visible patch that looks different from the surrounding floor—different sheen, different texture, different everything.
Even if you could match the color perfectly (which is almost impossible), the patched area would stand out.
The only way to fix fading properly is to refinish the whole floor. Sand it all down, stain it all (if you're using stain), and finish it all at once. That's how you get a uniform result.
What If You Like The Patina?
Some people actually like the way their floors have aged. The subtle color variations, the way the sunlight has left its mark—it tells a story.
If that's you, great. You don't need to do anything.
But if you're selling your house, or if the fading has gotten to the point where it looks neglected rather than charming, refinishing is the way to fix it.
The Bottom Line
Sunlight fades hardwood floors. It's not a defect. It's physics.
UV light breaks down lignin in the wood, changing its color. Some species lighten, some darken, and the finish and stain add their own complications.
You can slow it down with window treatments and UV-blocking film, but you can't stop it entirely—not if you want to actually live in your house and enjoy natural light.
When the fading gets bad enough that it bothers you, refinishing resets everything. We sand down to bare wood, restain if needed, and apply fresh finish. The floor looks new again, and you've bought yourself another decade or more before it becomes an issue.
And then the cycle starts over. That's how it works with natural materials.
Got faded hardwood floors that need attention? Get in touch for a free estimate. We'll look at what you've got, explain your options, and give you an honest assessment.
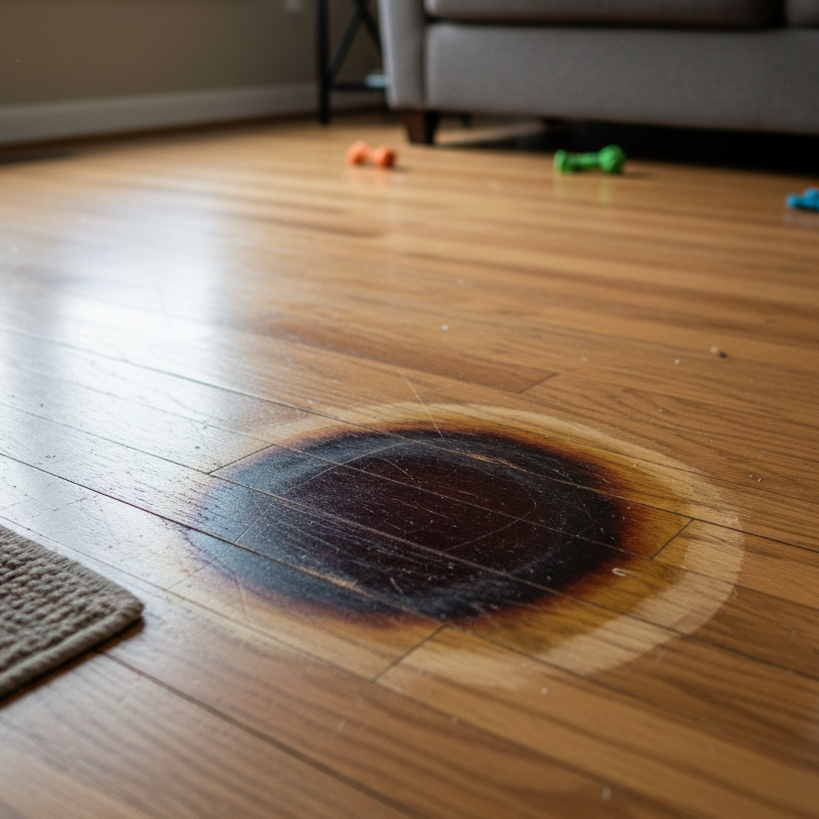
Why Some Stained Hardwood Boards Can't Be Sanded Out (And Need Replacement Instead)
Pet stains are a common problem, but when the discoloration and odor soak deep into your hardwood—often appearing black or "burned"—DIY solutions stop working. We understand that sanding alone rarely eliminates the problem; the urine and ammonia typically penetrate past the surface and into the wood's core.

After 20+ years of refinishing hardwood floors in PA and NJ, We've had a lot of conversations that go like this:
"Can you just sand out these dark stains?"
And we have to tell them: "No, those boards need to be replaced."
People don't want to hear it. I get it. Replacing boards costs more than just refinishing. But sometimes there's no other option, and pretending otherwise just wastes everyone's time and money.
Here's how to know when stains can be sanded out and when boards actually need to be replaced.
The Two Types of Stains That Go Too Deep
Most surface scratches, worn finishes, and light discoloration can be sanded away. We remove the top layer of wood, and the problem goes with it.
But two types of stains penetrate so deep into the wood that sanding won't touch them: moisture damage and pet urine stains.
Why Moisture Stains Can't Be Sanded Out
When water sits on hardwood for extended periods—from leaks, flooding, plant pots, or even high humidity—it doesn't just stain the surface. It soaks into the wood fibers.
What actually happens:
The water penetrates through the finish (if there is one) and into the wood itself. Once inside, it causes a chemical reaction with tannins in the wood, creating a dark gray or black stain. This stain goes all the way through the board, sometimes reaching the subfloor.
Why sanding doesn't work:
We can sand down 1/16" to 1/8" of wood during refinishing—that's the most you can safely remove without compromising the structural integrity of a 3/4" thick hardwood plank.
But moisture stains often penetrate 1/4" to 1/2" deep, sometimes through the entire thickness of the board.
Even if we sand as deep as we safely can, the stain is still visible. And if we try to sand deeper to reach it, we weaken the board to the point where it might crack or break under normal use.
What it looks like:
Moisture stains are usually dark gray or black. They often have irregular edges, following the grain of the wood. If the water damage was severe, you might also see:
Cupping (edges of boards higher than the center)
Warping (boards no longer flat)
Splitting or cracking
If you see cupping or warping along with the stain, the board is definitely compromised and needs replacement.
Why Pet Urine Stains Can't Be Sanded Out
Pet urine is one of the most frustrating problems we deal with in hardwood refinishing. It looks like a stain that should sand out. It doesn't.
What actually happens:
When a dog or cat urinates on hardwood, the liquid soaks through any gaps in the finish (or straight into the wood if the finish is already worn). Urine is acidic and contains ammonia. Both chemicals react with the wood, breaking down its structure and creating a dark stain.
Like moisture damage, this stain penetrates deep into the wood—often all the way through the board. But it's worse than water damage because the chemicals actively degrade the wood fibers.
Why sanding doesn't work:
Same issue as moisture stains: the damage goes deeper than we can safely sand. Even if we remove 1/8" of wood, the stain—and the smell—remain.
Yes, the smell. Even after sanding, pet urine odor can linger in the wood. Refinishing the surface doesn't eliminate what's soaked into the core of the board.
What it looks like:
Pet stains are usually dark brown or black. They're often concentrated around specific areas (near doors, in corners, under where a litter box or pet bed was). If the urine was there for a long time, you might see:
Multiple overlapping stains
Discoloration that spreads beyond the original spot
Wood that feels soft or spongy (the urine has broken down the fibers)
If the wood feels soft when you press on it, that board is structurally compromised and absolutely needs to be replaced.
What About Oxalic Acid or Bleaching Treatments?
Some contractors will try chemical treatments to lighten deep stains. Oxalic acid can sometimes reduce the appearance of tannin-based stains. Wood bleach can lighten some discoloration.
I've tried these methods. Sometimes they help a little. Most of the time, they don't work well enough to be worth the effort and cost.
Here's why:
The chemical only reaches as deep as you can apply it. If the stain goes through the entire board, surface treatment won't eliminate it. You might lighten it slightly, but it'll still be visible—and you've added time, cost, and potentially uneven color to the floor.
It rarely looks good. Even if you lighten the stain, the treated area often looks different from the surrounding wood. You've traded a dark stain for a lighter, blotchy area that still stands out.
It's a gamble. You won't know if it worked until after you've done the treatment, applied finish, and let everything cure. If it doesn't work, you've wasted days and still need to replace the boards anyway.
For small, shallow stains, chemical treatments might be worth trying. For deep moisture or pet damage, I don't recommend it. You're better off replacing the boards and being done with it.
How We Know If Boards Need Replacement
When we give an estimate, we inspect the floor carefully. Here's what we look for:
Moisture and pet stains:
How dark is the stain? (Darker usually means deeper)
Does it follow the grain or spread irregularly?
Is the wood around the stain cupped, warped, or soft?
Is there an odor? (Pet urine leaves a smell even if you can't see the stain)
Test sanding: Sometimes we'll sand a small test area to see how deep the stain goes. If it's still visible after removing 1/16" of wood, we know it's too deep.
Honest assessment: If boards need replacement, I tell you. I'm not going to refinish your floor, leave visible stains, and then say "Well, we tried." That's a waste of your money and my reputation.
What Replacing Boards Actually Involves
Replacing individual boards isn't as complicated as it sounds, but it does require skill.
The process:
Remove the damaged boards. We cut out the stained planks carefully without damaging adjacent boards.
Prepare the subfloor. Make sure the area underneath is clean, dry, and structurally sound.
Install new boards. We match the species and width of your existing floor. If your floor is older, we might need to source reclaimed wood to get a close match.
Blend the repair. After installation, we sand the entire floor (old and new boards together) to create a uniform surface. Then we stain and finish everything at once. When done right, you can't tell where the repair was made.
Cost consideration:
Replacing boards costs more than just refinishing, yes. But it's still way cheaper than replacing your entire floor.
If you've got 5-10 damaged boards in a 500 square foot room, we're talking about a few hundred dollars extra to replace those boards as part of the refinishing job. That's a lot less than living with ugly stains or tearing out the whole floor.
Can You Prevent This Kind of Damage?
For moisture damage:
Clean up spills immediately. Don't let water sit on hardwood.
Use mats under plant pots and check them regularly for leaks.
Address plumbing leaks right away—even small, slow leaks cause major damage over time.
Maintain proper humidity levels in your home (35-55%). Too much moisture in the air can cause problems even without direct water contact.
For pet stains:
If your pet has an accident, clean it up immediately. The longer urine sits, the deeper it penetrates.
Use enzyme-based cleaners designed for pet urine (not just regular cleaners). These break down the uric acid that causes staining and odor.
If your pet has repeated accidents in the same spot, address the behavioral issue before refinishing. Otherwise, you'll just damage the newly refinished floor.
Consider area rugs in high-risk spots (near doors, where pets sleep) to protect the floor.
The Bottom Line
Not all stains can be sanded out. Moisture damage and pet urine penetrate too deeply into the wood for surface sanding to fix.
If someone tells you they can "definitely sand out" deep black stains without seeing the floor in person, they're either inexperienced or not being honest with you.
A good contractor will assess the damage, tell you what's realistic, and give you a plan that actually solves the problem—even if that means replacing some boards.
Replacing boards isn't the answer you want to hear when you're hoping for a simple refinish. But it's better to do it right once than to waste money on a refinishing job that leaves you with visible stains and regret.
Got hardwood floors with deep stains or damage? Contact Us for an honest assessment. We'll tell you what can be sanded out and what needs replacement—no surprises, no BS.
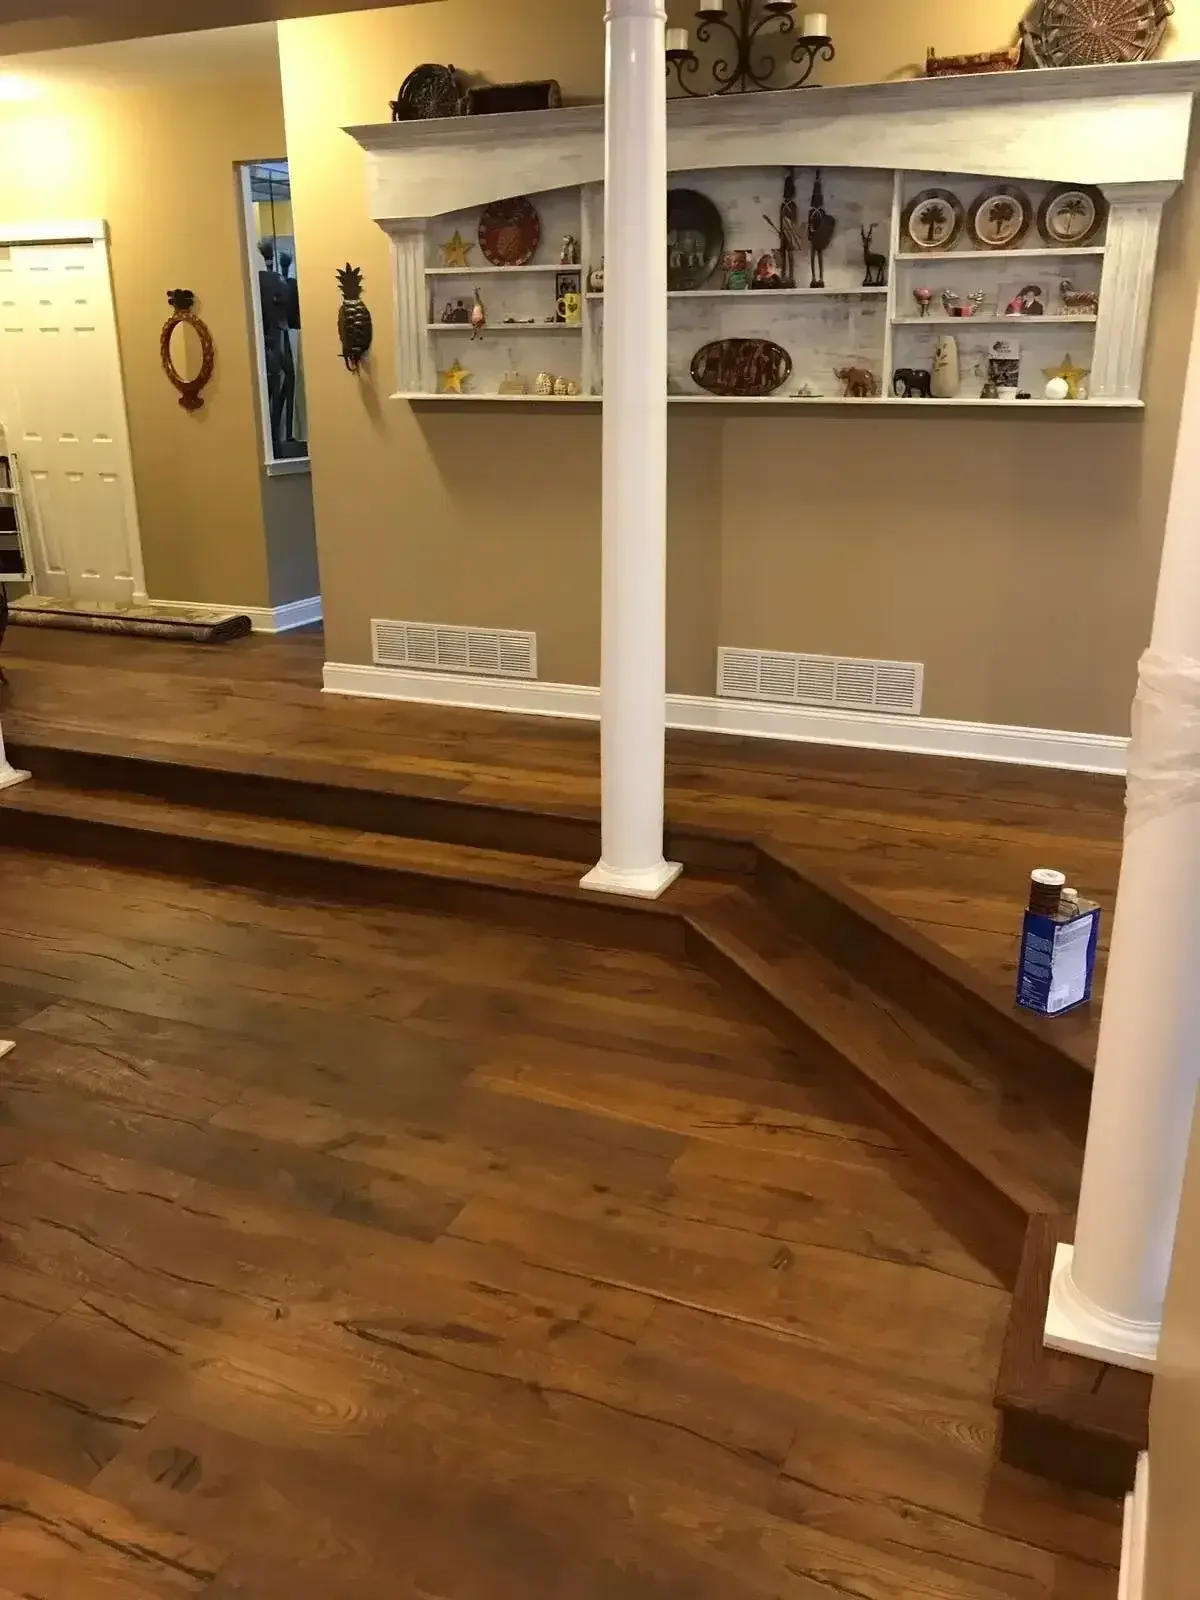
Why Hardwood Floors Are Better for Allergies Than Carpet
If you or a family member suffers from allergies, the type of flooring you choose is one of the most critical decisions you'll make for your home's air quality. While carpet is often seen as cozy, it is, unfortunately, a massive reservoir for allergens. This is why allergists and health experts consistently recommend hardwood flooring as the superior, allergy-friendly choice.
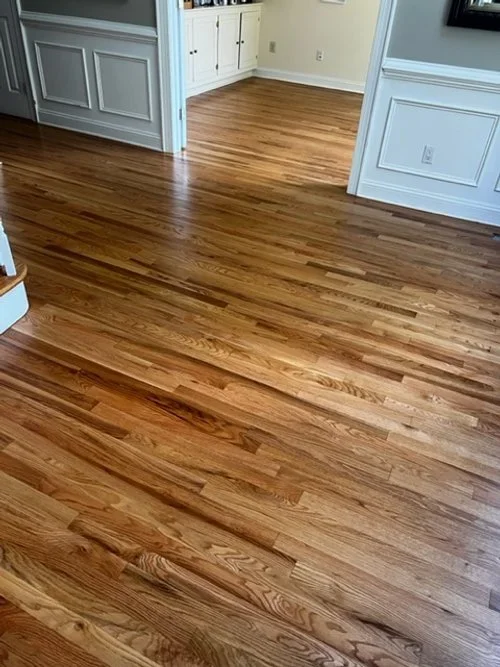
After 20+ years of installing and refinishing hardwood floors in PA and NJ, we've had a lot of conversations with homeowners about why they're ripping out their carpet. And one reason comes up more than almost anything else: allergies.
If you or someone in your house deals with allergies, asthma, or respiratory issues, your carpet might be making it worse. Here's what I've seen, based on hundreds of homes where we've pulled up old carpet and put down hardwood.
The Problem With Carpet and Allergies
Carpet is basically a giant filter sitting on your floor. And unlike the filter in your furnace that you change every few months, carpet just sits there collecting everything for years.
What gets trapped in carpet:
Dust mites (and their droppings, which are a major allergen)
Pet dander
Pollen tracked in from outside
Mold spores (especially if the carpet ever got wet)
Dust and dirt that settles deep into the fibers
You can vacuum all you want—and most people do—but vacuums only get surface-level stuff. The deeper particles stay trapped in the carpet padding and fibers. Over time, every step you take kicks some of that back up into the air you're breathing.
I've pulled up carpet that looked clean on the surface, and the amount of dust and debris underneath is shocking. Homeowners are always surprised. "We vacuumed regularly," they say. Yeah, but that doesn't get what's been accumulating for 10+ years.
Why Hardwood Floors Are Better
Hardwood doesn't trap allergens the same way carpet does. Dust, pollen, pet dander—it all sits on the surface where you can see it and clean it.
Here's what makes hardwood better for allergies:
1. Nothing hides in hardwood
There are no fibers for allergens to get trapped in. What lands on your floor stays on the surface. You can sweep it, vacuum it, or mop it away. It's gone.
With carpet, you're never really sure what's down there. With hardwood, you can see it, and you can remove it completely.
2. Dust mites hate hardwood
Dust mites need moisture and organic material to survive. Carpet provides both—fibers hold moisture, and dead skin cells (which we all shed constantly) get trapped in carpet and become food for dust mites.
Hardwood is a hostile environment for dust mites. It doesn't hold moisture the way carpet does, and there's nowhere for them to burrow and breed. They just don't thrive on hard surfaces.
If you're allergic to dust mites (and a lot of people are, even if they don't know it), getting rid of carpet is one of the best things you can do.
3. Pet dander doesn't accumulate
If you have pets, you know their hair and dander get everywhere. On carpet, that dander works its way deep into the fibers and stays there. Even after the pet is gone—if you rehome an animal or it passes away—the dander can remain in the carpet for years.
On hardwood, pet dander sits on the surface. You can sweep or vacuum it up daily. It doesn't build up the same way, and it doesn't linger after the pet is no longer in the house.
4. No mold or mildew issues
Carpet in basements, bathrooms, or anywhere that gets damp can develop mold and mildew. Even if you can't see it, the spores are there, and they get kicked into the air every time someone walks across the room.
Hardwood doesn't support mold growth the way carpet does. As long as you address any moisture issues in your home (which you should do regardless of flooring type), hardwood won't become a breeding ground for mold.
5. Easier to actually clean
Vacuuming carpet is maintenance. You're managing the problem, not solving it.
Cleaning hardwood is straightforward. Sweep, vacuum with a hard-floor attachment, or damp mop. You're removing allergens completely, not just pushing them around.
And if you spill something or track in mud? On carpet, that's a stain you're scrubbing for 20 minutes and hoping it comes out. On hardwood, you wipe it up and you're done. No residue, no moisture trapped underneath, no problem.
What Homeowners Tell Me After Switching
I've done a lot of projects where the main motivation was allergies. Usually it's a parent with a kid who has asthma, or someone who's been dealing with year-round sinus issues and finally connects it to the carpet.
After we install or refinish their hardwood, they almost always tell me the same thing: "I can breathe better."
Sometimes it's immediate—they notice the difference within a few days. Sometimes it takes a few weeks as the trapped allergens from the old carpet fully clear out of the house. But the improvement is real.
One client told me her daughter's asthma attacks dropped by half after we pulled up the carpet in the bedrooms and refinished the hardwood underneath. Another said he stopped waking up congested every morning for the first time in years.
I'm not a doctor, and I can't promise hardwood will cure your allergies. But I can tell you that a lot of people see a noticeable improvement when they get rid of carpet, and the research backs that up.
What About Area Rugs?
People ask this all the time: "If I get hardwood, can I still use area rugs?"
Yes, you can. And area rugs are way better than wall-to-wall carpet for allergies, for a few reasons:
1. You can take them outside and shake them out or beat them. Try doing that with carpet.
2. You can wash smaller rugs in a machine or take larger ones to be professionally cleaned more easily than cleaning an entire carpeted room.
3. You can remove them entirely if allergies flare up, or during high-pollen seasons.
Area rugs give you the comfort and warmth of carpet in specific spaces without turning your entire floor into an allergen trap.
What If You're Worried About Dust on Hardwood?
Some people worry that hardwood will show more dust than carpet, and that's true—you'll see it. But that's actually a good thing.
With carpet, the dust is there whether you see it or not. It's just hidden. With hardwood, you see it, which means you're reminded to clean it, and when you do clean it, it's actually gone.
If you're worried about constantly sweeping, here's what works:
Get a good microfiber dust mop and run it over high-traffic areas daily (takes two minutes)
Use a vacuum with a hard-floor setting a couple times a week
Damp mop as needed (not soaking wet, just lightly damp)
It's less work than vacuuming carpet, and it's more effective at actually removing allergens.
Hardwood Isn't Perfect for Everyone
I'm not going to tell you hardwood is the answer to every problem. There are a few things to consider:
Cost: Hardwood costs more upfront than carpet. If you're on a tight budget, it's a bigger investment. But it lasts longer and doesn't need replacing every 10 years like carpet does, so over time the cost evens out.
Comfort: Carpet is softer underfoot. Some people prefer the cushion, especially in bedrooms. If that matters to you, hardwood with area rugs is a good compromise.
Noise: Hardwood is louder than carpet. Footsteps echo more. If you live in a multi-story home or have downstairs neighbors, this can be an issue. Area rugs help, or you can add underlayment for sound dampening.
But if allergies are the main concern? Hardwood wins every time.
The Bottom Line
If you or someone in your household struggles with allergies, asthma, or respiratory issues, getting rid of carpet and switching to hardwood can make a real difference.
Hardwood doesn't trap dust, pollen, pet dander, or dust mites. It's easier to keep clean. And it doesn't harbor mold or mildew the way carpet can.
After two decades of doing this work, I've seen the difference it makes for people. It's not just about how the floors look—though that's a nice bonus. It's about being able to breathe easier in your own home.
If you're thinking about making the switch, we can help. We'll assess what you've got, talk through your options, and give you a straightforward quote. No pressure, just honest advice from people who've done this thousands of times.
Thinking about replacing carpet with hardwood? Contact us here for a free estimate. We serve PA and NJ, and we'd be happy to walk you through the process.
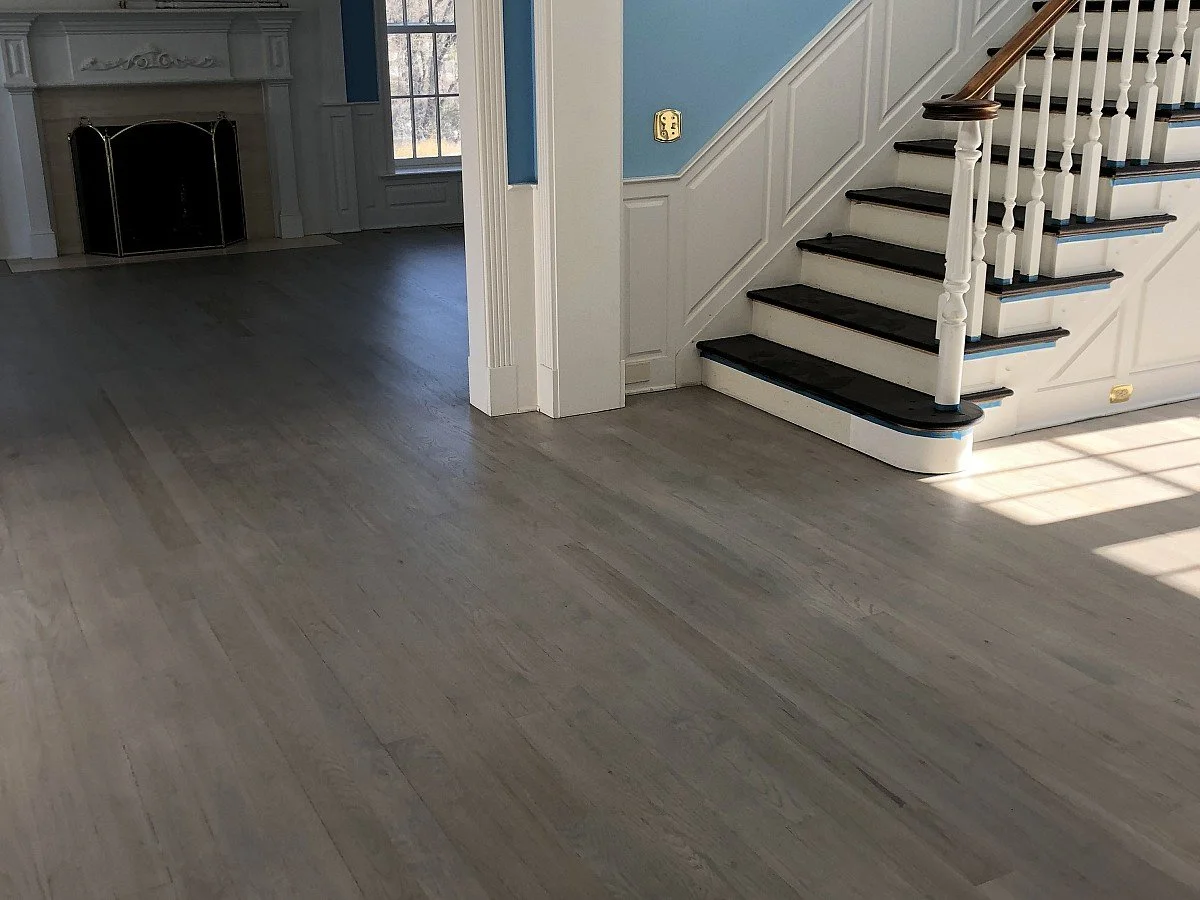
Why Your Staircase Must Match Your First-Floor Hardwood (And How to Get It Right in Bucks & Montgomery Counties)
The first thing visitors see in Wayne, Radnor, Newtown, and Doylestown homes is the entryway where first-floor hardwood meets the staircase. When these don't match, the space feels disjointed. Different wood species, grain direction, and vertical vs horizontal surfaces cause the same stain to produce different colors. Professional matching requires pre-stain conditioning, custom stain mixing, and coordinated finishing. After 20+ years refinishing Bucks and Montgomery County homes, we've perfected seamless staircase-to-floor transitions.

Walk into any home in Wayne, Radnor, Newtown, or Doylestown and the first thing you see is the entryway. Your eyes immediately register two surfaces: the first-floor hardwood and the staircase. When these don't match—when the stair treads are a different tone, the risers clash, or the handrail reads as a completely separate element—the entire space feels disjointed and amateurish.
This isn't about design pickiness. It's about visual coherence that determines whether your home reads as professionally finished or a DIY patchwork. After 20+ years refinishing hardwood throughout Bucks County and Montgomery County, we've seen countless homes where beautiful main-floor hardwood is undermined by staircases that don't match. The fix isn't complicated, but it requires understanding why matching fails in the first place.
The Entryway as Your Home's Visual Foundation
The entryway establishes the aesthetic standard for your entire home. In traditional colonials common throughout the Main Line, Newtown, and Yardley, the front door opens directly into a foyer with hardwood floors and a central staircase. In open-concept designs popular in newer Ambler, Warrington, and Conshohocken construction, the staircase is often visible from the living room and kitchen.
Either way, the staircase and main floor function as a unified visual plane. The floor is the horizontal surface, the stairs are the vertical extension. When both share the same wood species, stain color, and finish sheen, they create seamless flow. Your eye reads the space as intentional and complete.
When they don't match, the disconnect is immediate. A natural oak floor paired with dark walnut stair treads feels like two different projects cobbled together. White painted risers against honey-toned oak floors can work (we'll get to that), but only when executed with precision. Random mismatches—slightly different stain tones, varying sheen levels, or contrasting wood grains—just look like mistakes.
Why Floors and Stairs Don't Match (Even When You Use the Same Stain)
Homeowners attempting DIY staircase refinishing or hiring separate contractors for floors and stairs often discover a frustrating reality: the "same" stain produces completely different colors on different surfaces. Here's why:
Different Wood Species in Different Components
Your first-floor hardwood is typically one uniform species throughout—red oak, white oak, maple, or hickory. Your staircase, however, is built from multiple materials serving different structural and aesthetic functions:
Stair treads (the horizontal surface you step on) are usually solid hardwood—often oak, but sometimes maple or a different species depending on the home's age and original construction quality.
Risers (the vertical panels between treads) are frequently a different material entirely. In older homes built before 1980, risers might be solid wood matching the treads. In newer construction and many renovations, risers are often poplar, pine, or even plywood—cheaper materials that were originally intended to be painted, not stained.
Stringers (the diagonal supports on the sides) can be yet another wood type, often hidden behind walls or drywall in closed-staircase designs but visible in open staircases.
Handrails and balusters are typically hardwoods chosen for strength and grain appeal—oak, maple, or exotic species like Brazilian cherry—but rarely the exact same grade and cut as your floor planks.
When you apply the same stain to this mix of materials, each absorbs pigment differently based on density, grain structure, and moisture content. The result is a patchwork of tones that don't match each other, let alone your floor.
Grain Direction and Light Reflection
Hardwood floors are sanded with the grain running horizontally. Stair treads have grain running front-to-back (perpendicular to the edge you see). This difference in grain direction affects how light reflects off the surface and how stain settles into the wood.
Even if you're using the exact same species and stain on both surfaces, the grain orientation creates subtle color variations. Under natural light from windows or artificial light from fixtures, floors and stairs can read as noticeably different tones despite being "the same" color on paper.
Vertical vs. Horizontal Surfaces React to Stain Differently
Stain applied to a horizontal surface (your floor) has time to penetrate evenly before excess is wiped away. Gravity keeps the stain in place during the critical first minutes of absorption.
Stain applied to vertical surfaces (stair risers) wants to run and drip immediately. This creates uneven saturation—more stain accumulates at the bottom edge, less at the top. Even with careful technique, achieving uniform color on vertical surfaces requires different application methods and timing than horizontal floors.
Professionals account for this by using conditioners, adjusting stain viscosity, and working in smaller sections with precise wiping schedules. DIYers and contractors who don't specialize in staircases often end up with blotchy, streaky risers that don't match the beautiful even tone they achieved on the floor.
Age and Wear Create Different Starting Points
If you're refinishing existing hardwood rather than installing new, your floor and stairs likely have different wear patterns and existing finish buildup. Floors see foot traffic across their entire surface. Stairs see concentrated wear on the front edge of each tread (the nosing) where feet land with every step.
This means when you sand stairs, the front edges have less material to remove (they've been worn thinner over decades) while the back portions and risers might have thicker original finish. Uneven sanding depth creates uneven stain absorption, even if everything else is identical.
The Professional Approach: How to Guarantee a Match
At Cyclone Hardwood Floors, we treat entryway projects—first-floor hardwood plus staircase—as a single unified job, not two separate tasks. Here's our process for achieving seamless color continuity throughout Bucks County and Montgomery County homes:
Pre-Stain Conditioning for Uniform Absorption
Before stain touches wood, we apply a professional-grade pre-stain wood conditioner to all staircase surfaces. This product partially seals the wood's pores, slowing stain absorption and creating a more uniform base across different wood densities.
Conditioner is particularly critical for:
Mixed-species staircases where treads and risers are different woods
Softwood risers (pine, poplar) that absorb stain much faster than hardwood treads
Older staircases with uneven wear patterns
We allow conditioner to penetrate for the manufacturer-specified time (usually 15-30 minutes), then apply stain while the wood is still slightly damp from conditioning. This prevents the blotchiness and color variation that plague unconditioned multi-species staircases.
Custom Stain Mixing and On-Site Testing
We never rely on off-the-shelf stain colors to match across different surfaces. Instead, we custom-mix stains in small batches, adjusting pigment concentration and carrier ratios to account for the specific woods in your home.
Before committing to the entire project, we perform test patches on inconspicuous areas:
Underside of a stair tread
Back corner of the main floor (under where furniture will sit)
A scrap piece of the actual riser material
We evaluate these tests under your home's natural light at different times of day—morning sun through east windows looks different than afternoon light from west-facing rooms. Only when the test patches match perfectly across all surfaces do we proceed with the full application.
This testing phase adds time to the project but eliminates the heartbreak of finishing everything only to discover the stairs are two shades darker than the floor.
Sanding Technique for Staircases vs. Floors
Floors are sanded with large drum or orbital sanders that remove material quickly and evenly. Stairs require different equipment and technique:
Tread nosings (front edges) are sanded with detail sanders or by hand to avoid over-sanding thin edges that have already lost material to decades of wear.
Flat tread surfaces can handle slightly more aggressive sanding but still require care near the riser transition where wood thickness changes.
Risers are sanded lightly with fine-grit paper—the goal is removing old finish without removing significant wood, since most risers are thin material that can't handle heavy sanding.
Corners and crevices where treads meet risers or stringers require hand-sanding with sanding blocks to reach areas machines can't access.
Our crews have the experience to sand stairs properly—removing enough material to eliminate old finish and imperfections without creating thin spots that will absorb stain unevenly or telegraph through the final finish.
Dust Containment is Critical for Stairs
Sanding staircases generates massive amounts of fine dust that settles into every crevice, corner, and vertical surface. If this dust isn't captured during sanding, it contaminates the stain and finish, creating rough texture and dull appearance.
We use commercial-grade dust containment systems connected directly to our sanders. These capture 99%+ of sanding dust at the source, preventing it from circulating through your home and settling on freshly prepared surfaces.
For the remaining fine dust that escapes, we vacuum every surface with HEPA-filtered shop vacs and wipe down stairs with tack cloths immediately before staining. This level of cleanliness is non-negotiable for achieving glass-smooth finishes that match between floors and stairs.
Finish Application for Vertical Surfaces
Polyurethane finish applied to floors can be brushed or rolled with relative ease—gravity helps it level out before curing. Vertical stair risers require different technique to avoid runs, drips, and uneven film thickness.
We use:
Thinner finish coats on risers to reduce run potential
Faster-drying formulations on vertical surfaces where needed
Careful brush technique that applies finish evenly without overloading the surface
For homes where we're using water-based polyurethane (which doesn't self-level as well as oil-based), we sometimes spray risers and handrails to achieve factory-smooth results without brush marks.
The goal is uniform sheen across all surfaces—floors, treads, risers, handrails—so the entire entryway reads as a cohesive finished product.
When Painted Risers Work (And When They Don't)
Not every staircase needs stained risers matching the treads and floor. Painted white risers with stained treads is a classic design choice popular in colonial and traditional homes throughout the Main Line, Newtown, Doylestown, and surrounding areas.
When white risers work:
Traditional architecture: Colonials, Federals, and Cape Cod styles in Wayne, Radnor, Haverford, and Bryn Mawr where white trim is a period-appropriate design element
Open staircases where white risers create visual lightness and don't close off the space
Homes with significant white trim on baseboards, door casings, and crown molding where white risers unify the palette
Contrast enhancement: Dark walnut or espresso treads paired with crisp white risers create dramatic visual impact
When white risers don't work:
Modern/contemporary homes where all-wood staircases align better with minimalist aesthetics
Rustic or farmhouse styles where painted surfaces feel too formal
Maintenance concerns: White risers show scuffs from shoes, pet scratches, and dirt more obviously than stained wood—fine for meticulous homeowners, frustrating for busy families
Inconsistent trim: If your home's trim is stained wood rather than painted white, white risers clash
If you choose white risers, they must be executed properly: multiple coats of high-quality paint, proper surface prep, and durable finish that won't chip with traffic. Half-hearted painted risers that show brush marks or thin coverage look worse than mismatched stain.
Common Mistakes That Prevent Matching
We've repaired countless staircases where previous contractors or DIYers attempted matching and failed. These are the recurring mistakes:
Using floor-grade stain on stairs without testing: Floor stain formulations are designed for horizontal application on uniform species. Applying them directly to mixed-wood staircases guarantees color variation.
Skipping wood conditioner: This is the #1 mistake. Unconditioned softwood risers absorb 2-3x more stain than hardwood treads, creating dramatic color differences even with identical stain.
Not accounting for lighting: Stairs perpendicular to windows receive different light angles than floors. What looks matched in the can looks different on the wall. Test under actual lighting conditions.
Refinishing floors and stairs separately: When different contractors handle each surface, coordination fails. Slight differences in stain brand, application technique, or number of finish coats create mismatches.
Over-sanding worn areas: Aggressive sanding on thin tread nosings creates depressions that absorb extra stain, appearing darker than the rest of the step. Proper technique preserves uniform thickness.
The ROI of Matching Your Staircase to Your Floor
Matching your staircase to your first-floor hardwood isn't just aesthetic—it's financial. When selling homes throughout Bucks County and Montgomery County, real estate agents know that cohesive, professionally finished entryways create strong first impressions that translate to faster sales and higher offers.
Mismatched or poorly finished staircases create the opposite effect. Buyers notice immediately, mentally categorize the home as "needs work," and either make lower offers or move on to the next property.
The cost difference between mismatched and properly matched floors and stairs is minimal—maybe $500-800 in additional labor for proper conditioning, testing, and coordination. But the value difference at sale time can be $5,000-10,000+ in negotiating power and reduced days on market.
Even if you're not selling soon, living with a professionally matched entryway improves daily quality of life. It's the space you see every time you come home, every time guests visit, every time you walk upstairs. Visual coherence matters.
Our Process for Bucks and Montgomery County Homes
Cyclone Hardwood Floors has refined our staircase and floor matching process over 20+ years working throughout Wayne, Radnor, Newtown, Doylestown, Ambler, Yardley, and surrounding communities. Here's what to expect:
Day 1: Assessment and Planning We evaluate your existing floors and staircase, identify wood species, discuss color preferences, and explain realistic outcomes based on your home's specific materials.
Day 2-3: Sanding and Prep We sand floors and stairs using appropriate equipment for each surface, apply wood conditioner where needed, and prepare all surfaces for staining.
Day 4: Staining We apply custom-mixed stain to test areas, verify color match under your lighting, then stain the entire project in a coordinated sequence that ensures uniform results.
Day 5-7: Finish Application Multiple coats of polyurethane (oil or water-based based on your preference) are applied with appropriate cure time between coats. We protect finished surfaces during this phase to prevent dust contamination.
Day 8: Final Inspection We conduct a walkthrough, address any touch-ups, and ensure you're completely satisfied with the color match and finish quality.
Timeline varies based on project size, but most single-staircase plus first-floor projects complete in 5-8 days.
Ready for a staircase and floor that actually match? Contact Cyclone Hardwood Floors for a free on-site assessment. We serve Bucks County, Montgomery County, and surrounding Pennsylvania communities with professional hardwood installation, refinishing, and staircase restoration.
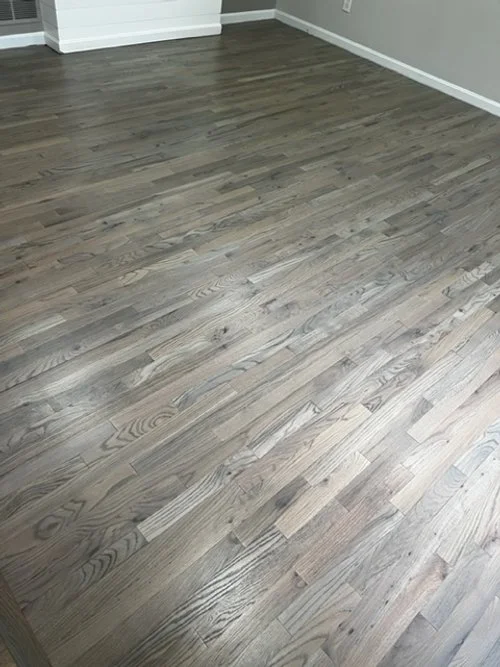
Why Gray Stains Look Better on White Oak Than Red Oak
Gray wood stains have exploded in popularity, and for contractors and designers, white oak is the non-negotiable choice for achieving a high-quality, authentic look. The key lies in the wood's composition: white oak contains significantly higher levels of tannins than red oak, which chemically react with the gray stain pigments to produce clean, crisp, and true gray tones without pulling unwanted red or pink hues. Furthermore, white oak's closed, tight grain structure absorbs the stain uniformly, resulting in a modern, even finish, whereas red oak's open grain can look busy and muddy the gray color. Therefore, specifying white oak for any custom gray finish is a technical guarantee for a premium, long-lasting aesthetic that homeowners demand.
After 20+ years of staining hardwood floors in PA and NJ, I can tell you one thing that homeowners get wrong more than anything else: they try to put gray stain on red oak and wonder why it looks terrible.
If you want gray floors—and a lot of people do right now—you need white oak. Not red oak. Here's why, based on what I've actually seen happen on hundreds of floors.
The Problem With Red Oak and Gray Stain
Red oak has a natural warm, pinkish undertone. It's built into the wood. When you put gray stain on top of that pink undertone, you don't get a clean gray. You get a muddy, purplish-gray that looks off.
I've had homeowners pick out a beautiful gray stain sample, we apply it to their red oak floors, and they're confused why it doesn't look the same. The sample was probably done on white oak or maple. Their floor is red oak. The underlying color changes everything.
You can fight it—layer darker stains, try different products—but you're always working against the natural color of the wood. It never looks quite right.
Why White Oak Takes Gray Stain Perfectly
White oak has a neutral, cooler undertone. It's more brown-gray naturally, without that warm pink cast. When you put gray stain on white oak, the gray actually shows up the way it's supposed to.
The stain goes on clean. It looks modern. It photographs well. It's what you see in design magazines and on Instagram when people show off their gray hardwood floors—that's almost always white oak.
Here's what I tell homeowners: If you want gray floors and you have red oak, you've got two options:
Pick a different stain color that works with red oak's warm tones (browns, darker tones, natural finishes)
Replace the red oak with white oak and then stain it gray
Option 2 is expensive. Most people go with option 1 once they understand the issue.
It's Not Just About Color—It's About Grain Pattern Too
White oak has a tighter, more consistent grain pattern than red oak. Red oak has a more pronounced, open grain that can look busy when you add gray stain to it. The strong grain pattern combined with the gray color can make the floor look dated—like you're trying to cover up old wood rather than enhance it.
White oak's subtler grain lets the gray stain sit on top without competing for attention. The floor looks intentional, not like you made the wrong choice at the paint store.
What About Mixing Stains to Fix Red Oak?
Some contractors will try to mix stains to neutralize red oak's pink tones before applying gray. I've done it. It works... sort of.
You can add green-toned or blue-toned stains to counteract the pink, then layer gray on top. But you're adding complexity, adding cost, and you're still not getting the clean gray look you'd get with white oak. It's a workaround, not a solution.
And here's the thing: most homeowners don't want to hear "we need to do a custom three-layer stain process" when they just wanted gray floors. They want it to look good and not be complicated.
When Homeowners Insist on Gray Over Red Oak Anyway
It happens. They've already got red oak floors. Replacing them with white oak costs $8-$15 per square foot installed. They don't want to spend $10,000+ to get the floor color they want.
So they ask: "Can we just try it?"
Yeah, we can try it. I'll do a test area first—usually a closet or a section that's not immediately visible—so they can see what it actually looks like before we commit to the whole house.
About 60% of the time, they see the test area and change their mind. They pick a different stain that works better with their red oak. About 30% of the time, they decide they're okay with the compromise—it's not perfect, but it's good enough. And about 10% of the time, they love it and we move forward.
But nobody—and I mean nobody—has ever been happier with gray on red oak than they would have been with gray on white oak. It's always a compromise.
If You're Buying New Hardwood and Want Gray Floors
If you're installing new hardwood and you know you want gray, buy white oak. Don't buy red oak thinking you'll stain it gray later. You're setting yourself up for disappointment.
White oak costs a bit more than red oak—usually $1-2 per square foot more in material costs—but it's worth it if gray is your goal. You'll get the look you actually want instead of settling for something close.
And if you're refinishing existing floors, check what species you have before you commit to gray. Pull up a floor vent or look in a closet. If it's red oak and you want that clean, modern gray look, you might want to reconsider your stain choice.
The Exception: Weathered Gray on Red Oak Can Work
There's one scenario where gray stain on red oak looks intentional: when you're going for a weathered, rustic, farmhouse look. The purple-ish undertones and busy grain pattern can actually work in your favor if you're trying to make the floor look aged and lived-in.
But if you want sleek, modern, clean gray? That's white oak territory.
Other Woods That Take Gray Stain Well
If you're shopping for flooring and want gray, here are woods that work:
Great for gray:
White oak (the best option)
Maple (very neutral, takes gray beautifully)
Hickory (harder wood, neutral tones)
Okay for gray with the right approach:
Ash (can work, but has pronounced grain)
Birch (neutral enough, but softer wood)
Don't bother with gray:
Red oak (we covered this)
Cherry (way too red/warm)
Brazilian cherry (even warmer than regular cherry)
What Contractors Won't Always Tell You
Some contractors will stain your red oak gray without pushing back because they don't want to lose the job. They'll do what you ask, collect payment, and move on. You're left with floors that don't look quite right, and you don't know why.
I'd rather have the conversation up front. Show you samples. Explain the limitations. Maybe lose a job occasionally because someone doesn't want to hear it. But the customers who listen end up happier, and they refer me to their friends because their floors actually look good.
The Bottom Line
If you want gray hardwood floors that look the way you're picturing them—clean, modern, neutral—you need white oak.
Red oak can be stained a lot of beautiful colors. Gray just isn't one of them, at least not without compromise.
After doing this for 20+ years and seeing the results on hundreds of floors, I can tell you: don't fight the wood. Work with what you have, or choose the right species for the look you want.
Your floors will thank you, and you won't be stuck living with a color that's not quite right.
Thinking about refinishing your floors or installing new hardwood? Give us a call at [YOUR PHONE] or [contact us here] for a free estimate. We'll look at what you have, talk through your options honestly, and help you get floors that actually look the way you want them to.
Cyclone Hardwood Floors, LLC
Serving PA and NJ for over 20 years
Licensed • Insured • Real advice from people who've done this thousands of times

Why Refinishing Your Hidden Hardwood Floors Saves You Thousands Over New Installation
Thinking about installing new hardwood floors? Wait. If your Philly-area home was built before 1970, there's probably beautiful hardwood hiding under that carpet right now. Refinishing it could save you $5,000-$10,000 compared to new installation. Here's how to find out what you've got and why it matters in today's economy.

If you've got carpet in your Philly-area home and you're thinking about upgrading to hardwood, I've got news that might save you some serious money: there's probably perfectly good hardwood hiding underneath that carpet right now.
After 20+ years of doing this work all over the Philadelphia metro area, I can tell you that most homes built before 1970—and a lot built even later—have original hardwood floors under that carpet. And nine times out of ten, those floors can be brought back to life for a fraction of what new installation would cost.
Let me break down the real numbers so you can make a smart decision.
The Cost Difference: Refinishing vs. New Installation
Refinishing existing hardwood floors:
Average cost: $3–$5 per square foot
For a typical 1,000 sq ft home: $3,000–$5,000
Timeline: 3–5 days
Installing new hardwood floors:
Average cost: $8–$15 per square foot (material + labor)
For a typical 1,000 sq ft home: $8,000–$15,000
Timeline: 5–7 days (plus additional time if removing old flooring)
Bottom line: You're looking at saving $5,000 to $10,000 by refinishing what's already there.
In today's economy, that's not pocket change. That's a kitchen remodel, a vacation, or a serious chunk toward your mortgage.
What's Actually Under That Carpet?
Here in the Philly area, older homes typically have one of these under the carpet:
Red oak (most common in homes from the 1920s–1970s)
White oak (less common, but beautiful)
Maple (usually in kitchens or higher-end homes)
Heart pine (older rowhomes and Victorian homes)
Mixed hardwoods (sometimes you'll find different species in different rooms)
These are solid hardwood planks—usually 3/4 inch thick—that were built to last generations. They're not particleboard. They're not laminate. They're the real deal, and they've been sitting under your carpet for decades just waiting to be brought back.
"But Are They in Good Enough Shape?"
This is the question everyone asks, and it's a fair one. The truth is, you won't know for sure until you pull back a corner of the carpet and take a look. But here's what I've learned from hundreds of these jobs:
Good signs:
The home was built before 1970
You can feel solid planks (not subfloor) when you press down on the carpet
There are hardwood floors in other parts of the house
The carpet was glued down with tack strips (not fully glued)
Concerns (but usually fixable):
Stains from old pet accidents (we can sand these out in most cases)
Deep scratches or gouges (can often be repaired or blended)
A few damaged boards (we can replace individual planks)
Color variations (this adds character—people pay extra for this look now)
Deal-breakers (rare, but it happens):
Severe water damage with warping or cupping throughout
Subfloor issues (not actually hardwood under there)
Floors that have been refinished so many times there's not enough wood left to sand
Even with some damage, refinishing is still usually cheaper than new installation. We can replace damaged sections, patch problem areas, and still come in under the cost of tearing everything out and starting from scratch.
What the Refinishing Process Actually Looks Like
A lot of people are hesitant because they think refinishing is going to be a disaster zone. Let me walk you through what actually happens:
Day 1: Carpet removal and assessment
We pull up the carpet and padding
Inspect the floors for damage
Remove old tack strips and staples
Give you an honest assessment of what we're working with
Days 2–3: Sanding
We use dust-controlled sanding equipment (not the disaster you're imagining)
Sand down to bare wood in multiple passes
This removes scratches, stains, old finish, and decades of wear
Day 4: Staining (optional)
If you want to change the color, we apply stain
You can go darker, add gray tones, or keep it natural
This is your chance to customize the look
Day 5: Finishing
We apply polyurethane or oil-based finish
Usually 2–3 coats for durability
Let it cure for 24–48 hours
Total disruption: Less than a week, and you can typically stay in your home. We work in sections, contain the dust, and clean up at the end of each day.
Why This Matters Even More Right Now
Look, we’re not going to pretend we don't have a dog in this fight—we do hardwood floors for a living. But we’re also not going to sell you something you don't need.
With the cost of everything going up—lumber, materials, labor—installing new hardwood has gotten expensive. Really expensive. And if you've already got perfectly good hardwood sitting under your carpet, paying double or triple to rip it out and install new floors doesn't make financial sense.
We’ve had clients who were about to drop $12,000 on new floors, pulled back the carpet, and ended up spending $4,000 to refinish what was already there. Same beautiful result. $8,000 still in their pocket.
That's the kind of money that actually matters to people.
What About Resale Value?
If you're thinking about selling, here's what we can tell you from working with real estate agents all over the Philly metro area:
Hardwood floors—whether refinished or new—sell homes.
Buyers don't ask "are these original floors or new floors?" They see beautiful hardwood and they're happy. In fact, a lot of buyers actually prefer the character of older, refinished hardwood over the more uniform look of new installation.
What buyers DON'T want to see? Worn-out carpet. Dated carpet. Carpet that smells like the previous owner's pets.
Whether you refinish your existing floors or install new ones, you're adding value. But refinishing gets you 90% of the benefit at 40% of the cost.
How to Find Out What You've Got
If you're curious about what's under your carpet, here's what to do:
Pull back a corner in a closet or inconspicuous area
Take a photo and text it to us or bring it when you call for an estimate
We'll come take a look and give you an honest assessment—no charge
We’re not going to tell you to refinish if the floors are shot. And we’re not going to tell you to install new floors if what you've got is perfectly good. I'll just tell you what's actually there and what your options are.
The Bottom Line
If your home was built before 1970 and you've got carpet covering your floors, there's a good chance you're sitting on a goldmine. Refinishing those floors instead of installing new ones could save you anywhere from $5,000 to $10,000.
In today's economy, that's a decision worth investigating.
Want to see what you're working with? Give us a call and we'll come take a look. No pressure, no sales pitch—just an honest evaluation of what's under that carpet and what it would take to bring it back to life.
Because sometimes the best investment is the one you've already made.
Ready to find out what's hiding under your carpet? Get in touch for a no-obligation estimate!

Why Hardwood Floors Buckle: A Local Contractor's Guide for Mainline and Bucks County Homeowners
After 20+ years refinishing floors across Bucks and Montgomery Counties, here's what causes buckling—and how Mainline homeowners can prevent costly damage.

By the team at Cyclone Hardwood Floors, LLC
After 20+ years of working on hardwood floors across Montgomery and Bucks Counties, I've seen just about every flooring problem you can imagine. But one of the most frustrating issues homeowners call us about? Buckling hardwood floors.
Just last month, I was in a beautiful colonial in Bryn Mawr where the oak floors in the kitchen had buckled so badly you could actually see the boards lifting off the subfloor. The week before that, we got an emergency call from a homeowner in Newtown whose entire first floor looked like a wave pool after their water heater leaked. And don't even get me started on what happens to floors in Wayne and Radnor basements when sump pumps fail during our spring storms.
Here's the thing about buckling floors: they don't happen overnight, and they're almost always preventable if you know what to look for.
What Exactly Is Floor Buckling?
Let me explain this the way I explain it to customers: imagine your hardwood floor is made up of thousands of individual pieces of wood that need to breathe. When those boards absorb too much moisture too quickly, they swell. Since they're nailed or glued down and can't expand outward, they have nowhere to go but up. That's buckling.
It's different from cupping (where boards curl at the edges) or crowning (where the middle of boards rise up). Buckling is the most severe form of moisture damage—we're talking about boards actually detaching from the subfloor and creating peaks or waves across your floor.
The Real Culprits Behind Buckled Floors
1. Water Damage and Flooding
This is the big one. I've responded to water damage calls in Doylestown, Ardmore, and Gladwyne where everything from burst pipes to dishwasher leaks caused floors to buckle within 24-48 hours.
Here's what happens: when water sits on or under your hardwood floor, the wood soaks it up like a sponge. In homes throughout Blue Bell and Ambler, I've seen finished basements flood during heavy rains, and by the time the homeowner realizes what's happening, the floors are already compromised.
The worst case I ever saw was in Yardley—a vacation home where the owners were gone for three weeks and didn't know their washing machine hose had burst. When they came home, the entire first floor had buckled so badly we had to replace everything.
2. High Humidity and Poor Ventilation
This one sneaks up on people. You don't need a catastrophic flood for floors to buckle—sometimes it's just sustained high humidity over months or years.
In older homes throughout Haverford and Narberth, I've seen this happen in rooms with poor air circulation. The humidity slowly works its way into the wood, and eventually, the floors give out. Same thing happens in Buckingham and Solebury township homes with crawl spaces that aren't properly sealed or ventilated.
Your hardwood floors are happiest when indoor humidity stays between 30-50%. When it creeps above 60% for extended periods—which happens a lot in our humid Pennsylvania summers—you're asking for trouble.
3. Improper Installation
I hate to say it, but sometimes buckling happens because the floors weren't installed correctly in the first place.
Wood needs room to expand and contract with seasonal changes. That's why proper installers leave an expansion gap around the perimeter of the room—usually about 3/4 inch—covered by your baseboards. I've been called to homes in Villanova and Rosemont where previous contractors skipped this step or didn't leave enough gap, and when summer humidity hit, the floors had nowhere to expand except up.
Another installation mistake? Not acclimating the wood before installation. Hardwood needs to sit in your home for at least 3-5 days before installation so it can adjust to your home's temperature and humidity. Skip this step, and you're gambling with thousands of dollars worth of flooring.
4. Subfloor Moisture Issues
Sometimes the problem isn't even the hardwood itself—it's what's underneath. I've worked on countless homes in Lower Merion and Cheltenham where moisture was wicking up through concrete slabs that didn't have proper moisture barriers.
In New Hope and Langhorne, where many homes have basements or are built on slabs, this is incredibly common. If there's groundwater or moisture vapor coming up through your foundation and you install hardwood directly over it without a proper vapor barrier, you're essentially setting up a moisture trap. The wood absorbs that moisture from below and—you guessed it—buckles.
5. Plumbing Leaks You Don't Know About
This is the sneaky one that drives homeowners crazy. I've been called to beautiful homes in Conshohocken and Lafayette Hill where floors buckled seemingly out of nowhere. After pulling up the flooring, we discover a slow leak from a pipe in the subfloor that's been dripping for months.
Same thing happens with leaking radiators in older homes throughout Jenkintown and Abington. These slow, hidden leaks are dangerous because by the time you see the buckling on the surface, the damage underneath is usually extensive.
What About Seasonal Changes?
Here's something I explain to almost every customer: some minor expansion and contraction is normal. Our Pennsylvania climate is tough on hardwood—we get humid, muggy summers and dry, heated winters. Your floors are going to move a little bit. That's not buckling.
Real buckling is dramatic. You'll see boards lifting, gaps opening up, and peaks forming across your floor. If you just notice your floorboards are slightly tighter in summer and have small gaps in winter, that's just wood doing what wood does.
Can Buckled Floors Be Fixed?
The answer every homeowner hates: it depends.
If we catch it early—like within a few days of water exposure—sometimes we can dry out the floors, remove some boards to relieve pressure, and reinstall them once everything dries. I've had success with this approach in Wynnewood and Huntingdon Valley homes where homeowners called us immediately after discovering water damage.
But if the buckling is severe, or if it's been happening over a long period due to chronic moisture issues, you're usually looking at floor replacement. The boards have been permanently deformed, and no amount of sanding or refinishing will make them flat again.
Before we do anything, though, we have to fix the source of the moisture. I've had customers in Warminster and Willow Grove who wanted to just replace the buckled boards without addressing the humidity problem or fixing the leaking pipe. That's just throwing money away—the new floors will buckle too.
How to Prevent Floor Buckling
After two decades in this business, here's my honest advice:
Control your indoor humidity. Get a hygrometer (they're like $15) and keep an eye on it. Run dehumidifiers in summer, especially in basements. In homes throughout Perkasie and Quakertown, I always recommend whole-house dehumidifiers if the basement has hardwood.
Address water issues immediately. If you have a leak, a flood, or even just a big spill, don't wait. Pull up area rugs, get fans going, and call a professional. The faster you dry things out, the better your chances of saving the floor.
Use proper vapor barriers. If you're installing hardwood in a basement or over a concrete slab anywhere from Lansdale to Chalfont, insist on a high-quality moisture barrier. Don't let anyone tell you it's optional—it's not.
Maintain your home's systems. Check for plumbing leaks regularly. Make sure your HVAC system is working properly. Keep gutters clean so water doesn't pool around your foundation. This stuff matters more than people think.
Hire experienced installers. I know I'm biased here, but proper installation really does make a difference. A good installer will acclimate your wood, leave proper expansion gaps, use the right fasteners for your subfloor type, and make sure moisture levels are appropriate before starting work.
The Bottom Line
Buckled hardwood floors are heartbreaking to see, especially in the gorgeous homes we work on throughout the Mainline and Bucks County. But here's the good news: they're usually preventable, and when they do happen, an experienced contractor can often help you understand your options and get your home back to beautiful.
If you're seeing signs of buckling—boards lifting, peaks forming, gaps opening up—don't wait. The longer moisture sits in your floors, the worse the damage gets. And if you're planning a new hardwood installation, make sure your contractor is taking moisture seriously from day one.
We've been serving homeowners throughout Montgomery County, Bucks County, and the Philadelphia metro area for over 20 years, and we've seen it all when it comes to hardwood flooring problems. Whether you need an assessment of existing damage, emergency water damage response, or just want a second opinion on an installation quote, we're here to help.
Because at the end of the day, your floors should be something you're proud of—not something you're worried about.
Need help with buckled floors or want to prevent moisture damage? Contact Cyclone Hardwood Floors, LLC for a professional assessment. We serve homeowners throughout Bucks and Montgomery Counties with honest advice and expert craftsmanship.

Thinking Engineered? Why Solid Hardwood Still Reigns Supreme for Bucks & Montgomery County Homes
For homeowners across our beautiful region, from the historic estates of Solebury to the family-friendly neighborhoods of Hatboro and Harleysville, the choice of flooring is a significant one. Engineered wood flooring often catches the eye due to its perceived lower cost, but it's crucial to understand the long-term value.
One of the biggest advantages of solid hardwood—and a significant drawback of most engineered products—is its refinishing potential. A quality solid hardwood floor can be sanded and refinished 3 to 5 times or more over its lifespan, translating into an incredible longevity of 100 years or more, making it a true generational investment.
In contrast, many budget-friendly engineered floors have a thin "wear layer" that cannot be safely sanded at all. Once it's worn through or deeply scratched, your only option is costly replacement.
For homes in areas like Collegeville and Southampton, where you want enduring beauty and resilience, solid hardwood remains the clear winner over the long haul.
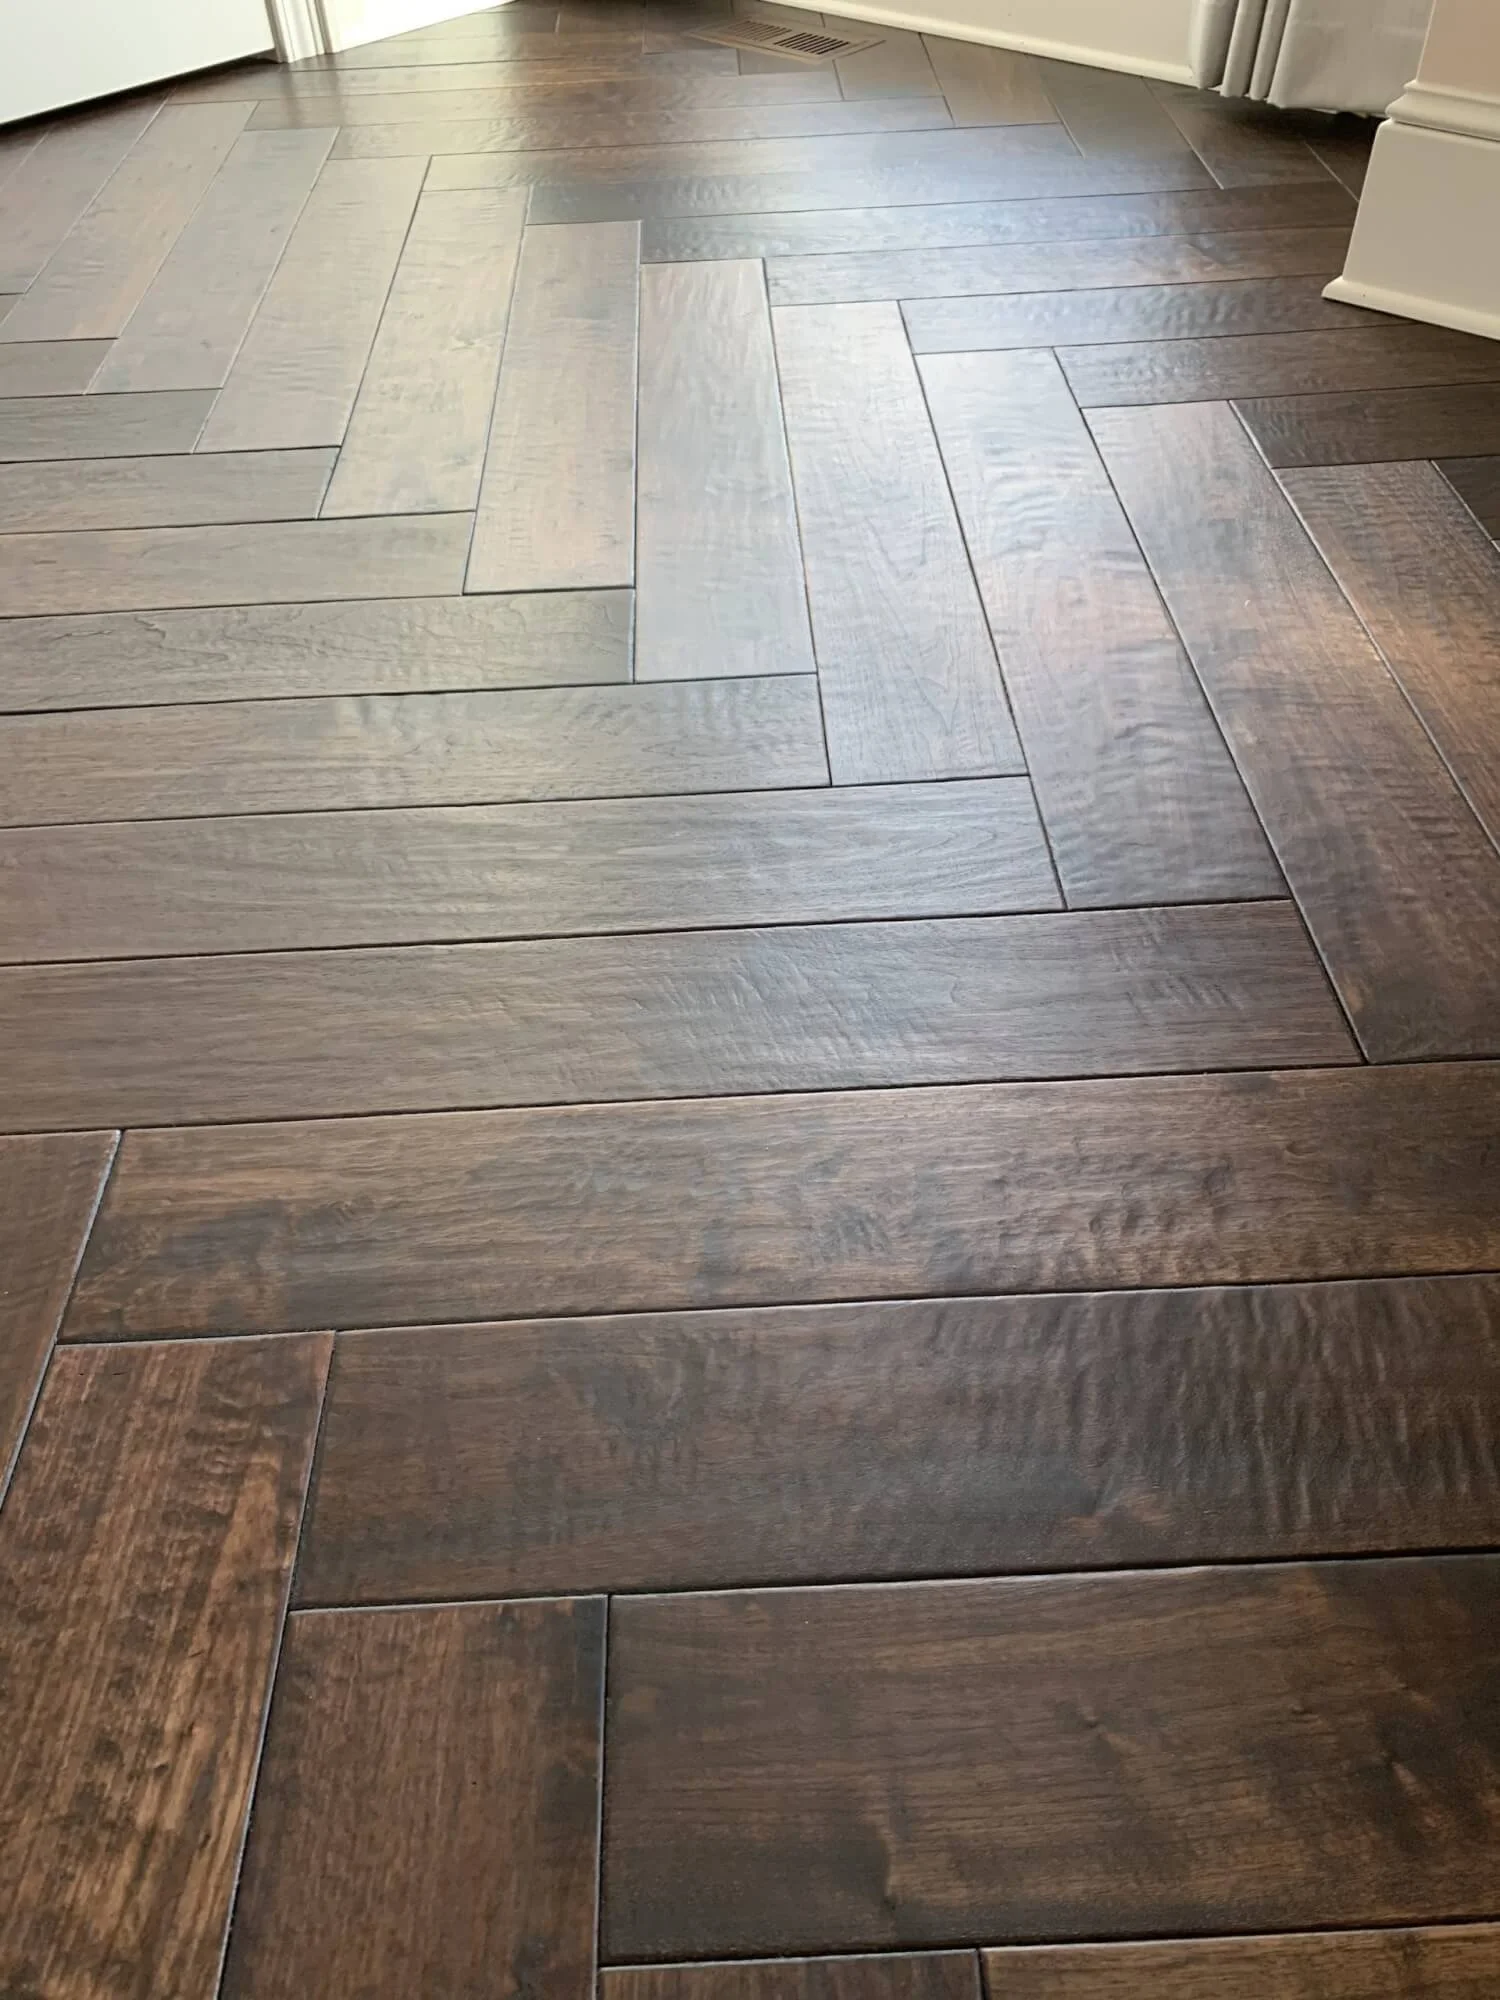
For homeowners across our beautiful region, from the historic estates of Solebury to the family-friendly neighborhoods of Hatboro and Harleysville, the choice of flooring is a significant one. Engineered wood flooring often catches the eye due to its perceived lower cost and ease of installation. However, as experts who've worked on countless floors in Newtown Square, Fort Washington, and Perkasie, we believe it's crucial to understand the long-term value and inherent differences when comparing it to timeless solid hardwood.
Yes, engineered wood has its place, but for many homes in areas like Collegeville and Southampton, it simply can't match the longevity, density, and enduring beauty of its solid counterpart.
The "Refinishing Trap": A Key Difference
One of the biggest advantages of solid hardwood—and a significant drawback of most engineered products—is its refinishing potential.
Solid Hardwood: A quality solid hardwood floor can be sanded and refinished multiple times throughout its lifespan – often 3 to 5 times or more. This means a floor installed today in a classic Hatboro home can be rejuvenated decades later, erasing scratches, dents, and changes in style. This capability translates directly into an incredible lifespan, often 100 years or more, making it a true generational investment.
Engineered Hardwood: While some high-quality engineered floors can be refinished once or twice, many, especially the more budget-friendly options, have a very thin "wear layer" (the actual wood veneer on top). If this layer is too thin (anything less than 3mm), it cannot be safely sanded and refinished at all. Once it's worn through or deeply scratched, your only option is costly replacement. Imagine the frustration for a family in Collegeville with an active household, facing a full floor replacement sooner than expected.
Density & Durability: A Heavier Hand for Busy Homes
Another often-overlooked factor is density. Solid hardwood, by its very nature, is a dense, uniform piece of wood. This contributes significantly to its:
Impact Resistance: It's more forgiving when something heavy drops, making it ideal for busy kitchens and living areas in homes across Fort Washington.
Sound Absorption: A dense solid floor can contribute to a quieter home environment, a subtle but appreciated benefit for many Newtown Square residents.
Structural Stability: While engineered flooring offers some stability against moisture, a well-installed solid hardwood floor offers unparalleled structural integrity over the long haul.
Engineered flooring, being a layered product, can sometimes feel less substantial underfoot. While its cross-ply construction does offer stability against moisture, its overall resistance to impact and heavy wear is often lower than solid wood, particularly in its thinner iterations. For the demands of active family life in Southampton or Perkasie, this difference can be quite noticeable over time.
The True Cost of "Cheaper"
While engineered flooring might have a lower upfront cost, consider the long-term economics:
A solid hardwood floor in a Solebury farmhouse might last 100+ years with proper care and several refinishes.
A thinner engineered floor might need full replacement in 15-30 years, incurring the full cost of demolition, disposal, and new installation multiple times over that same century.
When you factor in these replacement cycles, the "cheaper" engineered option can quickly become the far more expensive choice.
Making the Right Choice for Your Home
For homeowners in Bucks and Montgomery counties who seek a flooring solution that embodies longevity, warmth, and the ability to adapt and revive over decades, solid hardwood remains the gold standard. It’s an investment that grows with your home, providing unparalleled beauty and durability that can be refreshed for generations.
If you're weighing your options and want an expert opinion tailored to your specific home and lifestyle, we invite you to reach out. We serve all these wonderful communities and are happy to help you make the best choice for your floors.

Why Domestic Hardwoods Are Always the Safer Bet for Northeast PA Stability
"If you're buying exotic hardwood for your home, you're taking a gamble in the Northeast climate. It's not about how hard the wood is; it's about stability. We break down exactly why tropical woods fail in PA's humidity and why domestic White Oak is always the safer, longer-lasting choice for your investment."
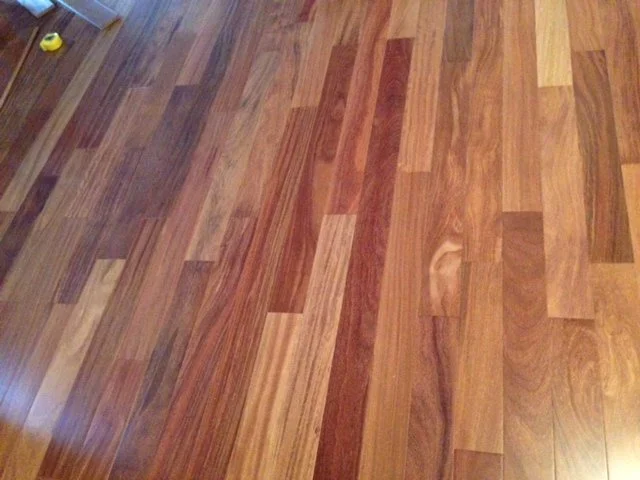
If you are renovating a home in the Bucks County suburbs like Newtown or Solebury, or tackling an older colonial in Montgomery County towns like Ambler, you’ve likely been dazzled by exotic hardwoods like Brazilian Cherry, Tigerwood, or Ipe. Their colors are stunning, and the Janka hardness numbers are impressive.
But here is the truth that often gets left out of the sales pitch: Exotic wood is a gamble in the Northeast climate.
It’s not about strength; it’s about stability. We’re going to break down exactly why domestic species—namely White Oak and Maple—will always give you less headache and a longer-lasting floor in Pennsylvania than their tropical counterparts.
The Northeast Climate: A Hardwood Killer
Our region is one of the most challenging places in North America for hardwood floors. It’s not just four seasons; it’s four extremes of moisture. Hardwood is hygroscopic, meaning it constantly trades moisture with the air. A successful floor installation relies on the wood being milled and acclimated for a regional Equilibrium Moisture Content (EMC) that averages between 6% and 9%.
The problem is that exotic species are accustomed to a stable, high humidity (tropical) environment. When you force them into a rapidly shifting, low-to-high humidity environment like ours, the stress often causes unpredictable movement.

Australian Cypress Hardwood Floor
The Domestic Advantage: Built to Handle the Swing
Domestic hardwoods—Red Oak, White Oak, Maple, and Hickory—have been growing here for millennia. They have evolved to handle the wild, 40-degree temperature swings and the seasonal humidity changes of the Northeast.
Here’s why they are the better investment:
1. Predictable Movement
All wood moves, but domestic wood moves in a way we can predict and manage. This comes down to two properties:
Radial Shrinkage: The movement across the growth rings.
Tangential Shrinkage: The movement parallel to the growth rings.
Domestic woods have a lower overall dimensional change rate than many exotics, meaning they shrink and swell less for the same change in moisture content. When we install White Oak, we know exactly how much gapping to expect in a dry winter. When we install Brazilian Cherry, the shrinkage can be erratic and sometimes forces the planks apart wider than the tongue-and-groove joint can handle. For instance, installing a White Oak floor in a historic Doylestown farmhouse requires a different moisture-testing protocol than a new construction home in Warrington. This is why a local expert who understands Chester County's mix of old and new properties is essential.
2. Better Milling and Drying Standards
American mills that handle domestic species are perfectly calibrated to dry lumber to the exact 6%–9% MC range needed for installation in the Northeast. This is not always the case with imported exotic woods:
MC Mismatch: Imported wood may arrive at 11% or 12% MC, which is suitable for a tropical port but will shrink excessively when introduced to a furnace-heated PA home in winter.
Inconsistent Quality: Quality control standards can vary widely overseas. We've seen exotic stock that is not square or has excessive internal tension, which leads to immediate issues upon installation.
3. Specific Domestic Winners for PA
If you’re building new or installing over radiant heat, we recommend White Oak every time. It has a closed grain structure that makes it more resistant to moisture absorption than Red Oak, giving it superior stability and making it the ideal choice for managing our humidity shifts.
The Exotic Factor: High Hardness ≠ High Stability
Homeowners often choose exotic floors because the Janka hardness score is much higher than Oak (which is true), but high hardness only measures resistance to denting. It has nothing to do with how the wood manages water.
Here are the practical risks of installing exotics in this region:
The Unmanageable Gap: We routinely see exotic floors shrink up to 1/8 inch between planks during the winter dry season. This creates unsightly black gaps that look terrible and collect dirt. Domestic wood, properly installed, typically gaps less than half of that.
Warping and Stress: When exotic wood acclimated at 10% MC is introduced to a bone-dry 6% environment, the extreme tension can cause planks to pull apart from the subfloor, leading to popping sounds and board separation.
Refinishing Difficulty: Exotic woods like Ipe and Brazilian Cherry are incredibly oily, which makes them highly difficult to stain and seal. The oils repel the finish, and if the floor ever needs to be patched, color matching is nearly impossible.
The Cyclone Hardwood Installation Standard: How to Prevent Failure
If you are determined to use an exotic species, you must hire a contractor who follows these non-negotiable standards. This is what separates a professional from a handshake crew.
Strict Moisture Content (MC) Testing: Before a single board is laid, we use a calibrated moisture meter to test the wood planks, the subfloor, and the air. Installation only proceeds when the wood MC is within 2% of the subfloor MC. We use technical data from the National Wood Flooring Association (NWFA) to ensure this.
Extended Conditioning Time: Acclimation isn't just dropping the boxes in the garage. The wood must be stacked and stickered in the specific room it will be installed in for a minimum of 7–10 days, allowing it to condition to the living environment.
Proper Spacing: We use wider expansion gaps (at the walls, under baseboards) for exotic wood to allow for the greater movement we anticipate.
For peace of mind and long-term beauty in your Northeast PA home, whether you're in Lower Gwynedd or renovating a home near Valley Forge, our recommendation is always a domestic species like White Oak. Contact us today—we service all of Bucks, Montgomery, and Chester Counties.
Ready to talk about the right wood for your property?
Call us today for a free, detailed estimate that accounts for your home's specific environment.